Epoxy Coating: The Ideal Treatment for Your Garage’s Concrete Floors

Guest Post by Elisaveta Doncheva

More often than not, focusing on finding ways to increase a home’s resale value leads to obvious alterations and upgrades, such as furnishings that freshen up the interior and landscaping that gives the outdoors a nice finishing touch.

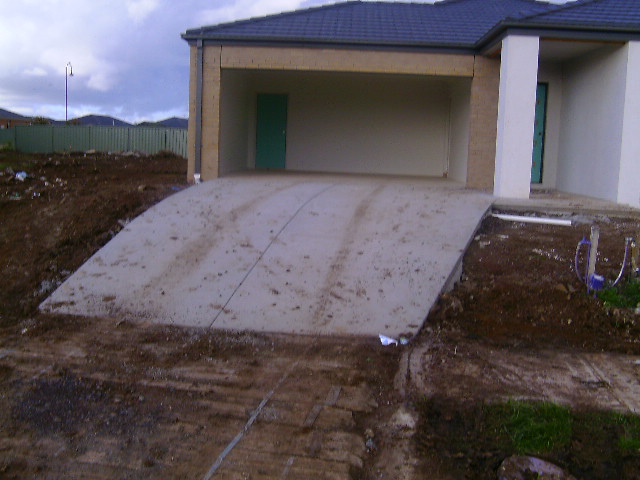
And yet, something as simple as treating the concrete floor of the garage with a little TLC could be the change that brings about the biggest impact.

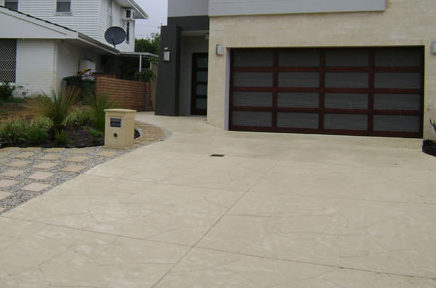
In addition to the functional purpose this home’s feature has, which is handling the pressures from heavy-duty use from your vehicles or machinery, it also has an undeniable aesthetic role which may be somewhat understated.

To avoid deterring future buyers, or even an eyesore for yourself that could also be dangerous and risky for you, your vehicles, your machinery, tools, and what is not present in the space, it’s time to make some improvements.

Don’t worry, it’s as simple as adding durable epoxy coating for concrete to get the desired makeover.

You’ve got a range of versatility available, differing not only in price but carrier agents too, giving you the chance to choose from solvent, solid, and water based.

Is It a Good Idea to Put Epoxy On the Garage Floor?

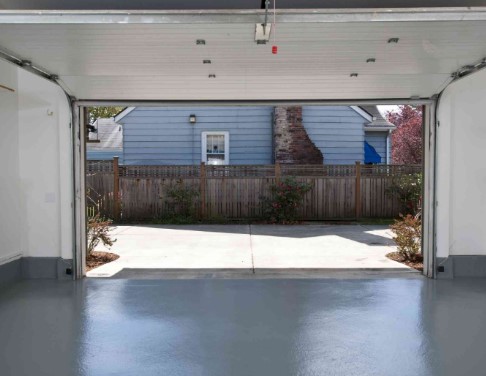
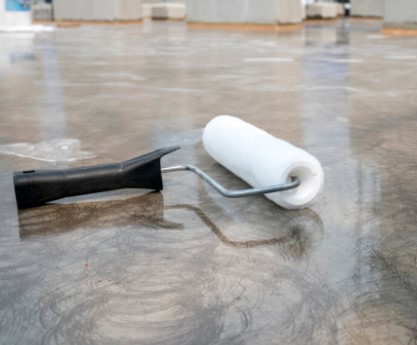
It’s a type of coating that’s meant to last for years and years, and it truly can with proper floor maintenance.

If it’s good for commercial purposes in industrial applications that require the best of the best in terms of floor protection, why should it be any different from residential applications?

When applied, there’s a specific permanant chemical reaction happening which gives this material some exceptional qualities for the surface it’s added to.

To give you an idea, the following are just some of the benefits you can expect to reap once you treat your floors with the suitable resin and hardener mix.

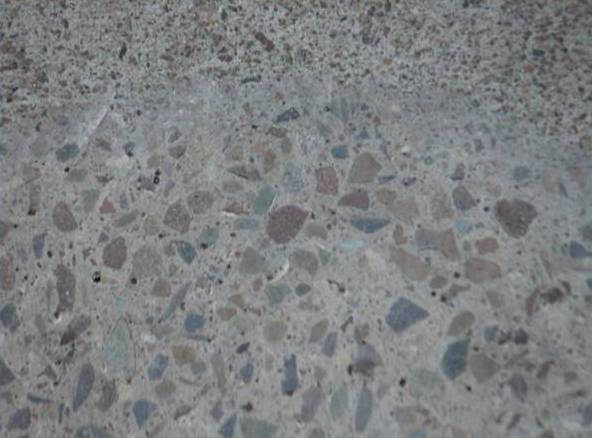
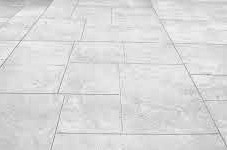
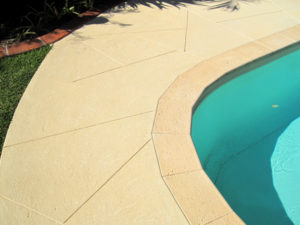
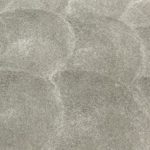
The Smooth and Shiny Appearance

The floor can make or break the space’s appearance, and all it takes to get it from drab to fab is a nice layer of epoxy coating for concrete to get smooth and seamless elegance.

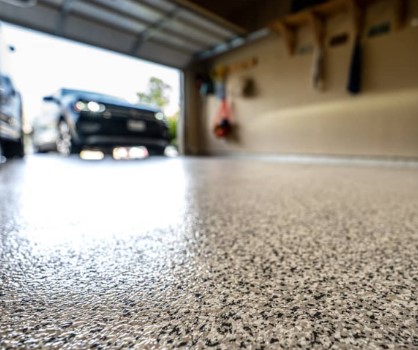
Even though elevated aesthetic may not be your goal, least of all for a utilitarian area like the garage which serves as a parking area, workshop, and storage for your seasonal equipment or home-brewing equipment, the sleek and elegant touch would surely increase the overall curb appeal.

And, you can have fun choosing the coating – for a polished ambience, why not pick one of the eye-catching metallic mixes?

A mixture with details from mica or quartz equally makes for a unique aesthetic that additionally doubles for better traction of the floor too, so you amp the look without sacrificing the function or convenience.

The Increase in Protection

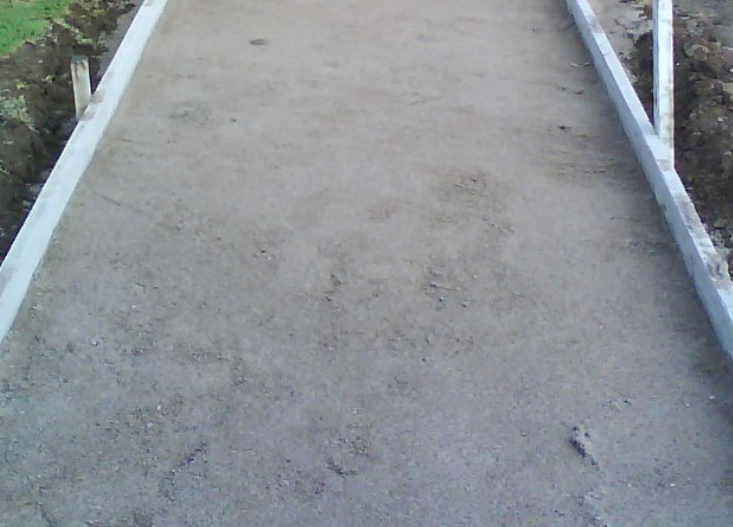
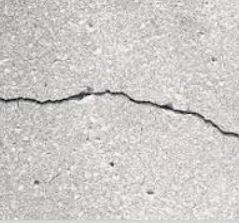
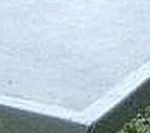
Instead of serving as the base, the garage floor epoxy is a layer added over the already sturdy concrete floor, taking up the role of protector for the underlying surface, shielding it from impact as well as wear and tear that might result in cracking and crumbling.

Since there’s more than one layer added, usually you get a thick coating that covers your precious concrete flooring, giving it an increase in durability.

This explains why upon application the possible defects of the floor might have magically disappeared with each and every layer of the coating, offering a sleek and smooth finish.

It’s exactly this that gives you peace of mind since usually defects can be the opening points for moisture to make its way through and damage the concrete little by little.

The Increase in Strength

Impacts, shocks, extra weight – you name it, the coating can handle it all.

Unlike other coatings, epoxy stands out from the rest with its incredible tensile strength, and the secret lies in the addition of the hardener, specifically the polyamine material.

Depending on the type of epoxy and hardener you choose, you can significantly increase the concrete’s ability to stand up to all the pressure you’d put it through.

If the bonding with the underlay surface is good, you can expect there to be strength in the resistance to peeling and tearing too so you won’t have to worry about those heavy loads.

The Increase in Safety

The garage that doesn’t have windows or proper illumination can easily become a place that compromises the safety of anyone going inside, but this too could become a thing of the past with the simple addition of a few layers of an epoxy concrete floor coating of your choice.

This is due to the material’s ability to reflect the light, which results in the brightening up of the whole area.

Moreover, with certain mixes of epoxy and hardener, it’s possible to increase the safety to reduce the danger from slipping accidents.

If a slick surface isn’t your thing, and you wish to further boost the safety, you could add your own ingredients to the mix, including polymer grit, gravel or sand.

The Resistant Properties

It is more than resistance to water and moisture.

It is also resistance as well as heat, chemicals, and even impact, it’s an investment that more than pays off in the long run.

The thicker the layer of coverage, the more of these incredible properties you can expect.

The Long-Lasting Result

As mentioned, this is a covering option that keeps on giving time and time again if we keep its resistance properties, strength, and durability in mind.

As such, it’s a much more reliable and convenient option than other covers in the likes of concrete paint, or tiles, especially if we consider the lack of need to redo the epoxy layering for many years.

The Eco-Friendliness

Sure, it’s a chemical, but that doesn’t mean it can’t be eco-friendly in its own way.

As it’s not that difficult to install, needing only a few essentials, and it doesn’t need to be recoated that often, it’s more helpful for the environment than other alternatives.

If you think about it, it’s quite cost-effective too so your budget won’t be significantly impacted once you take care of the proper installation.

How Do You Take Care of Epoxy Floors?

We’ve already discussed the outstanding properties of epoxy, including its durability, but it wouldn’t hurt to get in the habit of maintaining it to ensure it lasts as long as you expect it to, or even more.

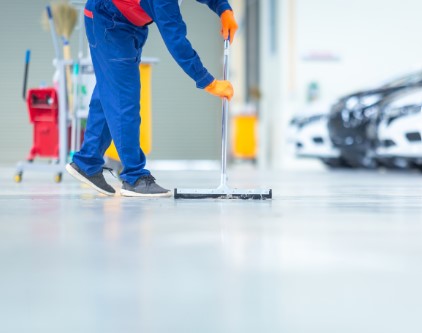
Sweeping to get rid of dirt, dust, and debris is the basic step you should implement, followed by mopping.

Getting rid of stains should be done immediately after they occur, with an emphasis on using epoxy-suitable products, from cleaners to the right tools for the job, to avoid scratching the coating yourself.

Also, remember that prevention is better than cure, and in the case of the coating, it’s advisable to protect it from heavy objects by using the appropriate mats and furniture pads. A little care goes a long way!

Concrete – After the Concrete is Laid

Concrete Myths

Some people think that concrete is strong enough the day after it is laid……..WRONG

Some people think that concrete ‘dries’……..WRONG

Hardening of concrete is a complex chemical reaction which requires time and moisture.

Concrete takes at least a month to reach its final design strength.

This time is known as the ‘Curing Period’.

During this time the concrete strength will increase but the slab will also shrink.

Strength

The typical slab laid and exposed to air after finishing will increase in strength as follows:

After 1 Day – The concrete will have about 20% of its design strength. Being still relatively weak it can easily be damaged. If you are going to have saw cut joints now is the time to cut them. You can also remove any formwork.

After 3 days – The concrete will now be at around 60% of design strength. You should be able to walk on it and use wheel barrows without damaging it. This is the earliest time I would like to see frame erection start on a house slab.

After 7 days – Around 80% has now been achieved. At this stage you should be able to use a driveway for cars

After 28 days – Design Strength Reached.

Shrinkage

During the 28 day curing period the concrete will shrink by 0.8 – 1.3mm per metre. That’s 2.4 -3.9mm for a 3m slab. This means:

  • Paving – Unless you have adequate joints this shrinkage will stress the slab causing cracks.
  • House Slabs – The slab is normally cast without joints so its usual to find that there are fine cracks. As long as there is adequate reinforcement in the slab these cracks should be less than about 1mm and are not an issue.

Curing Best Practice

Proper treatment of the concrete will improve the final result.

If treated properly during the curing period concrete can be up to 50% stronger than the Design Strength, and will also be stronger at each stage of the curing period.

There is also less likely to be fine cracking of the surface.

The most important thing during curing is to stop the concrete drying out too quickly.

Ways to achieve this include:

    • Covering with material such as sacking, sand, or Old Carpets, which are kept damp.
    • Covering with Plastic sheet.
    • Apply a Curing Membrane (You may need to go to a specialist supplier for this)
    • Regularly spraying the slab.once the initial set is achieved (wait at least 12 hours.

Frost

Frost can damage curing concrete reducing the final strength.

If you are in one of the colder states during winter protecting the concrete by covering it at night is a good idea.


For more posts on on getting your paths and driveways correct see Concreting


Concrete – What is It?

Concrete is an artificial stone that you can make yourself.

It has four ingredients that all contribute to the overall strength.

  • Large stones (Aggregate) – The aggregate provides shear strength to the concrete. In other words the concrete has to crack around rather than through the stones. A good aggregate will have a mix of stone sizes rather than just one size of stone, this help the aggregate lock together
  • Sand – acts to fill in the spaces between the aggregate and further helps lock it solidly.
  • Cement powder – Is the basis for the ‘cement paste’ (glue) which coats the surface of the first two components and holds them together.
  • Water – Reacts with the cement powder to form the cement paste

Just like baking a cake its important to get the proportions of the various components right for the best results.

Too Much Aggregate compared with the sand and the cement paste will be be just cement coated stones stuck together where they touch. (known as ‘Boney’)

Too Little Aggregate, or Too Much Sand and the mixis called ‘Fatty’ There will be too little aggregate to provide shear strength and much of the aggregate will sink to the bottom.

Too Much Cement will cost you money without adding to the strength of the concrete.

Too Much Water will dilute the cement paste meaning the ‘glue’ has less strength and will also cause increased shrinkage as the cement cures. (It is very unusual to use too little water as the concrete will be very dry and as a result be hard to place and finish)

If you are going to lay large areas of concrete its probably be best to get premixed concrete which should have the ingredients in the correct quantities.

For small quantities you can buy bags of dry concrete mix where you just add water. Make sure you follow the instructions.

If you have got a job that is of a reasonable size but too small for premixed concrete here is a suggested mix:

  • Cement = 1 part.
  • Sand = 2.5 parts.
  • Stone or gravel = 3 parts.

This should be fine for paths, garden wall foundations, fence posts, washing poles, and driveways.

If you are going to order Ready Mix N25 (Normal 25) should be fine for a driveway, pathway or shed foundation.

For  similar posts see Concreting


Concrete – Preparing The Base

It seems to me that many people think that a concrete driveway or path will cover any number of shortcuts and other sins.

Well if you want a good finish, that will last, you need to make sure that preparation isn’t skimped.

Without a good base for the slab to sit on cracks will soon spoil the finished look of your drive or path.

This is what I would regard as the minimum preparation for laying a concrete driveway or path for a new home.

Well prepared base for concrete path.
  1. The area of excavation, and base, should be a minimum of the area of concrete plus 150 mm all round, except where the edge is against a wall.
  2. During dry weather excavate the area to a depth that will allow for the depth of the slab plus for a gravel base of at least 100mm.
  3. Check the excavated surface for soft areas. Typical soft areas can be; water logged, topsoil, and badly backfilled trenches.
  4. Excavate any soft areas and backfill with gravel well compacted in 100mm layers.
  5. Lay the gravel base to the required level making sure its well compacted, preferably with a vibrating plate compactor.
  6. Keep people and equipment off the area and make sure surface water is not allowed to flow across the area.
  7. Cover with a polythene layer. You can normally buy this off a roll by the m at a building suppliers for small jobs.


For more posts on on getting your paths and driveways correct see Concreting

Concrete – Cracking

One of the inevitable facts about concrete slabs is that there will be some cracking.

One of the sayings in concrete design is “ All concrete cracks…..the purpose of reinforcement is to hold the broken bits together.”

So what does this mean when you are having a new house built?

Surface Cracking – All Concrete

Hairline surface cracking is not unusual particularly in steel power floated house slabs. It can be caused by

    • Excess water in the mix,
    • Too much work when finishing the surface
    • Or drying out too quickly when curing.

Although the cracks don’t look very good they shouldn’t affect any subsequent flooring such as tiles.

Full Depth Cracks – House Slabs

House slabs are normally designed as a single slab with reinforcement so that any cracks that occurs will be prevented from opening too far.

Cracks of up to 2mm wide are considered acceptable in a floor slab. If you should get any cracks this wide and want a tiled surface its important to make sure a flexible tile adhesive is used.

Full depth Cracking – Driveways and Paths

Good design of driveways and paths is based on making sure that cracks are encouraged to occur, but only at the location of constructed joints.

This is done by making sure these joints are weaker than the main slab.

For construction details and joint spacing see: Concrete Joints 1

The Standards say “cracks other than at the joints are unacceptable if more than 1.5mm”, although most people say that any crack is unacceptable.

More Information on Standards

See pages 16-19 of the Guide to Standards and Tolerances 2007 available here Victorian Building Authority


For  posts on on getting your paths and driveways correct see Concreting


Concreting – Bar Chairs

No we are not talking about seats in a pub.

Bar Chairs are used to make sure the steel reinforcement in concrete ‘sits’ in the right place.

Here is a typical plastic ‘chair”

And here is a different type.

Getting the steel reinforcement in place is very important in making sure you get the best quality slab. . . .and the only way to make sure is to ‘sit’ the reinforcement mesh, or bars, on these chairs.

The chairs need to be 800mm apart unless the bars in the mesh are greater than7mm diameter.

The reinforcement  in paths and driveways should be a minimum of 40mm from the top and bottom of the slab. (This typically means around the middle of the slab)

Some concreters, especially the one who give you a cheap price, will tell you you don’t need bar chairs as they can pull the reinforcement up to the right position with special hooks while they are pouring the concrete*.

This is completely wrong.

Below is a picture of the underside of a concrete slab that had to be dug up due to excessive cracking after using this money saving** ‘technique’.

You can clearly see the rusting reinforcement that was on the underside of the slab was doing nothing to stop the slab cracking.

To ensure you get the best slab make sure there are bar chairs in place while the concrete is being poured…………. I have been told its not unknown to put the chairs in place for a pre-concrete inspection and then take them out before the pour!


*Footnote 1: Many concretors disagree with me. . . but in America where they lay huge amounts of concrete roads they have developed special machines to pull the steel up into place. . . .In 300mm thick slabs they have found that the steel can be 75mm out of place (Federal Highways Administration).

So how can workers correctly “hook and pull” mesh reinforcement accuratly While Standing On The Reinforcement?

**Footnote 2: The actual cost of the chairs works out at around $1/m2 of concrete!

For more posts on on getting your paths and driveways correct see Concreting


Concrete – Reinforcement Mesh

Purpose of Steel Mesh Reinforcement

A lot of people believe that the steel mesh adds substantially to the strength of concrete paving.

This is a myth!

The truth is large areas of concrete paving will crack.

What well thought out reinforcement steel does is:

  • Limits cracking where you don’t want it (in the middle of slabs)
  • If some cracking does occur it holds the cracks tightly closed.
  • A reduced amount of steel across joints helps to make sure that cracks do occur at the joints (where you want it to crack).

Sizes and Types of Mesh Reinforcement

A single full sheet of mesh is 6m by 2.4m.

Many local suppliers will sell you half a sheet, or less, for small jobs if you plan on doing it yourself.

These are the common types of mesh that you can buy in Australia for paving work, with my opinions on what mesh to choose.

Type

Description

Comment

SL52

5mm dia bars @ 200mm spacing

For garden paths (max joint spacing 2m)

SL62

6mm dia bars @ 200mm spacing

For plain paths or patios (max joint spacing 3m)

SL72

6.75mm dia bars @ 200mm spacing

Caravan or Boat parking areas

SL82

7.6mm dia bars @ 200mm spacing

Front Driveway minimum for plain concrete

SL92

8.6mm dia bars @ 200mm spacing

Front Driveway best for patterned concrete

RL81

7.6mm dia bars @ 100mm spacing

Polished concrete floors

There are many more types of mesh but they are more specialised, the above will be fine for typical concrete slabs around your home.

Depth of Cover

The minimum cover from the top and bottom surfaces of the slab should be 30mm.

This will prevent the steel rusting once the concrete is placed.

To make sure you get this cover see this link: ‘Bar Chairs‘.

Overlap

When you need to join two pieces of mesh the overlap should be 2 squares.

Do Not overlap mesh across the site where a joint is going to be. That will stop the crack forming at the joint.

Rust

Don’t worry about a bit of surface rust on the mesh, although you should remove any rust flakes. The roughness of the corroded area help the concrete grip the reinforcement.

The alkali nature of the concrete will stop any further rust, as long as the 30mm cover is maintained.


See this link for advice on the thickness of concrete slabs: Concrete Thickness

For more posts on on getting your paths and driveways correct see Concreting


Cement

Some people confuse concrete with cement, but cement is just the ‘glue’ which holds the other constituents of concrete, sand and gravel, together.

There are a range of different cements but these are the three you will most commonly come across:

General Purpose Cement

This is consistent, versatile and cost effective product which makes it a good choice for most building works.

It is suitable for Domestic concrete slabs, driveways and footpaths

Trivial Fact -You may hear standard cement referred to as Portland Cement – This is because the finished concrete has an appearance similar to stone quarried from Portland in England.

Sulphate Resisting Cement

Sulfate Resisting Cement is a blended cement designed to improve the performance of concrete where the risk of sulfate attack may be present.

It also provides improved durability for concrete, and the steel reinforcement, in most aggressive environments, such as seawater exposure.

It has an additional cost, but it is much better for:

    • Geothermal areas
    • Soils containing sulphates
    • Saline Areas
    • Area that are frequently wet such as concrete swimming pools

Rapid Set Cement

Normally found in dry premixed concrete mixes.

This is a cement with various additives that speed up the reaction to give an initial hardening within 15 minutes.

Speeding up of the cement reaction time does lead to lower final strength.

This makes this product good for things like setting fence posts………… but NOT for significant structural applications.

Water Cement Ratio

One of the most important issues with cement is ensuring the ratio of water and cement is correct as this affects both the final strength and the durability. For instance:

  • Water cement ratio 0.5 (10L water to 20kg cement) is needed for high strength 35MPa.
  • Increasing the Water cement ratio to 1 (20L water to 20kg cement) will reduce the strength to 10MPa.

To ensure they don’t add too much water premix companies usually measure the water content in the sand and gravel piles and reduce the water content accordingly.

This means ading water to a premix lorry will affect the strength of the concrete

For more information see Concrete.


Liquid Limestone

You might have heard of Liquid Limestone as an alternative paving material…….But what is it?

Really its just a different type of concrete.

It is much more common in West Australia than other states.

The differences between conventional concrete and Liquid Limestone are:

  • Instead of standard Portland ‘Grey’ Cement it uses White Cement.
  • It uses crushed limestone rather than other types of rock gravel and sand.
  • Quite often a plasticiser is added. This means the mixture can be poured without having to add too much water.

Various patterns can be applied to the surface as the concrete sets. (see above photo)

As well as the standard limestone appearance the supplier can add various pigments. If you want a strong colour I think you would be better off  just going for coloured concrete.

Because it can be laid in large slabs like concrete there are less joints than in conventional brick or concrete slab paving. (There will still need to be some joints. For joint spacing see: Concrete Joints 1)

With the lighter colour it can be cooler underfoot than other pavements.

To maintain its appearance liquid limestone will need to be sealed around a week after laying.

Thanks to Concept Concrete WA. for these two great examples of  Liquid Limestone Paving

For  posts on on getting your paths and driveways correct see Concreting


Plain Concrete Finishes

Basically there are three different common finishes for plain concrete driveways paths etc.

Brushed

This is probably the simplest finish if you are going to do some concreting yourself.

You compact the concrete and ‘strike it off with a straight edge.

A stiff brush is then drawn over the concrete to form a textured surface.

The texture means this is a good anti slip surface for paths and driveways.


Steel Float

This finish requires a bit more skill than a brushed finish.

It done by ‘polishing’ the surface with a steel float to give a very flat smooth surface.

With no texture its not recommended for slopes and can be slippy when wet.

It is good for garage floors as it makes it easier to turn the wheel at slow speed and is easier to clean

Wood Float

A wood float finish is finished in a similar way to steel float but the wood float gives a texture between brushed and steel float finishing.

The texture is generally achieved with sweeping circular strokes as shown in the photograph.

This effect takes a bit of practice, so if you want to try this yourself its worth practising in an out of the way place before trying in a high profile area.

Concrete Edging

Whichever finish you choose the other decision you need to make is whether to edge it like this photograph.

Most concreters in Perth, and other parts of Australia, will normally include edging as part of their overall job.

If you want to do the work yourself you will need to buy a special edging tool.

Exit mobile version