Insulation Basics – Brick Veneer Walls

This post will help you understand how much heat you lose through walls. A previous post has explained ‘R’ and ‘U’ values

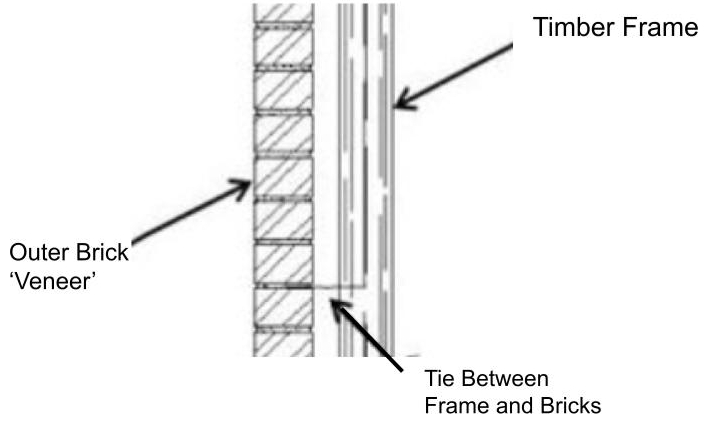
When considering insulation a typical Australian brick veneer wall would be:

Element

R value

Outside surface air layer

0.03

110mm brick

0.08

25mm cavity

0.12

R1.5 Insulation

1.5

Plasterboard 10mm

0.06

Inside surface air layer

0.12

Total R value

1.91

U value = 1/R

0.51

The heat losses or gains for 150 sq m (fairly typical external wall area) of this type of brick veneer wall at 15 degrees above, or below, outside temperature will be:

Area x ‘U’ x temperature difference = watts per hour

150 m2 x 0.51 x 15 degrees = 1178 watts per hour

Heating/Cooling Requirement = 1.17kw/hour

To change the U value calculation simply change the value of the element or add an element in.

Example 1 Changing the Insulation to R 2.0

New Total R = 2.41

New U = 0.41

Reduced Heating/Cooling requirement to 0.92kw/hr

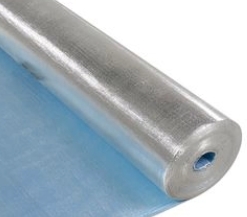
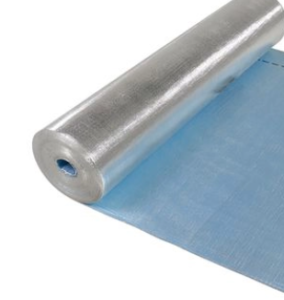
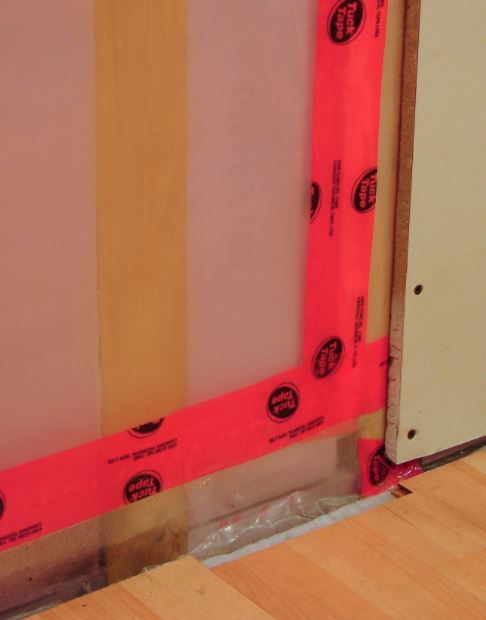
Example 2 Adding a reflective building wrap to example 1 (increases cavity R by 0.18

New Total R = 2.59

New U = 0.39

Reduced Heating/Cooling Requirement to 0.87kw/hr

Remember this isn’t the total heating requirement as heat is also lost through windows, ceilings floors and ventilation.


See Insulation for similar Posts

For Posts about Green Building see Sustainability

Double Glazing or Smaller Windows?

I’ve posted on Double Glazing but that not the only way to save heat loss through windows so I thought I would do a numerical comparison of the various options for glazing treatment of windows.

In a bedroom of our last house the South facing windows were approximately 4m square (We are in Australia so these windows don’t get any sun).The  basis of my calculations is a difference of 15oC between internal and external temperature.

The equation used to calculate heat loss is:

Heat Loss  =  Area  x  Temperature Difference   x   ‘U’

for

‘U’ single glazing = 7*

‘U’ double glazing = 3*

‘U’ brick veneer = 0.51

* ‘U’ value includes effect of frame.

Option 1 Do Nothing

Heat loss through sinle glazing  =  4 x 15 x 7  =  420watts  =  0.42kw/hour

Remember this heat loss is for one room only.

Option 2 Reduce window by 40% to 2.4 m

Heat loss through single glazing  =  2.4 x 15 x 7  =  252watts  =  .25kw/hour

Heat loss through new brick vineer   =  1.6 x 15 x .51  =  12 watts  = 0.012kw/hour

Total heat loss  =  0.25kw/hr  +  0.012kw/hr  =   0.262kw/hour

With our builder this was a no cost option that has reduced the heat loss by 38%.

Option 3 Double Glazing

Heat loss through double glazing = 4 x 15 x 3 = 180watts = 0.18kW/hour

This is a heat loss reduction of 57% but at a significant cost.

Option 4 Reduce Window by 40% and Double Glazing

Heat loss through double glazing = 2.4 x 15 x 3 = 108watts = 0.108kW/hour

Heat loss through replacement brick wall = 1.6 x 15 x .51 = 12 watts = 0.012kW/hour

Total  =   0.108kW/hour  +  0.012kW/hour  =  0.12kW/hour

This final option has reduced the heat loss by over 70% and will be around 30% cheaper than double glazing the original large windows.

I hope this has given you some food for thought!

See Insulation for similar Posts

For Posts about Green Building see Sustainability

Insulation Basics – Ventilation

A significant factor in the comfort of you house is the ‘Ventilation Rate’.

No one likes cold draughts in winter.. . . and hot air creeping in during summer can be equally unwelcoming.

So how do you calculate heat losses due to ventilation?

Well it starts by deciding how many air changes per hour (ac/hr) you have.

That is how often is the air in the areas you want to heat, or cool, replaced.

Typical ventilation rates

Its hard to measure the actual changes without specialist equipment however here are some typical values:

    • Old weatherboard property – More than 2ac/hr
    • Typical new house – Around 1 ac/hr
    • Well draft sealed house – 0.5ac/hr

Calculations

To calculate the ventilation heat loss the following formula is used:

Qv = 0.36 x V x N

Qv – Ventilation heat loss in in W/degree C
V – Volume in cubic m of space being heated or cooled
N – Number of air changes per hour

So for a typical house with a floor area of 250m2 with 2.3m ceilings:

Qv = 0.36 x (250 x 2.3) x 1 = 207W/degrees C

To keep this house at 20 degrees with an outside temperature of 10 degrees would need 207 x 10 watts = 2.07kw/hour…… just for ventilation losses

A well draft sealed house will reduce the heating required to 1.04kw/hour. (You would be saving $1 every five hours, with more saving on colder nights)

WARNING

If you have got a flue less heater (such as portable gas heaters, kerosene heaters or bio ethanol heaters) you do need some ventilation to keep a safe level of oxygen in the room.

See Insulation for similar Posts

For Posts about Green Building see Sustainability


Insulation Basics – Reflective Finishes

There are a number of insulation products with reflective surfaces now available but how do they work?

Why do the instructions tell you to put the more reflective surface on the underside rather that the top?

Here is some information to help you understand what’s happening.

All surfaces have different levels of ability to reflect heat with black and matt finishes being very poor and shiny metal surfaces being very good. Most reflective surfaces are also poor emitters of heat. This characteristic is called emissivity (normally written as ‘e’).

An example is clean aluminium foil has an ‘e’ value of around 0.03. This is much less than common building materials such as:

  • bricks ‘e’ = 0.9 ; or
  • Building membrane ‘e’ = 0.5

Low emissivity finishes are generally considered to have an ‘e’ value of less than 0.05.

As dust can increase emissivity by 0.25 Aluminium foil is only considered to be low emissivity on vertical surfaces or the underside of a inclined or horizontal surface such as a roof or ceiling, where it will remain clean.

The emissivity acts with the surface layer of air on the building material to give an overall R value for the surface.

The following table shows how the ‘R’ values increase with a Reflective (low emissivity) surface compared with a high emissivity surface.


Cavity Width

Direction of

Heat Flow

Low Emissivity

R value

High Emissivity

R value

Horizontal

Up

0.23

0.11

Down

0.8

0.16

Sloping 45 degrees

Up

0.24

0.11

Down

0.39

0.13

Vertical

Horizontal

0.3

0.12

You will see that low emissivity insulation such as aluminium ceiling insulation has better performance (Higher R values) when the the Hotter air is above the insulation than the reverse.

This means that in summer it resists heat during the day but allows the house to cool more quickly at night. In winter, however the performance in keeping the heat in the house will not be as good.


See Insulation for similar Posts

For Posts about Green Building see Sustainability


Buffer Zones

Planning a house layout? or considering builders standard layouts?

Thinking about buffer zones when you are will save you on heating and cooling costs.

So what are buffer zones?

Buffer Zones are basically rooms and spaces that may be heated to a lower temperature, only heated occasionally, or even left unheated in winter.

In summer the situation is reversed and these rooms and spaces will not need to be cooled to the same extent as the main rooms.

As these rooms and spaces are at a temperature between the main rooms and the outside they act as additional insulation reducing the cost of keeping the main rooms at a comfortable temperature.

Examples of Buffer Zones

Typical  ‘Buffer Zones’ are:

      • Roof space
      • Garage
      • Guest bedrooms
      • Laundry
      • Study
      • Toilet
      • Bathrooms
      • Porch
      • Conservatory

An example of using buffer zones can be seen on the following floor plan.

The study, laundry, main bathroom, toilet, en-suite are all enclosed rooms on the South side of the house.

They don’t need to be heated/cooled all the time.

For instance in winter the bathroom only needs to be heated for around half an hour in the morning.

All this reduces the volume to be heated in winter and stops heat loss to the North.

A popular buffer zone in England is a Porch.

We haven’t had one in an Australian house yet and they don’t seem to be very common in standard designs. . .but if you live in the High Country, or Tasmania, one could be well worthwhile.

Conservatories are also less common in Australia probably because of the overheating risk in summer.

They can however be useful for increasing ventilation through the house if properly designed with large top vents.

Has a buffer zone worked for you?

For more posts about plans see the Design Category.

To save money on Heating and Cooling see Insulation


Insulation Basics – Weather Effects

When you are considering how much heat you will gain in summer, or lose in winter its not just the outside temperature you need to think about.

It’s actually the surface temperature of the outside wall, or window as it can be different to the outside measures air temperature.

Here are some thoughts on how weather can change the thermal performance of your new house exterior.

Wind Chill

Although people normally talk about wind chill with respect to clothes it applies to buildings as well.

Typically the most affected surfaces are windows.

For an exposed windy site the R value of the windows can be 25% lower than on a sheltered site.

Things such as changes to the micro-climate of you house will reduce wind chill.

Rain Wetting Walls

Once a wall gets wet the rate of heat loss to the outside in winter will increase due to evaporation cooling the wall.

This affects porous surfaces such as brick and wood more than impermeable surfaces like steel.

For a typical brick wall a moisture content of 5% can lower the termperature of the outer skin by around 25%.

The most effective way of avoiding this by keeping the walls dry is to have at least 450mm wide eaves.

Summer Radiant Heat

Have you ever felt a brick wall after the sun has been shining on it for a while?

The radiant heat absorbed by the wall can make the wall surface 5-10 degrees hotter than the surrounding air.

If you are doing calculations for air conditioning this can make a difference to the required cooling capacity of the unit.

So keeping the summer sun off the north and west facing walls with wide eaves, verandas or pergolas will help keep your house cool.


See Insulation for similar Posts

For Posts about Green Building see Sustainability


Insulation Basics – Double Glazing

Large single glazed windows are one of the biggest reasons for heat loss in a modern house.

It is also a major source of heat coming into the house in summer.

So what can you do?……………here is a comparison between single and double glazing.

Single Glazing
A single glazed window with an aluminium frame has a U value of around 7watts/degree C/m2 (an R value of 0.14 )

So if your house has got 30m2 of windows and its 5 degrees C outside.

You will be losing the following amount of heat through the windows if you keep the house at 20 degree C

30 x (20-5) x 7 = 3,150watts = 3.15kW/hour

For refrigerated cooling from 300C to 200C you will need the following amount of cooling to balance heat gain through windows:

30 x (30-20) x 7 = 2,100watts = 2.1kW/hour

Double Glazing

If you have double glazing with timber or uPVC frames you will reduce the U value to around 3 watts/degree C/m2 (An R value of 0.33 ).

For the same conditions as the above example the heat loss through the windows will be reduced to:

30 x (20-5) x 3 = 1350watts = 1.35kW/hour

For refrigerated cooling from 300C to 200C your heat gain through windows will be reduced to:

30 x (30-20) x 3 = 900watts = 0.9kW/hour

Other ways to reduce heat loss are

  • Reduce window size. As walls are better insulation than windows this can offer significant reductions in heat loss
  • Curtains or Blinds. Will provide similar performance to double glazing. . . but only during the time when they are closed.

Extra Benefits of Double Gazing

Improved Security: Its much more difficult, and noisy, to break in through a double glazed window.

External Noise Reduction The bigger the gap between glass the better the performance.

See Insulation for similar Posts

For Posts about Green Building see Sustainability


Insulation Basics – Vapor Barriers

When you are thinking about installing insulation you also need to think about Vapour Barriers.

Although I frequently saw mention of vapor barriers in books and articles it was a long time before I understood why there were needed……………. Here is my explanation:

  1. Warm air, inside the house, contains a lot of moisture (water vapor) which comes from people breathing, cooking, showers, flueless gas or oil heaters, and house plants.
  2. If this air is allowed to pass through the building structure it cools.
  3. As the air cools it can’t hold as much moisture and water condenses in the structure and in the insulation.
  4. The water can:
    • Waterlog the insulation reducing its effectiveness.
    • Cause rot in wood.
    • Cause corrosion, Particularly on the underside of a metal roof.

To stop the problems you put a vapor barrier………….Which is really an airtight barrier……….on the inside face of any insulation.

An Exception

You Don’t usually need a vapor barrier on the ceiling if you have a ventilated roof space as the air flow above the insulation will dry out any moisture in the insulation.

Cathedral ceilings  and flat roofs are a different matter and Do Require a vapor barrier as there is no ventilated space above the insulation.

Types of Vapour Barriers

Vapor barrier don’t have to withstand any pressure so they can be quite thin. Examples are;

    • Polythene sheet,
    • Reflective foil,
    • Foil backed plasterboard,
    • Water resistant painted surfaces,
    • Impermeable insulation such as sheets of polystyrene.

All joints and overlaps in the vapor barrier should be taped or glued to make sure no air gets through.

See Insulation for similar Posts

For Posts about Green Building see Sustainability

For more about Moisture Problems see this link: Condensation.


Rooms over Garage

Will your new house have a bedroom above the garage?

If so you should check what the builder specifies in the way of Insulation between the garage and the room floor.

Although regulations quite often specify insulation on external walls they usually don’t consider above the garage.

Why this matters

In winter garages can get very cold, particularly if the garage door is left open.

In summer the garage can get very hot. . . more so if the garage door faces west and absorbs the afternoon sun..

This means that in both summer and winter the lack of insulation can make the room uncomfortable!

What You Can Do

Make sure you discuss with the builder the option of putting insulation in the garage roof before the ceiling is installed.

Doing it then is going to be much cheaper than trying to do it later.

Already built? . . . perhaps you could add Insualtion to the garage door.

Microclimate, And Why It’s Important To Your New House

A microclimate is a local atmospheric zone where the climate differs from the surrounding area.

The term can refer to areas as small as a few square feet (for example a garden bed) or as large as many square miles.

When we are talking about providing a microclimate for a house the things can do for are things like:

      • Providing shade trees to keep the summer sun out of the house, particularly on the west side where eaves don’t work as well. (see Photo)
      • Overhanging eaves, and verandas to keep the walls dry. (Once brick walls get wet winter winds cause evaporation which chills the brickwork speeding the loss of heat through the wall)
      • Providing shrubs and plants close to the walls to retain a layer of still air which slows heat loss in winter. The plants also help shade the walls in summer.
      • Soft leaved plants that can help reduce summer heat due to evaporation from their leaves.
      • Fences, bushes or trees to deflect or break up winter winds.


Have you provided a microclimate around your house?

For More post about the garden and finishing off a house see Settling In


Exit mobile version