

Guest Post by Luther Danfil
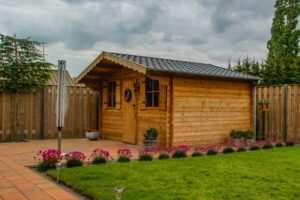

There are so many ways you can make better use of your shed.
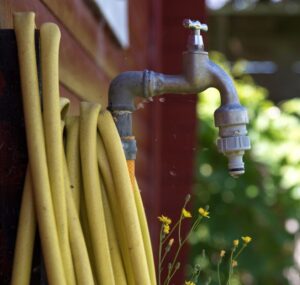
One excellent way to improve your shed is to have running water, and the best you can go about this project is through proper plumbing.
With running water, you can wash tools and do a variety of outdoor chores.
Should you decide to convert your shed into a guest room or an outdoor living area, for instance, you can then easily do so with a water supply.
Here’s the caveat, however:; Plumbing installation is a serious matter to get right.
One small mistake can potentially lead to more serious problems in the long run.
Defective plumbing can be problematic, and you can face costly water bills and an inefficient supply in the long run.
Then, there’s also the risk of going through regular repairs—all because the installation wasn’t done right to begin with.
If you’re planning to install plumbing to your shed, to seek expert advice from professional plumbers should be your first step. . . but while you’re negotiating with an expert for this project, here are a few things you must consider before undergoing this project:
Decide On The Water Supply Type You Need
First things first, decide on the water supply type you’ll need. This choice depends on factors like how you’re going to use your shed in the first place.
For instance, if you’re going to convert your shed into a guest house, you might first need to connect your shed to your main line.
This way, you can have hot water for the tap and for other plumbing fixtures.
Otherwise, if you don’t connect to the main line, you’ll have to connect the water line with the electrical simultaneously.

You can also create a rainwater collection system and use grey water for your outdoor chores. Making this decision first can help you decide the extent of work that you need to do to get the plumbing right.
1. Go Through Thorough Zoning And Planning
Once you decided how you’ll use the water, you can now proceed with zoning and planning.
This means reviewing your local council guidelines and any zoning requirements that you need to follow regarding the planning.
The reason behind this goes back to the fact that there are several issues related to plumbing with outdoor structures like your garden shed.
You’ll want to be certain that you won’t go beyond any local building codes and regulations.
One concern covered by building codes, for example, relates with how deep you have to bury the running water line.
Depending on where you’re from, local legislation might set a certain depth you’ll have to dig first to clear your property location’s underground frost line.
2. Assess The Needed Insulation
After getting the zoning and planning process in order, now comes the need for proper insulation.
If you live where the climate is colder, like Tasmania, and can drop below freezing, you’ll have to insulate your pipes.
If not, you’ll face the problem of frozen pipes every winter and burst pipes, unles you isolate and drain the pipes.
The best way to isolate your outdoor pipes is to install a water shut-off valve on those pipes connecting the shed’s plumbing line to the main house.
This allows you to shut off the water line to the work shed and then drain them on those days when it’s particularly cold.
3, Dig The Trench, Then Lay The Pipes
The trench serves as the direction where you’re going to lay your plumbing pipes.
After settling how you’ll use the water and getting the right permits, now comes the part where you’ll need to dig your trench and lay the pipes.
Typically, digging the trench is a step you can do by yourself.
But you’ll need advice from an expert plumber first to be certain of the dimensions.
You should also position your pipes away from other lines for your electricity, cable, internet, and even your gas.
After digging your trench, set the bottom of the pit with builder’s sand first. This gives your pipes a smooth base.
Most importantly, the builder’s sand also allows you to cover any sharp stones that can potentially damage it.
4. Create Alternatives For Water Collection
Now that you’re starting from scratch with building a new outdoor plumbing line, you can also try an eco-friendlier strategy.
Apart from installing your main water line, you can also take this chance to go with a rainwater collection system.
When you add this system to your shed, you don’t have to worry about costly water bills.
You can use the water collected in your shed from the rain for non-drinking purposes like gardening, for instance.
You don’t have to install a highly complex system.
A pipe from the shed’s gutters connecting to a storage tank should be enough for outdoor chores.
Conclusion
Running water is a convenience to have in every working shed. It can add value to your shed, with the end in mind of significantly improving the functions your shed can do.
But when you don’t do this project right, it can be a serious cause of concern.
When done correctly, however, you’ll have a system that can last a lifetime.
The tips in this blog post should help you with any concerns you have with plumbing installation so you can safely move forward from whatever difficulty you’ll face with the installation.
Author Bio
Luther Danfil is a home improvement specialist. He writes blog posts and guest posts to share his knowledge and expertise in home improvement. Luther enjoys biking, rock climbing, and hiking in his free time.