Solar Panels on Your New Roof – Things To Know

Guest Post by Craig Glover 

You’ve just considering investing in a new roof for your home; or thinking about a new home, which of course has a roof.

It’s time to think & plan for the future.

Specifically, thinking about solar.. .  If you’ve been considering solar panels to reduce your energy bills, now is the perfect time to make sure your new roof is ready for solar.

I’s critical to consider whether it can support the weight of solar panels for the next 25 years or more.

You want a roof that’s built for longevity and able to handle the elements, but also strong enough to hold several hundred kilograms of photovoltaic panels and the racking equipment that secures them in place.

As you review quotes from roofing contractors, ask about the options for beefing up your new roof to make it solar-compatible (if required).

A few small investments now could save you thousands of dollars down the road if you do decide to go solar.

Follow these tips to ensure your roof is solar-ready so you’ll be all set to take full advantage of the sun’s power for your home. The planet and your wallet will thank you.

Metal vs. Tiled Roofs – Choosing the Best Roof for Solar Panels

If you’re building a new home, you’ll have to decide between a metal or tile roof.

Metal Roof

For solar panel compatibility, metal roofs have the upper hand.

Metal roofs, like steel or aluminium, can also reflect sunlight, reducing heat gain in your attic by up to 25 percent.

This means lower cooling costs and a more energy efficient home.

Metal roofs are also lightweight, durable, and low maintenance.

They won’t crack or break under the weight of solar panels like some tile or shingle roofs might.

Metal roofs can last 40-70 years, outlasting most solar panel warranties.
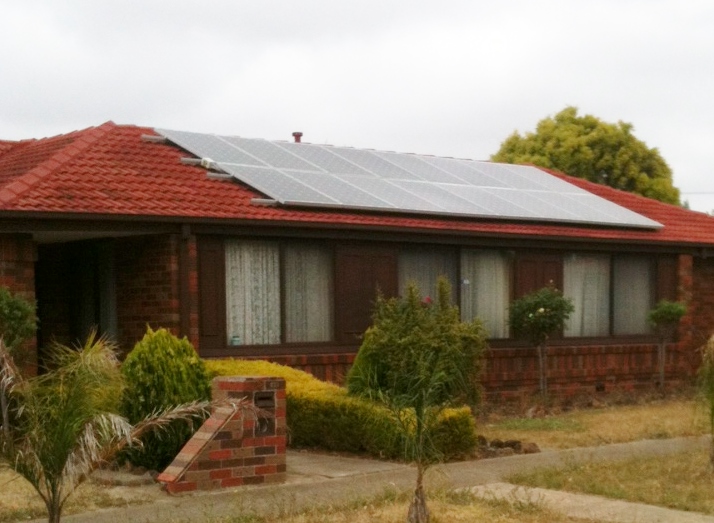
Tile Roof

Tile roofs, on the other hand, absorb and retain heat, increasing your attic temperature and energy usage.

The weight and brittle nature of tiles also make them more prone to damage during installation of solar panels.

If a tile cracks or breaks, it can be difficult to find a matching replacement.

Tile roofs typically only last 20-50 years, so you’ll likely need full roof replacement before your solar panels reach the end of their lifespan.

If solar panels are in your plans, a metal roof is the practical and economical choice.

You’ll maximise energy efficiency, minimise costs, and ensure maximum compatibility for current and future solar installations.

Why not build an eco-friendly home from the top down? A metal roof and solar panels are a winning combination.

Designing Your New Roof for Optimal Solar Panel Installation

If you’re building a new home, you have a perfect opportunity to design a roof that’s optimised for solar panels. Here are some tips to keep in mind:

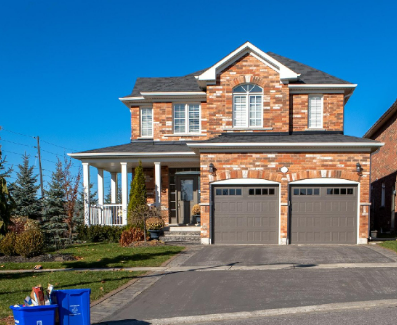
Choose a Roof Style that Maximises Solar Exposure

The best roofs for solar panels are large and unshaded.

Gable or hip roofs are ideal, as they provide the most roof space facing the sun.

Metal roofs with standing seams also work great for installing solar panels.

These roof styles score highly on solar receptivity charts, harnessing 22-47% of available sunlight.

If you’ve done some research on solar panel placement previously, you would have most likely come across mentions of south facing panels being the best.

But this isn’t as important as it’s made out to be.

For example, west facing solar panels here in Australia provide power in the afternoon & early evenings, which is when most people are at home consuming energy.

Ensure Proper Roof Orientation

Aim for a roof with the largest sections facing within 45 degrees of due North.

This orientation allows for the most sunlight exposure, especially during peak sun hours in the middle of the day when solar panels operate most efficiently.

But remember, the worst panel orientation in Australia is still better than the best panel orientation in the UK.

Provide Enough Roof Space

Most homeowners need at least 20 to 50 m2 of roof space for a typical residential solar panel system.

The more space you have, the more panels you can install and the more energy you can generate. If possible, choose a roofline free of vents, skylights, and other obstructions that could shade panels or take up valuable space.

Consider Panel Attachment Methods

Discuss your options for attaching solar panels to your new roof with contractors.

Mounting systems that clamp panels flush to the roof typically require roof penetrations, while rail-mounted systems attach at the seams and minimise penetrations.

The best method for your home depends on your roof type and warranty.

With some advanced planning, you can have a new roof that’s tailor-made for solar panels.

Why not harness the sun’s power for energy independence in your new home?

The long-term savings will make the investment worthwhile.

Questions to Ask Your Roofer About Adding Solar Panels

Adding solar panels to your roof is an excellent choice for lowering your energy bills and reducing your carbon footprint.

As experts in metal and tiled roofs, here are some key questions to ask your roofer to ensure a seamless installation:

    • What type of solar panel mounting system do you recommend for my roof? Ask about both attachment methods and their impact on roof warranties.
    • Will my roof need any modifications to accommodate the solar panels? Many roofers offer flashing and other services to properly integrate panels.
    • How will you waterproof the roof penetrations where the panels and racking attach? Make sure the waterproofing method meets manufacturer specifications.
    • DIf you live at high altitude climate you live in – How will snow and ice buildup be managed around the panels? Some racking systems include features to aid with snow sliding off panels.
    • What is the expected lifespan of my roof with solar panels installed? Most roof-integrated solar systems should last the life of a new roof with proper installation and maintenance.
    • How will you address potential shading issues from nearby trees or structures? Your roofer may suggest panel placement and angles to maximise the sunlight exposure.

Asking these questions upfront will help ensure your new roof and solar system provide you with clean, reliable solar energy for many years to come.

Installing solar as part of your new home construction also takes advantage of economy of scale benefits to help lower the overall cost.

Conclusion

So there you have it, the key things to keep in mind if you’re thinking of going solar with your home’s new roof.

Make sure you choose a roofing material and slope that will maximise energy production.

Get multiple quotes from reputable installers and compare. And don’t forget about tax incentives and rebates that can help offset the costs.

Going solar is an investment in your home and the environment that can pay off for decades.

While it may require some upfront financial outlay, you’ll be generating your own power and reducing your grid dependence.

That feeling of self-sufficiency is priceless.

The sun is shining – are you ready to make the most of it?

Flooring Done Right: How to Pick the Right Tiles for Your Home

Guest Post by Hubert Dwight

When it comes to designing the interior of your house, every detail matters—especially the flooring of your house, which speaks volumes about the room.

The floor is one of the most important components of a house, but most often, it is overlooked. However, you will see that when homeowners pay equal attention to the design and colour of the floor tiles, the home looks more welcoming and put together.

So, if you are planning to redo the entire flooring of the interior of your house, working with a tile store is a wise decision.

The experts will assist you with everything you need to renovate the floors.

You can also take the help of this article to figure out how to pick tiles that complement your house.

Consider the following criteria when you are picking tiles for your home:

Think About the Size of the Room

While choosing titles for your home, it is important to consider the size of the room/ rooms.

There is a rule of thumb that every interior designer follows while choosing the colour of the tiles with regard to the size of the room.

If the room is small, it is best to go for lighter shades such as beige, white, and light oak, giving the illusion that the area is large.

However, if the room is big, you must choose warm-tone colours such as walnut and charcoal to make it feel cosy and cohesive.

Consider the Mood of the Room

Before you choose a colour, consider the mood of the room because colours display emotions and can influence how one feels when one enters the room.

Many people make the mistake of not considering the colour of the walls and the floors when designing the interiors.

For example, cool-tone colours such as white and beige display purity, whereas blue is considered soothing and yellow is an every-green happy colour.

The mood you want to set in a room must be predetermined before you choose the colour of the tiles.

Doing this will help you plan the colour scheme of the room.

Pro tip: Go for white floors in bathrooms because they make it look clean and big and yellow-hued tiles for the kitchen; because who doesn’t want to be in a jolly mood while cooking?

Take the Location into Consideration

One type of tile may not be suitable for the whole house.

You need to remember that your home has different rooms with different needs.

For instance, your kitchen and your bathroom will need tiles that are water-resistant, stain-proof, and easy to clean.

On the other hand, you can go for fancier tiles for your living and drawing room.

Ceramic and vinyl tiles are the most preferred choice for the kitchen and bathroom because they can be easily cleaned, and marble is the top choice for living and drawing rooms because they give a rich and royal feeling while being affordable.

Find the Ideal Size

Choosing the right size of tiles is crucial to ensure that there is minimum wastage during installation.

Therefore, large tiles are most suitable for larger spaces such as living rooms, bedrooms, and drawing rooms, and smaller tiles are best for kitchens and bathrooms.

Find the Ideal Finish

There are three widely used types of tile finishes: glossy, matte, and semi-matte finish.

The glossy finish is very shiny and reflects a lot of light, so it’s best for those who want to make a smaller room to look bigger.

However, keep in mind that installing these tiles as flooring in the kitchen or bathroom can be a risk, as they tend to be a little slippery.

Matte finishes are not glossy but are water and stain-resistant, making them a great choice for kitchens and bathroom floors.

Semi-matte tiles are slip-resistant and glossier than matte tiles and look great when installed in bedrooms.

Conclusion

Your tiles speak a lot about your home, and therefore, it is extremely crucial that you choose the right ones.

While you will find a lot of guides online that will help you in the selection, it is best to rely on the experts for this task because installing tiles is a big investment.

You don’t want to spend money on tiles that don’t compliment your home or your personality!

Beyond the Basics:

5 Makeover Ideas for Pergolas and Outdoor Structures

Guest Post by Chiyako Ikeda

Do you wish to enjoy the Australian outdoor lifestyle more but are faced with the challenges of creating the perfect outdoor space?

Whether you’re unsure how to balance style and functionality, or don’t know which products or design elements can withstand the harsh sun, occasional rain, and the ever-changing seasons, this article is for you.

Unleash the full potential of your pergolas, gazebos, decks, and patios with these practical makeover ideas.

1. Add more shade with outdoor blinds

If you’re yearning for extended comfort in your outdoor space, consider investing in outdoor blinds.

These provide adjustable shade that can greatly enhance your stay in your backyard or garden structure and come in a wide variety of colours and materials for you to choose from.

If you’re looking to enjoy the fresh outdoor atmosphere away from prying eyes, opt for a thicker material for heightened privacy.

These exterior window furnishings also provide an extra layer of privacy without obstructing your views.

Outdoor blinds can also help shield your furniture from sun damage, ensuring longevity and vibrancy.

When lowered, they also double as barriers against flying insects, doubling as mosquito or fly screens.

Perfect for: Pergolas, decks, and patios.

2. Grow climbing plants.

Enhance your outdoor area with a few touches of nature with climbing plants.

These natural decorations bring not only aesthetic charm but also practical benefits like increased privacy and fresher air.

Here are some ideas on how you can incorporate plants into your outdoor living space:

● Hang basket plants from a lattice, creating an instant burst of colour and life.
● Opt for climbing plants like wisteria, grapevines, or banksia roses for natural cascading curtains and privacy shades.
● Use potted climbing plants around deck posts, transforming them into natural focal points.

Unsure which plants to use?

Below is a list of climbing plants that thrive and grow fast in Australia:

● Wisteria
● Hardenbergia
● Grapevine
● Bougainvillea
● Rock trumpet
● Bridal wreath
● Boston ivy
● Star jasmine

Perfect for: Pergolas, gazebos, and decks

3. Go for cosy, functional furnishings

Transform your outdoor haven into a functional retreat with thoughtfully selected furnishings.

When creating an inviting space, you need to consider both the appearance and the functionality of your outdoor furniture.

To begin, choose the best furniture for comfortable seating.

There are plenty of high-quality outdoor tables and chairs you can buy to elevate your outdoor style and withstand the elements.

Opt for furniture that complements your deck while serving multiple purposes.

Some good examples include storage benches to convertible tables.

If you’re a bit short on your budget, you can also explore garage sales and thrift stores or go for DIY pallet furniture.

With some creativity and resourcefulness, you can have unique and personalised pieces that fit your outdoor space perfectly.

Perfect for: Gazebos, pergolas, decks, and patios

4. Build a fire pit

Ever imagined yourself having a campfire in your backyard during chilly autumn nights?

You can do just that with a fire pit.

Of course, you need to first consider the type of fire pit to build according to your needs.

The common options include wood, gas, or eco-friendly bioethanol.

Once you’ve made your choice, the next step is to find the best spot for it.

Place it somewhere with proper ventilation and enough space.

Remember that the type of fire pit may dictate the amount of space and ventilation required for its safe use.

Wood fire pits need more air, while gas and bioethanol pits offer versatility.

Gas- and liquid propane-fuelled flames are easy to control, so they work better for covered outdoor spaces.

Meanwhile, bioethanol tends to produce very little smoke, making it the best choice for use under a gazebo.

Don’t forget to verify whether the structure is made from material that can withstand the heat and ensure ample space for the safe use of the fire pit.
Perfect for: Gazebos and pergolas

5. String in some lights

To enjoy your outdoor living space until nighttime, consider installing some artificial lights. Here are some ideas on how you can achieve this:

● Hang strings of Edison lights from the lattice of your pergola to create a more ambient and enchanting outdoor space.
● For a touch of whimsy, wrap the posts of your gazebo with smaller LED or fairy lights.
● Illuminate the inside of your gazebo, patio, or roofed deck with pendant lights. You can also use a minimalist chandelier for a more elegant effect.
● Light up the path to your gazebo or pergola with solar-powered lights for an aesthetically pleasing and energy-saving landscape.

Experiment with different lighting arrangements and patterns to infuse some personality into your outdoor space.

Perfect for: Pergolas, gazebos, decks, and patios

Elevate Your Outdoor Living

Transform your outdoor haven with shade, greenery, functional furnishings, warmth, and enchanting lights.

Embrace these makeover ideas to create a personalised outdoor oasis for you and your family.

Epoxy Coating: The Ideal Treatment for Your Garage’s Concrete Floors

Guest Post by Elisaveta Doncheva

More often than not, focusing on finding ways to increase a home’s resale value leads to obvious alterations and upgrades, such as furnishings that freshen up the interior and landscaping that gives the outdoors a nice finishing touch.

And yet, something as simple as treating the concrete floor of the garage with a little TLC could be the change that brings about the biggest impact.

In addition to the functional purpose this home’s feature has, which is handling the pressures from heavy-duty use from your vehicles or machinery, it also has an undeniable aesthetic role which may be somewhat understated.

To avoid deterring future buyers, or even an eyesore for yourself that could also be dangerous and risky for you, your vehicles, your machinery, tools, and what is not present in the space, it’s time to make some improvements.

Don’t worry, it’s as simple as adding durable epoxy coating for concrete to get the desired makeover.

You’ve got a range of versatility available, differing not only in price but carrier agents too, giving you the chance to choose from solvent, solid, and water based.

Is It a Good Idea to Put Epoxy On the Garage Floor?

It’s a type of coating that’s meant to last for years and years, and it truly can with proper floor maintenance.

If it’s good for commercial purposes in industrial applications that require the best of the best in terms of floor protection, why should it be any different from residential applications?

When applied, there’s a specific permanant chemical reaction happening which gives this material some exceptional qualities for the surface it’s added to.

To give you an idea, the following are just some of the benefits you can expect to reap once you treat your floors with the suitable resin and hardener mix.

The Smooth and Shiny Appearance

The floor can make or break the space’s appearance, and all it takes to get it from drab to fab is a nice layer of epoxy coating for concrete to get smooth and seamless elegance.

Even though elevated aesthetic may not be your goal, least of all for a utilitarian area like the garage which serves as a parking area, workshop, and storage for your seasonal equipment or home-brewing equipment, the sleek and elegant touch would surely increase the overall curb appeal.

And, you can have fun choosing the coating – for a polished ambience, why not pick one of the eye-catching metallic mixes?

A mixture with details from mica or quartz equally makes for a unique aesthetic that additionally doubles for better traction of the floor too, so you amp the look without sacrificing the function or convenience.

The Increase in Protection

Instead of serving as the base, the garage floor epoxy is a layer added over the already sturdy concrete floor, taking up the role of protector for the underlying surface, shielding it from impact as well as wear and tear that might result in cracking and crumbling.

Since there’s more than one layer added, usually you get a thick coating that covers your precious concrete flooring, giving it an increase in durability.

This explains why upon application the possible defects of the floor might have magically disappeared with each and every layer of the coating, offering a sleek and smooth finish.

It’s exactly this that gives you peace of mind since usually defects can be the opening points for moisture to make its way through and damage the concrete little by little.

The Increase in Strength

Impacts, shocks, extra weight – you name it, the coating can handle it all.

Unlike other coatings, epoxy stands out from the rest with its incredible tensile strength, and the secret lies in the addition of the hardener, specifically the polyamine material.

Depending on the type of epoxy and hardener you choose, you can significantly increase the concrete’s ability to stand up to all the pressure you’d put it through.

If the bonding with the underlay surface is good, you can expect there to be strength in the resistance to peeling and tearing too so you won’t have to worry about those heavy loads.

The Increase in Safety

The garage that doesn’t have windows or proper illumination can easily become a place that compromises the safety of anyone going inside, but this too could become a thing of the past with the simple addition of a few layers of an epoxy concrete floor coating of your choice.

This is due to the material’s ability to reflect the light, which results in the brightening up of the whole area.

Moreover, with certain mixes of epoxy and hardener, it’s possible to increase the safety to reduce the danger from slipping accidents.

If a slick surface isn’t your thing, and you wish to further boost the safety, you could add your own ingredients to the mix, including polymer grit, gravel or sand.

The Resistant Properties

It is more than resistance to water and moisture.

It is also resistance as well as heat, chemicals, and even impact, it’s an investment that more than pays off in the long run.

The thicker the layer of coverage, the more of these incredible properties you can expect.

The Long-Lasting Result

As mentioned, this is a covering option that keeps on giving time and time again if we keep its resistance properties, strength, and durability in mind.

As such, it’s a much more reliable and convenient option than other covers in the likes of concrete paint, or tiles, especially if we consider the lack of need to redo the epoxy layering for many years.

The Eco-Friendliness

Sure, it’s a chemical, but that doesn’t mean it can’t be eco-friendly in its own way.

As it’s not that difficult to install, needing only a few essentials, and it doesn’t need to be recoated that often, it’s more helpful for the environment than other alternatives.

If you think about it, it’s quite cost-effective too so your budget won’t be significantly impacted once you take care of the proper installation.

How Do You Take Care of Epoxy Floors?

We’ve already discussed the outstanding properties of epoxy, including its durability, but it wouldn’t hurt to get in the habit of maintaining it to ensure it lasts as long as you expect it to, or even more.

Sweeping to get rid of dirt, dust, and debris is the basic step you should implement, followed by mopping.

Getting rid of stains should be done immediately after they occur, with an emphasis on using epoxy-suitable products, from cleaners to the right tools for the job, to avoid scratching the coating yourself.

Also, remember that prevention is better than cure, and in the case of the coating, it’s advisable to protect it from heavy objects by using the appropriate mats and furniture pads. A little care goes a long way!

Transforming Your Outdoor Space: How Sheds Can Enhance Your Home’s Value

Guest post by James Austen

Benefits of having a shed

Having a shed provides extra storage space, reducing clutter in your main living areas.

It can secure tools, lawn equipment garden furniture.

Many types of sheds and homes can can also provide workspace for hobbies and DIY projects, or provide additional living space.

Purpose of the Shed

Storage  Sheds that are only used for storage can be faily basic with little need for windows, power supply or insulation.

Don’t skimp on the size including the door as you want to make it easy to get your stored materials in and out.

Workshop. If you are going to use the shed as a workshop you need to think about light and comfort.

Natural light will make your work easier and things like insulation will make the space more usable in the hight of summer and the depths of winter.

ou will also have to think about a power supply and perhaps organise for a sink

Living/ Leisure Space This can be for relaxation and entertainment and may even incorporate outdoor shaded areas.

Other uses include home offices and even accomodation such as  ‘Granny Flats’..

Higher standards of fit out and services will be required for living spaces.

Choosing the right location for your shed

Relationship to the house

A well-paved path with good lighting is essential to provide safe access at all times during the day and evening.

A location close to the house may be convenient for providing services.

You also need to consider the appearance of the shed from inside the home.

An attrative leisure space shed may look good; but you might want to screen a workshop or storage shed.

Exposure To The Weather

Picking a shady spot will make the inside of the shed much more comfortable in summer

Drainage and Land Slope

Many sheds have limited roof drainage so the run off falls to the ground.

If this is what you propose make sure the shed is not in a low spot or the whole area around the shed is going to get waterlogged.

Sizing Your Shed

Space availability

Space availability is a crucial aspect to consider, a shed that takes up a large part of your garden is likely to negativly affect your property value!

Planning Laws

Planning laws include planning permissions, and building codes, may affect what you can do.

A small shed at the back of the house is unlikely to be a concern but a large shed or a livable room may require a trip to the council offices..

Materials for the Shed

Metal Sheds

Metal sheds are durable, low-maintenance storage solutions which are a popular choice in Australia/.

Wooden Sheds

Wooden sheds are generally chosen in Australia for their rustic appearance and are available in many styles and sizes.

They  often can be attractive garden features while offering functional storage.

One disadvantage is that wood does require more maintenance than other materials.

Masonry

Brick or block sheds are very durable but as they are usually considerably most expensive they are rarely used in Australia.

Plastic Sheds

Plastic sheds are a durable, weather-resistant storage solution for your garden or yard.

They are typically  a small convenient option for storing tools and outdoor items.

DIY or Professional Installation?

DIY installation can result in significant saving but requires careful planning and the right tools.

Always ensure accuracy in measurements to avoid costly mistakes.

Follow instructions diligently, prioritize safety, and don’t rush the process as persistence and patience often lead to the best results.

Professional installation benefits include guaranteed quality of work, time-saving, expert knowledge of best procedures.

How To Safely Remove A Tree Stump From Your Property

Guest post by Hubert Dwight

When it comes to personal landscaping, removing tree stumps is any arborist’s nightmare.

There’s a lot involved in making sure you can execute the job properly and without injury.

But what is the safest way to remove a tree stump from your property using your own tools?

Well, if you’re handy with a chainsaw, the job may be as simple as heading to Jono & Johno for chainsaw spares and then getting started.

For those seeking a little more direction, we’ve gathered some helpful tips that will give you the confidence in planning that you’ll need to rid your garden of that pesky stump.

Reasons you might need to remove a tree stump

Whether it’s a safety hazard or merely an eyesore, there are many reasons to prioritise the removal of a tree stump.

Even so, many homeowners are still hesitant to take on such a big job, namely because it can be labour-intensive. . . but there are a few reasons why you don’t want to leave this job at the bottom of your list.

Firstly, rotten tree stumps can attract and grow fungi spores which may become toxic to other plants in your garden or even attract pests.

Rotten root systems can also corrupt the soil quality making your garden a hostile place for other plants.

It’s also important to maintain a tidy garden to prevent any bushfire hazards.

Professional or DIY

With any DIY project, there’s always the question of when to try yourself and when you should leave it to the professionals.

If you’re planning on removing a tree stump, the answer really depends on your own personal situation.

Removing a tree stump can be simple and straightforward as long as you’re prepared to plan.

Here are a few reasons why you might want to call in a professional

Big job

If your pesky tree stump is wider than a metre, it may require a skilled team of workmen to ensure that it’s safely removed.

Type of tree

Some trees have root systems which are fairly simple, but others may spread further down or even around.

For this reason, it’s important to know what tree species you’re dealing with prior to attempting to remove the stump.

If this is something you’re not sure of, it may be best to call a professional.

Confidence with tools

Operating heavy machinery is not something to be taken lightly and we don’t recommend tree stump removal to be your first project using a chainsaw.

If you don’t have much confidence using a chainsaw, it’s best to enlist the assistance of someone who does.

How to prepare for the removal of your tree stump

One of the most important steps to removing a tree stump is to assess the surroundings.

If the stump is on a hill, or surrounded by other foliage, or if the ground is muddy, all of this could have an impact on how successful your stump removal will be.

It’s important to make sure that you’re aware of any potential slip hazards as you will be handling hazerdous machinery.

Get the gear

Whilst having the proper set of tools is important, any landscaping DIY project should be handled with appropriate personal protective gears. For a stump removal we would recommend having

      • A heavy pair of gardening gloves
      • Safety goggles
      • Safety footwear
      • Hearing protection

It’s also important to consider sun protection as uprooting a tree stump is no quick task.

Get the tools

There are a variety of tools that may help with tree stump removal but the basics that we would recommend would be:

      • Chainsaw
      • Wheelbarrow
      • Shovel and/or Garden trowel
      • Shears
      • Machete or handsaw


Removing the tree stump

Begin to cut

There’s no simpler way to put it, the first thing you’ve got to do is make some initial cuts.

You want to make sure you’re cutting down the trunk into more manageable pieces.

Remember to be slow and precise with your cuts.

Get to the root of it

Once you have cut the trunk down to size, begin to slice through the roots of the stump.

It’s good to have them as exposed as you can so be sure to dig deep around the trunk to get the cleanest cut possible.

Remove the debris and cover

Now that you’ve finished all your slicing and dicing, it is time to remove all of the dead roots and bits of trunk that are leftover.

Remove as much of the tree as possible and then fill the hole with dirt using a shovel or a dingo loader depending on the size of your project.

Enjoy your new garden

With your tree stump finally removed, you can be free to enjoy your garden with peace of mind.

Perhaps you could use the space for a veggie patch or as an entertainment area.

Take pride in knowing you’ve undertaken one of the trickiest garden home improvement tasks.

5 ways to Create a Safe and Comfortable Home Environment for Seniors

Guest Post by Rebecca Lee

Home should be a place of sanctuary for all, invoking a sense of safety, comfort, and familiarity.

This is especially true of seniors, who might be considering downsizing, but want a new house

Living spaces play a vital role in overall well-being.

Thus, it is integral to ensure that homes of seniors cater to their specific needs and provide a sense of peace.

In order to ensure that seniors are living in a safe and comfortable environment, we have provided a list of simple ways to transform a new house into a home.

1. Enhance Accessibility and Safety Features

The foundation of a safe and comfortable home can be created by improving accessibility. Installing simple modifications suited to senior citizens’ needs can make their daily lives far easier and reduce the chance of incidents happening.

Household modifications that are commonly utilised in senior houses are:

      • Handrails
      • Grab bars in bathrooms
      • Ramps in inclined areas
      • Significant lighting
      • Switches are within easy reach
      • Obstacles and clutter barring mobility are removed
      • Alert systems
      • Smart home devices

These safety measures give peace of mind for both seniors and future caregivers.

2. Adapt the Living Space to Accommodate Mobility Needs

Although on purchase mobility can be good as you age thinngs can change.

Beyond integrating safety and mobility accommodations in a household, you can ensure a more comfortable home environment for seniors by keeping their most commonly used spaces accessible.

Specifically, adapting living spaces to accommodate any hobbies and interests and king sure there is a space to relax when needed.

Living spaces can be made to be more accessible by:

      • Reorganising furniture for more open pathways
      • Choosing furniture that is comfortable and supportive
      • Adjusting the layout to reduce the need for excessive movement
      • Placing commonly used items in easy-to-reach places

Making these simple adjustments will reduce strain on seniors and promote independence.

3. Create a Relaxing and Serene Atmosphere

Engaging in a serene environment is known to significantly support the comfort and mental well-being..

To create a soothing environment indoors, it is best to incorporate:

      • Soothing colours
      • Comfortable seating
      • Soft lighting
      • Musical options

Nature is also known to greatly improve mental health across all ages, including seniors.

Bringing in elements such as plants or other greenery can reduce stress and anxiety.

This soothing atmosphere can be further heightened by adding personal touches to remember what matters most.

Cherished photographs or sentimental items can support the sense of familiarity and comfort within a home.

4. Encourage Social Interaction and Engagement

For everyone, regardless of age, social interaction is essential for mental and emotional well-being.

Encourage social interaction by specifically making spaces that suit family gatherings, hobbies, or group activities.

Over time, a greater sense of connection and belonging can be created within the elderly.

Social interactions can also become a more regular affair and more accessible by incorporating technology into the home.

Help stay in communication with family and friends who may not be able to visit regularly by thinking about where to take video calls.

This will allow you to stay connected and engaged with loved ones, staving off any sense of loneliness.

5. Regular Home Maintenance and Supportive Networks

Regular home maintenance and cleaning are crucial in ensuring a safe and comfortable environment for seniors.

Taking the time to ensure all necessary repairs are addressed will prevent safety hazards.

Meanwhile, having access to support networks, such as trusted caregivers, neighbours, or community services, is invaluable for seniors’ well-being.

This network grants help whenever needed, keeping seniors able-bodied and more connected to others.

Furthermore, regular check-ins from neighbours, or routine visits from professional home or health assistance can ensure any issues or concerns are addressed promptly.

However, if a senior is showing signs of being unable to maintain their independence, consider moving  to an aged care facility such as this aged care facility in Cowes.

Such environments are specifically designed to support seniors and ensure all of their comfort and safety needs are met.

Conclusion

It requires a thoughtful and comprehensive approach for a seniors’ environment to become safe and comfortable.

These five essential elements listed in this article can significantly improve the quality of life for seniors in their own homes when followed.

By providing a space where the elderly can feel the most at ease, not only will their quality of life improve, but so too will their emotional well-being.

Prioritising safety and comfort allows seniors to age gracefully while maintaining independence and dignity within their cherished homes.

What to Consider Constructing a Home in a Retirement Village

Guest Post by Rebecca Lee

So you want to build a new home in a retirement village?

If you’re looking to build a home of your own in a village, there’s plenty you need to consider.

But what really goes into constructing a new home in a retirement village? Let’s analyse some key tips you can use to succeed.

Location, location, location. . . It’s a core mantra of real estate for good reason.

Choosing the right location for your new retirement village home is essential.

Here are some things to look for when searching for the perfect community to build your home in:

Leisure amenities

Something very important to consider when looking for the perfect village for you is leisure amenities.
These can make or break your retirement village experience, and are definitely worth strong consideration when deciding where to build your home.
Here are just a few amenities to consider including in your village:

Swimming pool with ramp access and aquarobics classes
Bowling green and bocce court
Cinema
Arts and craft studio to help your residents unleash their creativity
Walking trails
Library packed with books, magazines and newspapers
Games lounge filled with cars, billiards, ping pong and more
Outdoor patio complete with barbecue and dining spaces
Auditorium/concert hall for live shows, lectures and other special events
Healthcare

There’s no overstating the importance of robust healthcare in a retirement village.

Whether it’s a full-on integration with aged care facilities or some more modest offerings, you should have a strong understanding of what healthcare will look like in a retirement village before you construct a new home there.

Having an alarm system with 24-hour emergency assistance buttons will be important as you age.

Other healthcare facilities might include rehabilitation gyms and mental health services.

Before you begin construction, you should understand how the village offers holistic care to its residents.

This will give you the best peace of mind that the village is the right choice for you.

Safety and security

The safety and security of residents in a retirement village should always be paramount.

On top of the integration of healthcare into a retirement community, there’s plenty more to be done to ensure safety and security.

Video surveillance around the exterior of the village
Check-in at the front gate for all visitors
Staff available 24/7 – you never know when an emergency may arise
Adequate lighting all around the village
Period safety checks of smoke alarms and other critical pieces of equipment
Clear signage for emergency exits and fire extinguishers

These are just some of the markers of a safe and secure village, which you should look for when constructing your new home.

Designing your home

With your location set, now’s the time to make some design decisions.

Here a few key concepts to keep in mind as you’re drawing up your plans:

Wheelchair access: If wheelchair accessibility is a concern, your new home should be single-story with wide halls and doorways.
Anti-fall measure: Include grab bars, railings and non-slip floors to help mitigate the risk of falls.
Landscaping: When it comes to landscaping, prioritise flat walking paths with plenty of rest areas.
Storage space: Your new home might eventually require some additional storage space for medical equipment including oxygen tanks and mobility scooters.
Energy-efficiency: Include insulation and double-glazed windows for a more sustainable design. You can even consider solar panels, which might save you a penny to boot.

Type of home

Now, what type of home will you construct?

Many villages have a range of houses that you can choose from, while others may have more choice within style guidlines.

For more inspiration on a range of homes in a retirement village, check out this range of Adelaide retirement villages.

If you’re building your own home in an existing community, the choice is all yours. Do you want an extensive property with plenty of gardening to take care of? Or is a cosier accommodation more suitable for you?

Be sure to give plenty of consideration to this all-important detail.

Budgeting

Retirement community or not, budgeting for building a new home is a mammoth undertaking.

It’s often worth getting professional advice at this time.

Here’s a brief overview of some things to budget for when constructing a new home in a retirement village.

Who’s paying what?: For incoming residents constructing new homes in retirement communities, ensure you have a comprehensive understanding of which costs you are paying for, and what, if anything, is being paid for by the village itself.
Village entrance and land fees: Fees and costs associated with acquiring land in a retirement village can be confusing at times. Be sure to read all the fine print so you understand exactly how much you are spending.
Construction fees: At the outset of construction, create the most comprehensive budget possible, understanding that it is very much not set in stone. Be sure to ask around and get plenty of quotes.
Landscaping and outdoors: Don’t forget these all-important parts of the process! Landscaping costs can add up quickly, so you’ll need to have a solid budget set aside for it.

Constructing a new home in a retirement village can be a daunting process.

Be sure that your new structure is a fitting and welcome addition to the community.

This will ensure happiness and prosperity in your golden years.

The Importance of Stair Nosing for Staircase Safety

Guest Post from Laila Hales

Vinyl plank flooring has gained immense popularity for its durability, versatility, and aesthetic appeal.

As this flooring choice continues to flourish, it’s essential to explore another crucial aspect of vinyl plank installation: stair nosing.

In this guide, we will delve into the significance of vinyl plank stair nosing, its role in ensuring safety and aesthetics, and how it can elevate your interior design while protecting your staircase.

The Role of Stair Nosing

Stair nosing serves as a functional and aesthetic element in any staircase design, but its primary role is enhancing safety.

Whether in residential or commercial settings, stair nosing provides the following benefits:

Safety: Stair nosing offers additional traction on the edges of steps, reducing the risk of slipping and falling.

Durability: It protects the edges of the steps from wear and tear, prolonging the lifespan of your staircase.

Aesthetics: Stair nosing can be a stylish and complementary addition to your flooring, tying together the overall design of your space.

Why Choose Vinyl Plank Stair Nosing

When it comes to stair nosing, there are various materials available, including metal, wood, and rubber.

However, vinyl plank stair nosing offers unique advantages:

Matching Aesthetics: Vinyl plank stair nosing can seamlessly match your existing vinyl plank flooring, creating a cohesive and visually appealing staircase.

Durability: Vinyl plank is known for its longevity, and this durability extends to vinyl plank stair nosing, making it an ideal choice for high-traffic areas.

Easy Maintenance: Vinyl plank stair nosing is easy to clean and maintain, making it a practical choice for busy households or commercial spaces.

Affordability: It is a cost-effective solution for both residential and commercial applications.

Installation of Vinyl Plank Stair Nosing

Installing vinyl plank stair nosing is a straightforward process that can be done by professionals or experienced DIY enthusiasts.

The installation typically involves the following steps:

Measure and Cut: Measure the length of the step’s edge where the nosing will be installed. Cut the vinyl plank stair nosing to the required length.

Adhesive Application: Apply adhesive to the back of the nosing and press it firmly onto the edge of the step.

Secure with Fasteners: For added security, use screws or nails to fasten the nosing in place.

Seamless Transition: Ensure that the nosing creates a smooth and level transition between steps, maintaining safety and aesthetics.

Design Options and Styles

Vinyl plank stair nosing offers a variety of design options and styles to suit your interior decor. Some of the popular design choices include:

Wood-Look Stair Nosing: Emulate the classic look of wooden staircases with vinyl plank stair nosing that replicates wood textures and finishes.

Contemporary Styles: Modern interiors can benefit from sleek and minimalist vinyl plank stair nosing designs, complementing a clean and uncluttered aesthetic.

Color Variations: Choose from a wide range of colors and shades to match or contrast with your vinyl plank flooring, adding a touch of personal style.

Conclusion

Vinyl plank stair nosing is essential for safety and aesthetics in your home or commercial space.

Its ability to enhance the longevity of your staircase, provide an extra layer of protection, and create a harmonious design makes it a valuable addition to any vinyl plank flooring project.

Whether you’re looking to renovate your home or enhance the look and safety of your commercial space, vinyl plank stair nosing is an excellent solution that elevates both function and style.


Reflecting Elegance

An Expert Guide to Shopping for Mirrors in Your Interiors

Guest post by Kristina Rigina

Mirrors are more than just reflective surfaces; they are interior design powerhouses and have become a must have in any space.

When used strategically, mirrors can amplify light, create the illusion of space, and add a touch of sophistication to any room.

However, shopping for mirrors can be daunting with the wide array of styles, sizes, and materials that have not come available.

To help you make informed decisions, we’ve crafted a comprehensive expert guide on how to shop for mirrors, what to look for, how to avoid common interior design mistakes, and the best shopping practices!

Determine Your Purpose

Before diving into the world of mirrors, it’s essential to clarify your purpose and ask yourself why you want a mirror in a particular space.

Mirrors can serve multiple functions, such as adding depth, enhancing natural light, or creating a focal point.

Identifying your goals will guide your mirror shopping journey.

Size Matters

The size of the mirror is a crucial consideration.

A larger mirror can make a small room feel more spacious by reflecting light and creating the illusion of depth.

However, in smaller spaces, it’s important not to overwhelm the room with an overly large mirror.

Take accurate measurements of the wall or space where you plan to hang or place the mirror to ensure it fits perfectly.

Consider the Style

Mirrors come in a wide range of styles, from sleek and modern to ornate and vintage.

Choose a style that complements your overall interior design theme.

For contemporary spaces, frameless or minimalistic mirrors work well, while ornate frames can add a touch of classic elegance to traditional interiors.

Consistency in style helps maintain the visual harmony of your space.

Reflect on the Shape

The shape of a mirror can significantly impact the aesthetics of your space.

Common mirror shapes include rectangular, oval, round, and square.

Consider the existing shapes and lines in your room when choosing a mirror shape.

For instance, if you have a room with many angular furniture pieces, a round or oval mirror can soften the look.

Conversely, in a room with softer curves, a rectangular or square mirror can add structure.

Frame It Right!

Mirrors with frames offer an opportunity to add texture, color, and personality to your space.

Wooden frames exude warmth and are perfect for traditional or rustic decor.

Metal frames, on the other hand, can provide a sleek and modern feel.

Consider the finish of the frame – whether it’s matte, glossy, or textured to match your interior vibe.

Consider the Placement

Strategic placement can maximize the impact of a mirror.

Reflecting natural light from a window or a beautiful view can make a room feel brighter and more inviting.

Placing a mirror opposite a focal point, like a piece of artwork or a stunning piece of furniture, can create balance and draw attention to the area.

Experiment with different positions to find the most visually appealing placement for your mirror.

Multiple Mirrors and Gallery Walls

If you have a larger wall to decorate, consider using multiple mirrors or creating a gallery wall with mirrors and other artwork.

This arrangement can be visually captivating and adds depth and interest to the room.

Ensure that the mirrors are well-spaced and balanced to create a harmonious display.

Pay Attention to Proportions

When hanging a mirror, pay attention to its proportions in relation to the wall.

A mirror that is too small for a vast wall can look out of place, while one that is too large can overwhelm the space.

Aim for a balanced look by centering the mirror on the wall or placing it at eye level, especially in spaces where people are likely to see their reflection.

Lighting Considerations

Mirrors and lighting go hand in hand.

The placement of mirrors can either enhance or diffuse light.

If you have a room with limited natural light, consider positioning mirrors strategically to bounce light around the space.

Mirrors can also be used to highlight certain areas with task lighting or to create a sense of warmth
with soft, ambient lighting.

Quality Matters

Invest in a high-quality mirror that will stand the test of time.

Check the mirror’s reflective surface for any imperfections or distortions, as these can affect the overall aesthetics.
Ensure that the frame, if present, is well-constructed and free from defects.

While quality may come with a higher price tag, it is a worthwhile investment for a mirror that will elevate your interior for years to come.

Practical Considerations

In addition to aesthetics, consider practical aspects such as ease of cleaning and maintenance.

Mirrors in high-traffic areas or spaces prone to splashes (for example bathrooms) should have easy-to-clean surfaces and be built for more endurance.

Frameless mirrors or those with minimalist frames are often easier to maintain and clean (metal frames).

Common Interior Design Mistakes to Avoid

1. Overloading with Mirrors: While mirrors can enhance a space, overusing them can create a
cluttered and chaotic look. Avoid placing mirrors on every available wall surface.
2. Ignoring Scale: A small mirror on a vast wall or a large mirror in a tiny room can create visual
dissonance. Pay attention to scale to maintain balance.
3. Neglecting Frame Styles: The wrong frame style can clash with your interior design. Be mindful of
frame choices and how they complement your decor.
4. Not Considering Privacy: In bedrooms and bathrooms, be cautious about mirror placement, as it can inadvertently reflect private areas.

Best Shopping Practices

1. Measure Twice: Always measure your available wall space twice before making a purchase to ensure the mirror fits perfectly.
2. Visualize: Use painter's tape to outline the mirror's dimensions on the wall before buying. This will help you visualize how it will look in space.
3. Check Reviews: Research the brand and read customer reviews to gauge the quality of the mirror and the level of customer satisfaction.
4. Consider Customization: If you have specific requirements or unique spaces, consider custom-made mirrors to ensure a perfect fit and design. There are plenty of options in the market now, opt for what stands out to you!

In Conclusion…

Navigating the vast world of mirrors can indeed be overwhelming.

From selecting the right size to determining the best style for your space, every detail matters.

However, with the right guidance, such as the points mentioned above, you can effortlessly infuse elegance and style into any room with the ideal mirror choice.

Remember, while aesthetics are essential, practicality and durability shouldn’t be overlooked.

When it comes to shopping for the perfect mirror, there’s no better place to start than Bargain for You mirror shop.

Their extensive collection, backed by impeccable craftsmanship and quality, ensures that you not only get a mirror that beautifies your space but one that stands the test of time.

Whether you’re in search of a classic vintage frame or a sleek, contemporary design, their variety ensures something for every taste.

Plus, the knowledgeable staff is always on hand to guide you, ensuring that your chosen mirror aligns perfectly with your vision and the character of your home.

So, as you embark on your mirror shopping journey, let it be a reflection of your taste and style.

With careful consideration and a dash of inspiration, every mirror can become a statement piece, transforming any room from ordinary to extraordinary.

Remember, every beautiful interior deserves a mirror that amplifies its charm let Bargain for You be your trusted partner in this quest for reflected elegance.


Exit mobile version