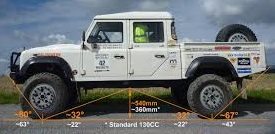
If your vehicle is a specially adapted off-roader like this Land Rover then driveway slope is not going to be an issue.
For the rest of us it is something you should be aware of.
If you have lowered your suspension, installed a body kit, or have a sports car then it could be critical.
Maximum and Minimum Slopes
For proper drainage of the driveway you will need a minimum gradient of 1 in 100 (1%, or 10 mm per metre)
This could be either along the driveway or cross fall.
Local Authorities rules on maximum slopes do vary (so check) but typical gradients are:
Public areas 1 in 20 (5%, or 50mm per metre) in the public footpath area or
Within the property boundary 1 in 4 (25%, or 250mm per metre) .
Transitions
At the top of slopes there is a risk of the underside of the vehicle grounding.
At the bottom of the slope the front or rear of the vehicle can ground.
For standard vehicles a change in gradient of 12.5% is typically the point where problems can start to occur. (For lowered vehicles it may be much less than 10%)
A typical way to minimise the risk is to have a transition section of around 2m long between the two gradients.
For example
To go from a Flat slab (gradient 0%) to a gradient of 15% a transition section would be 7.5% ( [0% + 15%] / 2 )
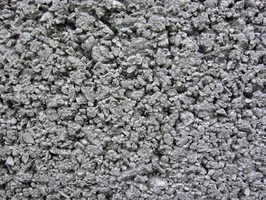
If you have got a concreting job to do there are a few different options for getting the mix:
Small Jobs
Up to about 0.1m3 buy premixed bags 20kg bags ( 0.01m3) from a DIY store.
Not cheap at a cost of around $7.50 a bag ($750/m3), but convenient.
For fence posts its probably better to use a rapid set premix at around $8 for a 20kg bag,
That means that the concrete sets in about 15mins.
If you want to save a few dollars you can always drop some half bricks into the hole, it will be fine as long as each stone/brick is surrounded by concrete.
I normally mix in a barrow as it keeps the area cleaner than mixing on the ground.
Medium Sized Jobs
0.1 to 0.4m3 it will be cheaper to buy aggregate, cement, and sand, then mix it yourself.
Expect it to cost around $150 per m3 if you can pick the gravel and sand up, more if you get it delivered.
Larger Jobs
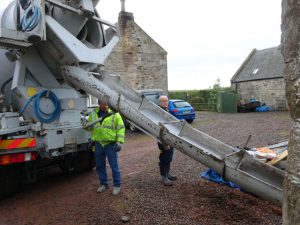
More than 0.4m3 I would use a local ready mix supplier, due to the saving of time and effort.
Prices are around $180 for 0,5m3 ($360/m3) dropping to $250 for 1m3.
A couple of things to bear in mind:
You need enough help to be able to place the concrete in 20-30 minutes otherwise you will have to pay extra.
If you let a big mixer on your drive it could crack it, so if you are working in the back garden you could have a lot of barrowing. We have generally used at least barrows.
Have you ever seen concrete that looks like this on a vertical face?
Its called ‘Honey combed’
Sometimes its in large areas like this, sometimes in smaller patches.
This concrete is obviously weaker and more porous than dense concrete.
The odd small hole isn’t a problem but when it gets like this it is a sign of poor laying practices.
What Went Wrong
As concrete comes out of the mixing truck/pump it traps bubbles of air within it.
Similarly as the concrete is placed against vertical forms air is trapped between the form and the wet concrete.
This trapped air prevents the cement paste flowing completly around the aggregate in the mix
Some dodgy concretors will add water to the concrete to make it easier to lay and finish without vibration, but that will make the risk of ‘honey combing’ greater.
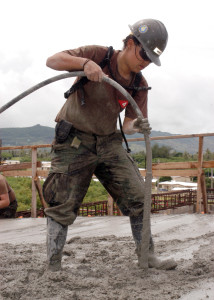
Vibration
US Naval Mobile Construction Unit 4
To get a strong dense mix it is necessary to get the air out of the mix and allow the cement paste to fill the voids between the stone.
On site the normal method is to use a vibrating poker as in this photograph.
This should be slowly lowered into the concrete and then lifted out.
Each insertion is typically around 300 – 400mm apart.
Extra care is needed against forms with one method being to hold the vibrating poker against the outside of the form.
Precaution
If you are having some concreting done make sure that you tell the concretor you will expect to see proper poker vibration of the concrete to full depth.
I regularly hear the question “Where should the reinforcement mesh go in slabs?”
Well here is some advice. . . .
Understanding The Materials
Concrete – Strong in Compression, but weak in Tension.
Steel Reinforcement– Strong in Tension, and strong in Compression (As long as the concrete can stop it bowing)
Myth Busting
Lots of concretors will tell you “We put steel the reinforcement close to the bottom of a driveway slab because when you load a slab, the bottom is in tension,which needs the steel, and the top compresses.” . . . . . THIS IS WRONG!
Here Is The Explanation Why
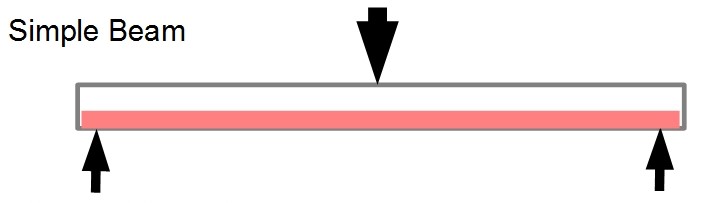
For a simple beam that is supported at the edges like the sketch below the bottom part, coloured pink is in tension as the load tends to push the centre downwards.
For this type of beam, or slab, reinforcement in the tension zone (the bottom) is the way to go. . . . . BUT THIS DOESN’T REPRESENT A SLAB ON THE GROUND!
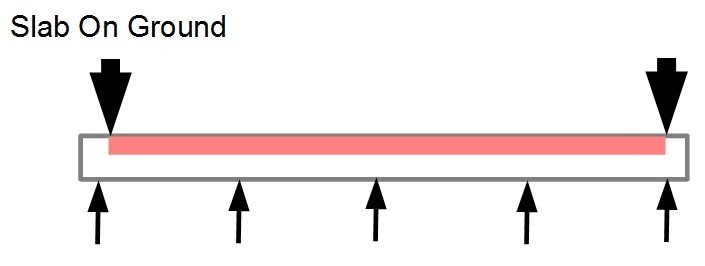
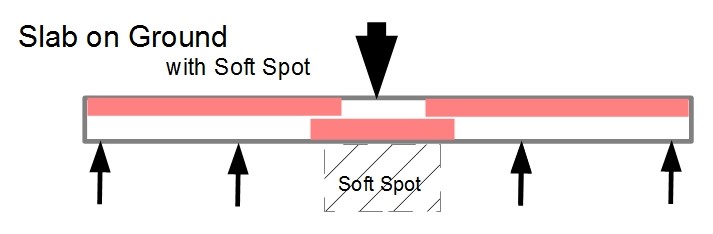
The sketch below does represent your typical slab on ground with the slab supported fairly evenly by the ground.
Typically the loading can come close to the edge of the slab; car tyres if it’s a driveway, brick walls for a house slab.
With the heavy loads on the edges but the support across the whole area the loads are trying to bend the ends down . . . so the tension area is the top.
Finally here is the case where there is a load towards the middle of a slab over a soft spot such as a badly backfilled trench.
In this case at various points of the slab; the bottom, the top, or even the whole slab can be in tension.
What Is The Answer?
Well for a slab on ground the bending stresses (which cause tension) are actually quite low, as the concrete actually takes transfers the load to the ground by spreading it out over a wider area see sketch.
The main purpose of the steel reinforcement is to hold the concrete together and keep any shrinkage cracks as narrow as possible.
Conclusion
If you are concerned about the surface appearance, reinforcement is better closer to the top where it will better control surface cracks.
The best place to put steel mesh reinforcement in a concrete slab, cast on the ground, is about 1/3rd of the depth from the top. . . . . Unless you have an engineering drawing that says otherwise!!
Make sure the reinforcement is in the right position by insisting on Bar Chairs.
Some people refer to these as ‘spiderweb’ cracks but the technical name is ‘mapping cracks’.
That’s because they can look like a street map.
Generally they are much more obvious after rain as water seeps doown into the cracks.
These cracks are typically only 2-3mm deep and are as a result of the surface concrete shrinking more, and sometimes faster, than the underlying concrete.
The reasons for this greater/faster shrinkage include:
■ Adding water to the mix, when the delivery truck arrives on site, to improve concrete workability.
■ Starting finishing while ‘bleed water’ (standing water after placed concrete levelled) is on the surface
■ Sprinkling cement powder to soak up ‘bleed water’.
■ Letting the surface dry without Proper Curing .
Although the cracking does spoil the look, it is a cosmetic issue and it doesn’t significantly affect the strength of the concrete.
One simple thing to improve the quality of concrete is to use a spray applied curing membrane. . . it’s a pity that this techniques doesn’t seem to be used much in Australian domestic building.
Purpose of Membrane
These membranes main purpose is to prevent the loss of moisture during the Curing Period.
Some membranes can also help with surface hardening the concrete and help prevent dust.
Types of Membranes
When looking at types of membranes you will find
Water based
PVA based
Chlorinated-rubber based
Resin based.
In my opinion a water or PVA based membrane will be quite suitable for the typical house slab or driveway.
A further consideration is whether to use a clear membrane or a white pigmented material.
Unless I was using the compound on a coloured concrete, or an exposed aggregate finish, I would go for the white pigmented finish. It has the following advantages:
The colour makes is easier to check the whole surface has been covered evenly.
The white colour, which will fade during the curing period, will reflect more sun reducing the temperature of the concrete during the cure.
Always check that the membrane coating is compatible with anything that will be later applied to the concrete, such as flooring materials.
Further Information
For further information you can check the following websites
A galvanised steel strip forms a keyway in the vertical face of the joint which means that reinforcement isn’t needed across the joint in footpath slabs.
In driveway slabs dowel bars can be used to provide additional support across the joint.
Installation
The ‘Key Joint’ is fixed installed on the base to form contraction and construction joints, and ensures that the concrete cracks at the joint in preference to in the middle of the slab.
The concrete is then laid and finished to the top of the ‘Key Joint’.
As the concrete ‘Cures‘, and shrinks, it breaks cleanly away from the ‘Key Joint’ to form a suitable joint surface.
Photographs
(NB as these photos were taken the day before concrete was to be poured so Bar Chairs had not been installed )
Photo 1 – Contraction Joint
This shows an unreinforced contraction joint which will occur in the middle of the pour to ensure that the concrete will crack at the joint.
You can see that the reinforcement has been stopped approx 40mm from the joint.
The pegs which are driven into the base to hold the ‘Key Joint’ in place can also be seen.
Photo 2 – Construction Joint
This shows construction joint with dowels for additional joint support, after placing of the first slab.
Again you can see that the main slab reinforcement has been stopped approx 40mm from the joint.
The dowels are pushed through ‘Knock Outs’ in the ‘Key Joint’. (N.B the dowel spacing is greater than the mesh spacing)
Although it has not been done in this case I prefer alternate ends of the dowels to be painted with bitumen to reduce the grip of the concrete on the dowel. (This helps reduce the risk of shrinkage crack other than at the joint)
Edge Formwork
The Key Joint can also be used as a permanent form work at the edge of slabs, preferably with the key on the outside.
N.B, I have received any financial benefit for this posting or am in any way connected with the manufacturers or suppliers of this product.
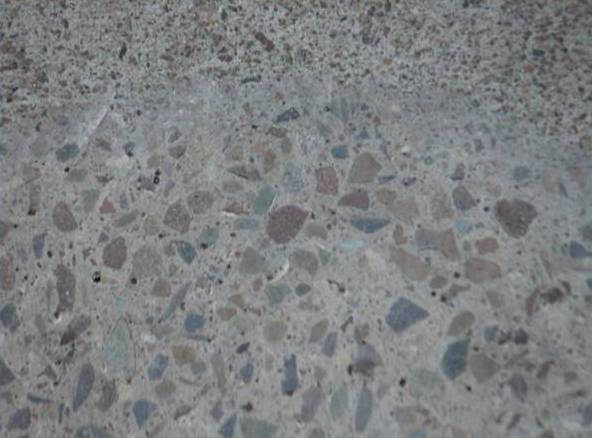
Although a standard concrete can look good when polished there is also the opportunity to make the following changes:
Aggregate Talk with your specialist subcontractor who should be able to provide a range of different aggregates. (NB some porous aggregates such as sandstone and limestone are unlikely to polish up well)
Cement Paste In addition to the standard light grey a range of concrete colours can be provided with the addition of various oxide based pigments.
Typically if you want either, or both, of these options the slab will be laid with a layer of concrete with your selected finish as a final delivery of the pour, over a standard concrete.
Grind and Seal Finish
Suitable for indoor and outdoor concrete.
In this process the floor is generally ground twice . The floor can then be grouted (see below) followed by 2 coats of sealer to give the concrete a shiny appearance (The sealer will eventually wear and need to be sanded back and re-applied.).
There are typically between around 5 steps in the process.
An advantage of this process is that you are able to make it anti-slip by puting grit into the sealer. Great for around pools.
Mechanically Polished Concrete (MPC)
This high end process is really only suitable for inside concrete
This concrete polishing process the floor is generally ground twice depending, as above.
It’s then grouted (see below).
A densifier is then applied to harden the floors surface.
Next is up to 7 passes with diamond impregnated resin pads to get the desired shine (the concrete itself shines rather than a sealer which could scratch off).
Finally a penetrating sealer is applied to leave a stain resistant floor that that looks and feeling like glass.
The process has between 10 – 14 steps.
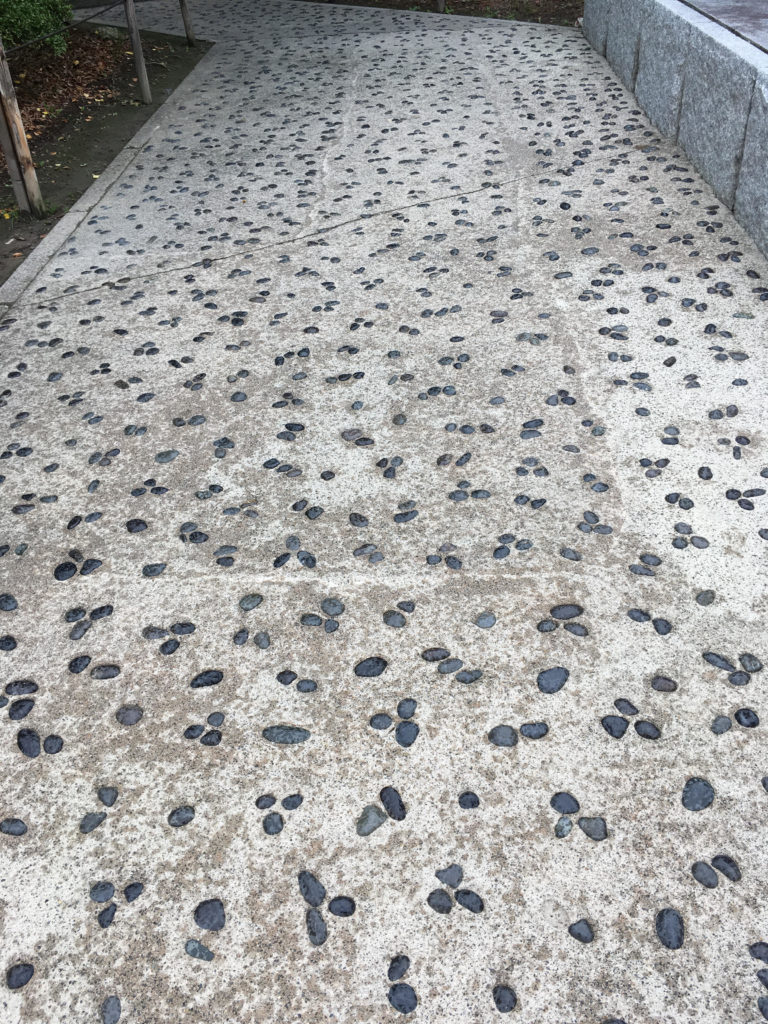
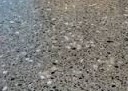
Aggregate Exposure
There are 3 levels of grinding exposing various levels of the aggregate commonly known as:
Nil Exposure –(less than 1mm) – Very little/no stone shows on the surface of the concrete (Difficult to achieve unless the concrete has been poured perfectly)
Minor/Random Exposure or Salt and Pepper Look (1-2mm) – Small amounts of aggregate visible on the surface – some areas may have minimal exposure while other areas some may have heavy exposure. – approx 1-2mm from surface.
Full exposure (5mm) – this is where you can see all the stones on the surface.
Grouting
Any insitu concrete will have some defects such as small ‘air’ voids or small cracks.
To get the best finish they need to be filled with grout.
With a natural cement concrete grouting may be carried out with a cement paste in the case of a grind and seal.
If you have a coloured concrete a better grout result is achieved by mixing a latex based product with the concrete dust from the grinding procedure to get a better colour match. This procedure should always be done for mechanically polished concrete.
Summary
There are a lots of options when thinking about ‘Polished Concrete’ so make sure that you understand the options and specify exactly what you want.
A ‘Dirty Secret’ of the Construction Industry is; adding of extra water to concrete mixes.
The ready mix concrete suppliers carefully design mixes with appropriate water cement ratios, which are loaded onto the delivery truck by computer controlled batching systems. . . . . . . All this effort on getting the mix right goes out of the window when the truck arrives on site and a hose comes out to arbitrarily add water to the mix.
Problems
Here are some of the problems adding extra water causes:
Too much water will cause settling and segregation of the aggregate to the bottom of the slab (with more sand at the top) which results in a lower strength slab.
Water that is not consumed by the chemical reaction will eventually leave the concrete as it hardens, resulting in holes that will reduce the final strength of the concrete.
As the excess water leaves there will be more shrinkage, resulting in larger internal cracks and visible fractures.
Reasons Why Extra Water Is Added
Easier To Lay A ‘wetter’ mix is said to be more ‘Workable’, in other words it can be spread and a top surface formed with little or no vibration. (Fully vibrated concrete will minimise voids in the concrete without the need to add water) Adding water saves the concretor time, effort, and hire costs for a vibrator
Delivery Drivers Time A ‘wetter’ mix comes out of the drum faster allowing the driver, who is paid per load, to fit an extra delivery in his day.
Material Costs Improved workability can be achieved by adding a plasticiser, rather than adding water, but this adds significantly to the cost.
Solutions
I have worked on big construction projects where every concrete delivery has been been tested before pouring. Any load that was too wet, or any driver seen adding water, and the load was sent straight to the tip. ( I once saw 5 consecutive deliveries sent to the tip)
For you, organising your own concreting, the best advice I can give make sure that anyone you ask for a price knows that are not prepared to accept added water. Be prepared to pay extra for a plasticiser added to the mix.
For more posts on on getting your paths and driveways correct see Concreting