Leftover Bricks

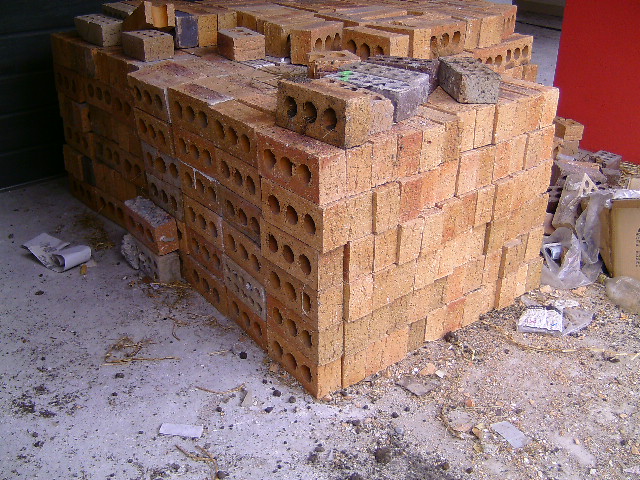
Usually builders over order bricks. This is to ensure that all the bricks come from the same batch and there is no problem colour matching. (Each batch of bricks manufactured should be consistent within the batch, but will vary from batch to batch).

Some of the extra bricks may be used by the brickies cutting bricks, but there is usually lots of intact bricks left over that you could use for:

  • Path edging;
  • Brick planter boxes; or
  • Building a barby.

So whats the situation when it comes to getting those bricks?……………

Well for most house contracts you are paying for the completed walls not the actual bricks so the bricks are really owned by the builder.

In practice if there are complete packs/pallets of bricks the builder will probably want to take them off site for reuse. The reuse is typically for houses or fences that are going to be rendered.

For packs that have been opened its normally ‘too hard’ for the builder to load the bricks by hand so they go off to the tip during the clearance.

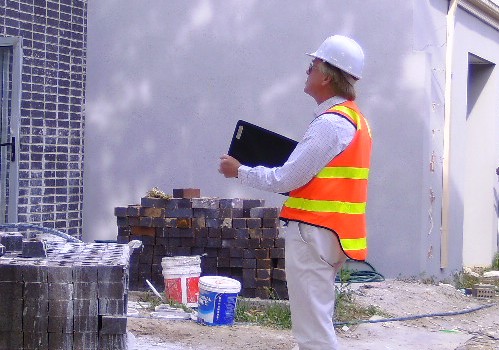
If you want the bricks the best thing to do is speak to the Site Supervisor. If you have a good relationship the SS may allow you to collect and stack the bricks somewhere on the site and make sure they are left there for you to use once you have moved in.

What did you use any leftover bricks for?


For similar posts see Garden


Concrete – Pavement Joints 1

I have previously talked about Concrete Cracking …….but how do you stop random cracking across your driveway concrete?

Well the best way is to control cracking by making sure it cracks where you want it to and the cracks are neat.

To do this you need  ‘joints’  which ensure the cracks in the right place.

A good rule of thumb for a reinforced concrete slab is the joint spacing should be no more than 25 x the depth.  That is for a 100mm thick slab the joints should be every 2.5m.

Un-reinforced and I wouldn’t be happy with a joint spacing of more than 15 x the depth.

Contraction Joints

Contraction joints, sometimes called control joints, are the most common type of joints. They are formed to ‘break up’ slabs poured over large areas into the smaller final slabs.

The following sketch shows some of the characteristics of a contraction joint.

The key features are:

  • A joint is either formed, or sawn, to weaken the concrete at the joint position. Below is a picture of a joint forming tool

  • Below the formed joint the concrete naturally cracks with a rough surface. This rough surface stops one slab moving up or down relative to the other slab.
  • Reinforcement continues across the joint to hold the joint closed. This reinforcement should be be weaker than the main slab mesh. One way to achieve this is by cutting out alternate bars in the reinforcement mesh.

Problems

Here are some of the the things that go wrong and mean you get random cracking spoiling the look of your concrete paving.

  • Too Much Steel
    This can be;
    • The mesh has not been weakened across the joint by removing alternate bars.
    • Two sheets of reinforcement mesh have been overlapped across the joint.
  • Shallow Initial Formed Joint This joint should be 1/3rd the total depth of the slab other wise it may not weaken the slab enough to form the crack at the intended position. When I have used a formed joint I usually run an angle grinder along the bottom of the groove  the morning after the pour to make sure it is deep enough.
  • Joint Not Sawn At Right Time If the joint is to be a saw cut it should be done 16 -24 hours after the pour. Too soon and the saw will pull stones out of the concrete leaving a rough edge. Too late and the concrete will have cracked at a place other than the intended joint.

You may think your concreter will know all this.  It’s a sad fact that a lot either don’t know, or don’t care, judging from  the jobs I see!


For more posts on on getting your paths and driveways correct see Concreting


Should You Use Yor Own Building Inspector?

Although I give lots of opinions on all aspects of building a house, including checking quality, I would never say “Don’t employ your own Building Inspector.”

I’m very experienced in the construction industry and have done lots of research so I’m happy doing it myself. A lot of people wouldn’t have the same level of knowledge and might be happier getting a more experienced person in.

A good inspector is going to charge around $400 for an inspection, so an inspection at every stage is going to cost around $2,000. . . . Not a lot for peace of mind when you are paying for a $200,000, or more, new house.

Be Involved

Even if you employ an Inspector they are only going to be going round at the completion of each Stage with several weeks between visits. A lot can happen in that time.

If you do some research and visit regularly you might see things that are covered up before the Inspector gets on site. I managed to stop things being done on my last build which would have caused delays if left unchallenged until the Stage Payment was due.

I would also say its well worth visiting the site with the Inspector and asking him about what he is looking at. He may also give you a different opinion on something the builder has told you.


To find out more about inspecting a new house see

Practical Completion Inspection


Why Aggi Drainage Pipes Have Slots In The Base

A lot of people aren’t sure how drainage pipes work.

“Why doesn’t the  water run out of the slots at the bottom?” is a question that many people ask.

The pipes work on the principle that the soil/gravel around the pipe is water logged. This water drains into the pipe as the bottom of the pipe is below the  soil water level.


When the water drops below the  pipe  the water then runs through the gravel in the trench getting into the pipe further along the trench. (Diagram below shows a section along a pipe)


See Agricultural Drains for more information


Brickwork – 45 Degree Corners

One of the things that really annoys me as I walk around is 45 degree bends in brick fences like this photo.

Bricks are meant to be laid so that they fully interlocked and this is a long way short of that.

I have even seen this type of corner on a house, where the joint will lead to penetration of water into the wall.

What this tells me is that someone:

  • Didn’t understand what can be done.
  • Planned the work poorly.
  • Tried to save money.
  • Employed dodgy bricklayers.

The photo on the left is what a proper 45 degree brick corner should look like.

It uses a special brick which is called a squint.

These brick are a special order, so they take time to be delivered, and they are more expensive……………….but they do make a much better job!

See Bricks for more posts on understanding brick work

 Planning some building work in the garden? see Brick Fences


Exit mobile version