Organised Excellence: The Power of Workshop Tool Cabinets

Guest Post by Elisaveta Doncheva

In the world of craftsmanship and DIY endeavours, having the right tool for the job is paramount.

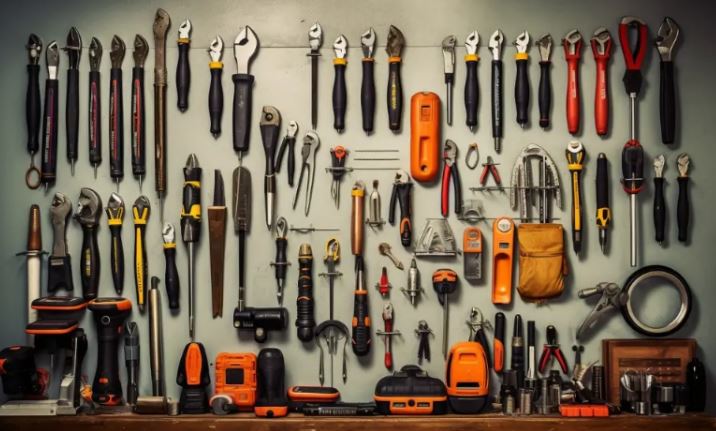
From wrenches and screwdrivers to power tools and specialty implements, a comprehensive toolkit forms the foundation of productivity and efficiency in any workshop.

However, the challenge lies not only in acquiring the necessary tools but also in organising and storing them effectively.

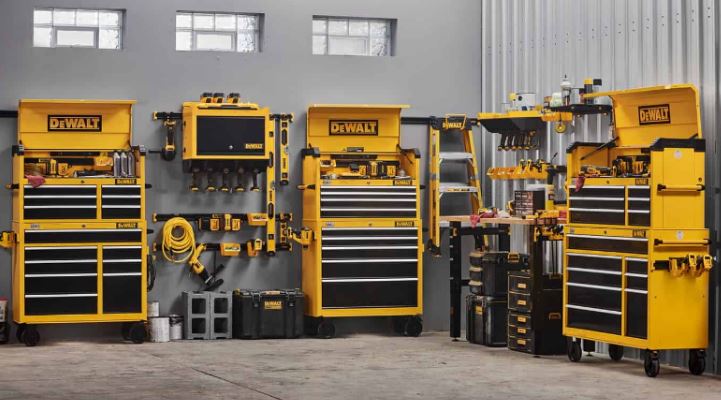
Enter workshop tool cabinets – the ultimate solution for tidiness, accessibility, and efficiency.

Having said that, let’s delve into the importance of having the right tools at your disposal, the advantages of investing in a tool cabinet, and the transformative benefits of organised workspace management.

The Importance of Having the Right Tool

Efficiency and Precision

Having the right tool for the job ensures efficiency and precision in task execution.

Whether it’s tightening a bolt, cutting a piece of wood, or assembling intricate components, using the appropriate tool streamlines the process and minimises the risk of errors or damage.

By eliminating the need for makeshift solutions or improvisation, the right tool empowers craftsmen to achieve optimal results with minimal effort.

Safety and Reliability

Using the correct tool enhances safety and reliability in workshop operations.

Quality tools, designed for specific tasks and engineered to withstand rigorous use, provide a level of assurance and confidence that is indispensable in high-stakes projects and demanding environments.

Productivity and Time Savings

The right tool accelerates productivity and saves valuable time in workshop endeavours.

With the ability to perform tasks efficiently and effectively, craftsmen can complete projects faster, tackle more complex tasks, and take on additional workloads.

Time saved through optimised tool usage translates into increased output, profitability, and customer satisfaction.

Why Investing in a Tool Cabinet Makes Sense

Organisation and Accessibility

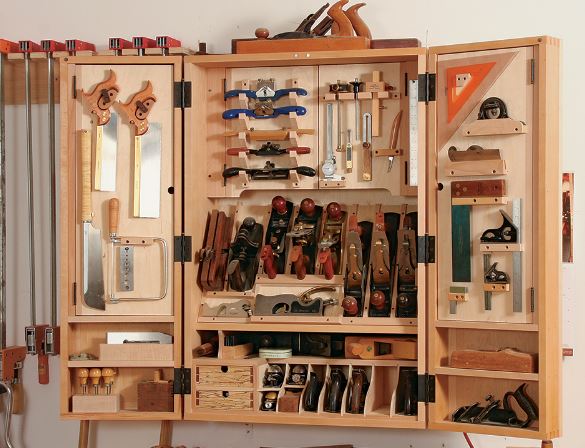
Workshop tool storage cabinets offer unparalleled organisation and accessibility for a wide range of tools and equipment.

With dedicated compartments, drawers, and shelves, these cabinets provide a designated space for each tool, ensuring easy identification and retrieval when needed.

By eliminating clutter and chaos, tool cabinets streamline workflow and promote a tidy and efficient workspace.
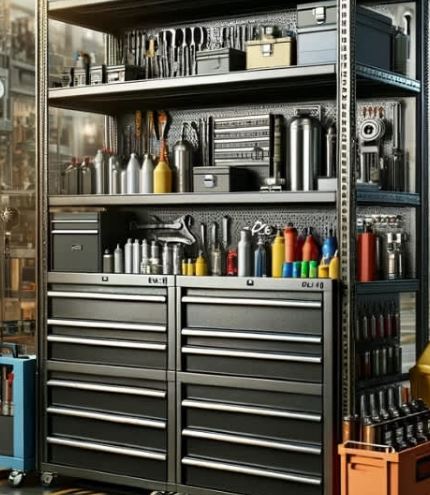
Space Optimisation

Tool cabinets optimise space in the workshop, maximising floor space and minimising clutter.

By consolidating tools into a single storage unit, cabinets free up valuable floor area for additional workstations, equipment, or storage solutions.

Compact and versatile, tool cabinets are ideal for workshops of all sizes, from small home garages to large industrial facilities.

Protection and Security

Workshop tool cabinets offer protection and security for valuable tools and equipment.

With lockable doors and reinforced construction, these cabinets safeguard tools from theft, damage, and environmental hazards.

By providing a secure storage solution, tool cabinets instil peace of mind and confidence in craftsmen, allowing them to focus on their work without worrying about the safety of their tools.

Preservation of Tool Quality

Proper storage and organisation in tool cabinets help preserve the quality and condition of tools over time.

By protecting tools from dust, moisture, and physical damage, cabinets extend the lifespan of tools and ensure consistent performance in the long run.

The Benefits of Workshop Tool Cabinets

Efficient Workflow

Workshop tool cabinets facilitate efficient workflow by providing quick and easy access to tools and equipment.

With tools organised and readily available, craftsmen can transition seamlessly between tasks, minimising downtime and increasing productivity.

The intuitive layout of tool cabinets ensures that every tool has its place, reducing the time spent searching for misplaced items.

Improved Safety Standards

Organized tool storage cabinets promote safer working conditions in the workshop.

By eliminating clutter and trip hazards, cabinets reduce the risk of accidents and injuries.

Lockable cabinets add an extra layer of security, preventing unauthorized access to potentially dangerous tools or equipment.

By prioritizing safety, tool cabinets create a conducive environment for focused and uninterrupted work.

Enhanced Professionalism

Well-maintained and organized tool cabinets contribute to a professional and polished image in the workshop.

The sight of neatly stacked tools reflects a dedication to quality, accuracy, and attention to detail, which reassures clients and customers.

Whether in a commercial setting or a home workshop, the appearance of organized tool cabinets conveys professionalism and competence to observers.

Streamlined Inventory Management

Tool cabinets facilitate streamlined inventory management by providing a centralized location for tool storage and tracking.

With tools arranged systematically in drawers or compartments, craftsmen can easily assess inventory levels, identify missing or damaged items, and replenish supplies as needed.

Effective inventory management ensures that tools are always available when required, reducing delays and disruptions in workflow.

Considerations When Choosing Workshop Tool Cabinets

Size and Capacity

Select a tool cabinet with adequate size and capacity to accommodate your current tool collection and allow for future expansion.

Consider factors such as the number and size of tools, as well as any specialized equipment or accessories that require storage.

Choose a cabinet with adjustable shelves or modular configurations to adapt to changing storage needs over time.

Construction and Durability

Opt for a tool cabinet constructed from high-quality materials and built to withstand the rigours of daily use.

Steel cabinets offer superior durability and stability compared to plastic or wood alternatives, making them ideal for heavy-duty applications.

Look for features such as welded seams, reinforced corners, and powder-coated finishes for enhanced strength and longevity.

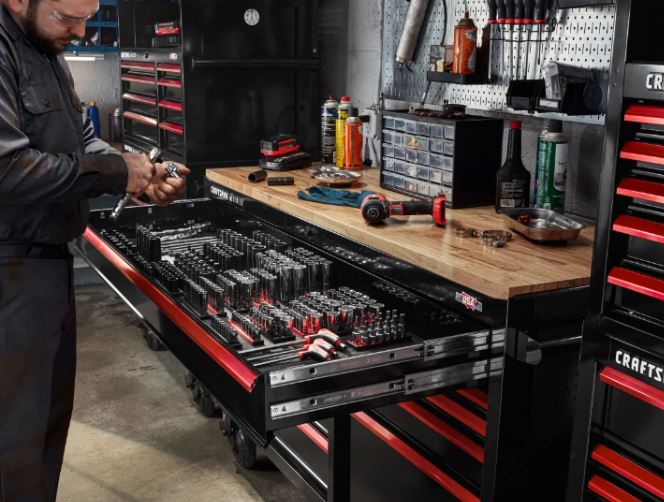
Drawer and Compartment Design

Evaluate the drawer and compartment design of the tool cabinet to ensure optimal organization and accessibility.

Choose cabinets with full-extension drawers, ball-bearing slides, and removable dividers for maximum storage flexibility and ease of use.

Consider additional features such as foam-lined drawers or tool trays for added protection and organization of delicate or specialized tools.

Mobility and Portability

Determine whether mobility and portability are important factors in your workshop setup.

Mobile tool cabinets with casters or wheels offer flexibility and convenience, allowing craftsmen to easily reposition the cabinet as needed or transport tools between different work areas.

Consider cabinets with locking casters for stability during use and secure positioning when stationary.

Conclusion

Workshop tool cabinets serve as indispensable assets in the pursuit of excellence and efficiency in craftsmanship and DIY endeavours.

By providing organized storage, enhanced accessibility, and secure protection for tools and equipment, these cabinets empower craftsmen to unleash their creativity and productivity with confidence and precision.

Whether in a professional workshop or a home garage, the benefits of investing in a tool cabinet extend far beyond mere storage solutions – they embody the principles of organization, professionalism, and craftsmanship that define success in the workshop.

With the right tool cabinet at your disposal, the journey towards mastery and accomplishment becomes a seamless and rewarding experience, where every tool has its place and every project unfolds with precision and efficiency.

Facade Fail

Wood Columns….

Stone Columns…..

Brickwork……

Painted Board……

Flat Roof…….

Pitched Tile Roof……

This House looks like it’s in a competition to get as many different materials in the facade.

It’s a display home……….in an attempt to make it look different it just look a confused mess!


For more Fails, and Unusual houses go to What the………………….?


Electrical Planning – Master Bedroom

Perhaps you agree with most builders, who seem to think a couple of power points in the bedroom is fine………….. Well I think that’s nowhere near enough and here’s why:

Starting on my side of the bed I have:

    • Bedside reading light
    • Clock/Radio alarm,
    • A wireless phone charger pad
    • Lap top charger (useful for us to chrome cast to the bedroom TV).

On my wife’s side its:

    • Bedside reading light
    • A wireless phone charger pad.
    • Power for the electric bed

Next is the TV that’s mounted high on a wall.

Don’t forget the aerial socket as well.

We don’t like to use the main light too much so we have a simple  ‘oyster’ fitting to provide low intensity background lighting in the evening.

We have a reverse cycle air conditioner.

You might also want power for electric blankets!

As we want somewhere to plug in the vacuum cleaner its a good job all the sockets are doubles, so we have still got convenient sockets.


Light are another matter.

    • We have a three way set up for the main light so we can control it from the door and either side of the bed. the bedside switches are set to be 300mm above the bedside cabinet height.
    • You might like to think about bedside wall or ceiling mounted lights (personally I prefer table lights)
    • In the walk in robe we have a motion detector switch so we don’t have to worry about leaving it on all day (This works very well a long as you have a door to the WIR. The dog sleeps under the bed and if the door is open and he walks round the room in the night the light goes on)

Don’t forget the smoke alarm outside the bedroom door.

For similar posts see Electrical

More Electrical Planning including 24 pages of Check Lists

in the ‘Selection / Pre-Start Guide’


Is It Time To Get A Battery?

I got my Electricity Bill the other day which set me wondering if I should invest in a battery for our house.

Our Situation

We live in a retirement unit which is reasonably compact.

As a result our 3.25 kW of Solar Panels takes up most of the available roof space.

The advantage of having a small house is that although we are all electric our daily usage is quite small.

The below graph shows our daily usage and solar export.

From the figures above it would appear that with a battery we should be able to store, and then use overnight 3kw of power almost every day..

Power Company Rates

Our current rates from Powershop are:

$0.2893/kWh Consumption Charge
$0.052/kWh Feed in Tariff

Annual Savings

The annual savings by installing a battery  will be:

Consumption Charge minus the feed in Feed In Tariff  multiplied by 3kWh multiplied by 365.

$(0.2893 – 0.052) x 3 x 365 = $259.84/year

NB There will be some efficiency loss in the battery but this may be compensated by the battery partially discharging and being recharged during summer days.

Conclusions

Recent industry figures (September 2023) indicate the installed cost of batteries is $1,000 to $1,300 per kW.h

This gives a cost for a 3kWh of $3,000 to $3,900,

Even with the cheapest battery the payback at $259/year is going to be over eleven year,.by which time the battery will have gone through over 4,000 charging cycles.

As I am not convinced that the battery will be in good condition after those 4,000 cycles I think I might not bother with a battery for a while yet.

If I see battery prices drop to around $500/kWh I might rethink..


What’s The Side View Of Your House?


When most people look at a display home the two first considerations are:

  1. The Floor Plan.
  2. The Front Elevation. (Like the impressive facade in this photo)

Sometimes that works fine when all the houses are in a line, and the same size…….but what about when the side of the house is on show?

For example:

  • Houses on corner blocks.
  • Double storey houses next to single storey houses.
  • Houses on large blocks.

The photo on the left shows the side view of the house, in the top photo, with the impressive facade.

Not only is this a lot less impressive……but as it is the view from the main road its the first impression of the house any visitor gets.

Don’t forget to think about how the sides of a house look when you are looking to build a new house!


For similar posts look in the Design Category


Which Air Conditioning Units are the Most Efficient?

Guest Post by Rebecca Lee

A lot of people fail to read the specs of they’re newly-purchased AC unit before buying it.

It’s new, does its job, and affordable? . . . Might as well be good as sold!

That said, overlooking these crucial factors before securing the appliance can be a costly act.

While any air-conditioning unit can perform its primary function, not all of them are efficient in doing so.

This could be because of deterioration of the hardware, from a blown fuse to dirty filters or coils.

In some instances, it can also be because of the inherent limitations of the appliance itself.

When you leave these limitations unattended, you could inadvertently be causing your electricity bill to spike up quite considerably.

Over time, this could rack in thousands of dollars of extra costs—something no one wants.

If you’re in the market for the top air conditioning units for your home, you’ve come to the right place.

Here are some air conditioning units that are a cut above the rest in terms of energy efficiency.

Let’s begin!

What Makes an AC Unit Efficient?

There are factors to consider when measuring an air conditioner’s efficiency. Let’s look into some of them.

SEER Rating

The primary measuring system for AC efficiency is the Seasonal Energy Efficiency Ratio (SEER). This is a scale of efficiency that starts at 1 and goes all the way to 26 for the top-grade, efficient air conditioning units.

Most A/C units have a SEER rating attached to them. They’re usually found pasted at the back of the A/C unit in the form of a yellow and black EnergyGuide sticker. The rating may also be part of the name of the product model itself in number form.

SEER ratings are given to nearly all types of AC units, including central, mini-split, and window air conditioning units. This rating method has been around since 1987 and is still used today as a standard of measurement for cooling efficiency.

The higher the SEER unit, the less resources and energy the air conditioning unit requires to produce cooling for an area. When an A/C unit uses up fewer resources, it consumes less energy and rewards you with a happier electricity bill

Generally speaking, newer AC models are more energy efficient than older models. This is because they have undergone extensive development over time and the technology has made achieving a higher SEER number more simple.

Nowadays, you can typically find units with a SEER rating of around 13 to 15 at the minimum, which is already serviceable.

That said, some units with a SEER ranking of 19 to 24 are even more energy-efficient, but they typically come with higher upfront costs.

ENERGY STAR® Certification

If the product has an ENERGY STAR® certification, which is a blue sticker with the words ENERGY STAR written on it, you’re dealing with an efficient AC unit.

This symbol is a government-backed sign of energy efficiency, headed by the U.S. Environmental Protection Agency.

As this is regulated by a third-party organisation without business interests, this helps in removing any biases as only credible manufacturers can be given this label.

Energy Saving Features

Besides external labels that label the AC unit as environmentally friendly and cost-effective, a good sign of an efficient AC unit is when they are propped with energy-saving features.

For instance, some AC units, particularly split-type models, can automatically turn off when the surrounding zone reaches a certain comfortable temperature. This is often only the case if the A/C unit has inverter technology. This feature can save up to 50% of a home’s electricity bill if used regularly.

Some machines may also automatically turn the circulation and exhaust fan on or off as necessary, reducing energy consumption. Lastly, most A/C units have a timer feature that can turn the unit off after a set time has passed.

Which Air Conditioning Units are the Most Efficient?

There are four major types of A/C units: split, window, portable, and ducted (or central) A/C units.

Each type varies in terms of efficiency, and choosing the right one can also depend on your household’s size and your own financial capabilities.

But if you want the most efficient one for large houses, ducted A/C units are the way to go.

Want to know more? Here’s a breakdown of each AC type’s efficiency levels:

Ducted (Central) A/C Units

According to the Department of Energy, ducted A/C units are more efficient than room A/C units when cooling a big space.

This is because they come with a network of ducts that retrieve warm air in the house and then convert them using a refrigerant to cool air.

In the long run, having a ducted A/C unit is very efficient for your electricity bills. That said, the installation process can be quite difficult, so it’s best to consult HVAC experts Alliance Climate Control for them to help you safely set up your appliances.

Split A/C Units

Split-type air conditioning consists of two primary units: the indoor A/C unit, and a large outdoor compressor unit to remove air.

This type of AC unit typically has good SEER ratings, an inverter type, and a wealth of energy-saving functionalities. This makes them fairly energy efficient compared to other energy-intensive AC types. They may cost more upfront, but they’re cheaper to run over time.

They also come in other variants, such as mini ductless split AC units, which can make them even more energy efficient. This is because there’s no reliance on ducts for the unit to operate.

Examples of Split Type ACs you can find in the market include the Awoco 36″. Mitsubishi and Fujitsu also offer split-type ACs.

Window A/C Units

Window units boast the cheapest upfront costs, easy installation process, and highly accessible nature. You don’t have to search far and wide to grab a small box-type window AC, as there’s usually one or more in your local appliance store.

As far as efficiency goes, many window A/C types can be pretty energy efficient, especially if you don’t own a large house. If your living arrangement needs only three or fewer A/C units, window units are generally more efficient to run.

However, if you have a large house and want to bring cool air to all areas of your place, you may want to consider central or split A/C units.

Portable A/C Units

Portable A/C units provide flexibility, as they can be moved from one room to another. They also can come with a wealth of energy-saving features like a timer.

However, in the long term, they’re not as energy efficient as split types or window types. This is because the air in the room gets recycled again and again, leading to hot and humid air over time.

While a large room may seem like it would mitigate this problem given the larger volume of air, portable A/Cs also come with the cost of not having enough power to cool a big space. This makes them the least efficient A/C unit type.

Garage Doors

Originally garages doors were hinged doors, then tilt and lift doors came in.

More recently the main choice for garage doors is between roller doors or sectional panels.

Roller Doors

Fairly common as its the most used door in commercial applications.

Has the advantage in that its a fairly compact unit although it does need a bit more height to fit the roll over the opening.

Normally fairly draught proof but very hard to insulate.

Sectional Panel Doors

I think these look a bit more classy than roller doors, after all you want to look more like a house than a commercial garage.

They are available in a wide range of styles.

If you don’t have windows in the garage it might be worth having a door with windows to bring a bit of extra light in.

They can be quite easily insulated if your garage is your workshop (or man cave) but are harder to draft proof.

One disadvantage is that the door takes up a lot of ceiling space which restricts where you can put ceiling light.

Remote ?

Last time we built I didn’t bother about a remote opener.

After a couple of years I was served with the ultimatum ” Remote opening or else” (My wife said afterwards “Well worth the money!”)


For more posts on garages see: Garage Electrics and How much garage do you need?

More on doors including 24 pages of Check Lists for your new house choices in the‘Selection / Pre-Start Guide’


Roof Space – Access

One of the things that frequently gets forgotten is the hatch that gives access to the roof space.

Location

A usual location is in acorridor close to the secondary bedrooms.

It doesn’t seem that important but when you need the heating serviced, electrical alterations, plumbing alterations, etc, you are going to get tradies coming through the house.

Alternative Locations

When they have gone I often find dirty fingerprints on the hatch. . . which means I then need to get a ladder to clean the hatch.

It’s worth thinking about where you put this hatch.

If you have a single storey house the garage is probably the most convenient location followed by the laundry.

If you have got a 2 storey house an unobtrusive location may be a bit harder to find. . . . but make sure you think about it otherwise Sod’s Law says it will finish up in the worst spot.

Type and Size

If you are the sort of person who can’t throw anything away you might want some extra space for storage.

In that case perhaps you should think about a larger hatch fitted with a ladder. (The ladder in the photo is a product of the ATTIC Group which is going to cost over $1,000)

Finally

Don’t put anything heavy in the attic as the roof trusses aren’t designed for heavy loads.


For similar posts see Selection


Eaves

If you go back 39 years most houses had proper eaves but now they are less common.

As I travel around I sometimes see new houses with eaves on the front facade but non elsewhere, which I think looks weird.

If you are thinking about ‘eaves’ on your new house here are some advantages and disadvantages.

Advantages

  • The eaves keep the rain off the walls. As well as improving the weather proofing this helps improve the thermal performance of the walls in winter.
  • They will shade north facing windows in summer while letting the winter sun in. (This effect is negligible for windows facing in other directions and only about 50% effective for full length windows and patio doors)
  • Appearance. I think they give a more finished appearance and the shadow line adds interest.

Disadvantages

  • Cost. A typical cost is around $80/m2 so 600mm eaves all the way round a typical house could add around $4,000 to the cost. 450mm eaves will be a little bit cheaper.
  • You can’t build as close to the boundary which can be important if you have a narrow block.

As for me my first Australian house had eaves, but my next house did not so I have a foot in both camps.

I didn’t mind the look of the design without eaves and I built a pergola on the north side for shading.

Are you for, or against, having eaves on your new house?


To find out how big your eaves need to be… see Shading Northern Windows


Floor Drains


Up until recently we have never had floor drains.

Now we have them in bathroom, laundry and the walk in shower.

I’m quite impressed and would definitely specify them for another build.

Having had one washing machine overflow in the past I think they are a great idea to give you added security against internal flooding.

Some things to plan

So what does it mean if this is the way you want to go?

      • For them to be fully effective the floor needs to slope down to the drain at least 1:80 (13mm in 1m), preferably 1:60 (17mm in 1m).
      • The normal procedure is to cast the slab in the room 25mm below the main slab.
      • A cement grout bed is then laid on the slab, at the appropriate fall to the drain, before waterproofing and then tiling.

Shower Drains

If you are going to have a walk in shower it can be neater to have a rectangular floor drain like this one.

This example has a stainless steel finish but you can also get covers with a tray that you can fix matching tiles in. All you can then see is a narrow slot.


For similar posts see  Plumbing in the Selection Category.

More plumbing information and 24 pages of Check Lists in the ‘Selection / Pre-Start Guide’


Exit mobile version