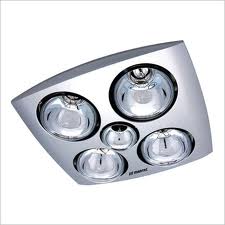
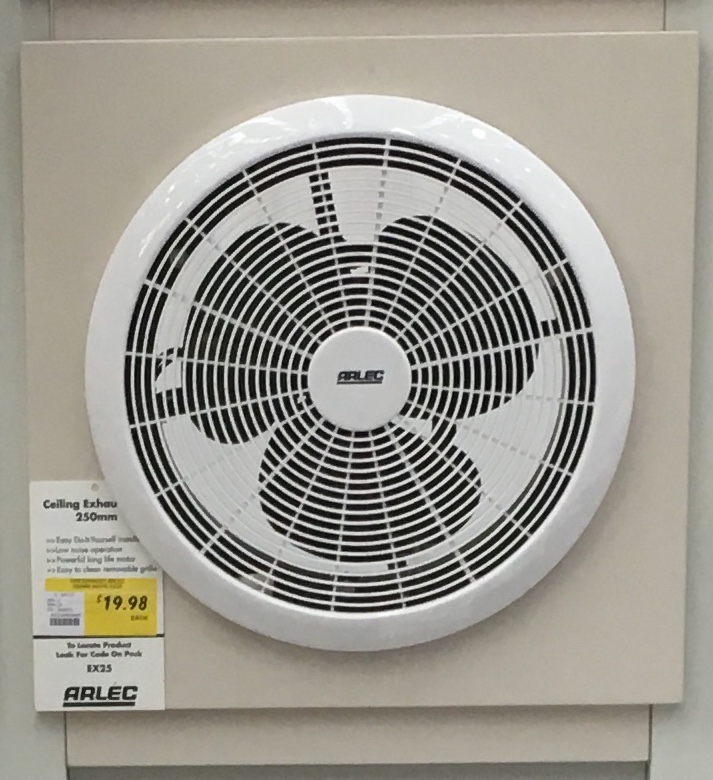
In a previous house we had one of those 3 in 1 bathroom light/heater/extraction fan.
I can’t say I was impressed. . . . It suffers from the Swiss Army Knife Syndrome…… doing lots of things, but none of them as well as a purpose designed tool.
It seems more sensible to me to have the fan directly above the shower and extract the steam at it’s source, rather than let it drift across the ceiling and then extract it.
As far as Lighting is concerned it’s easier to see yourself clearly in the mirror if the light is in the area between the mirror and you, rather than behind you. . .
I think that ladies putting on make-up in the bathroom will agree!
For heating I never seemed to get much heat from the heat lights. (One exception was a unit in a hotel bathroom with a low 2.1m ceiling)
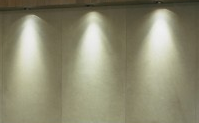
Downlights are very popular and can give dramatic light effects so you seem them a lot in show houses, and shops ……but I won’t have them again.
A but harsh? . . . . here are my reasons why.
The dramatic effect means that the light from each fitting is fairly limited in area so you need lots of them.
The cost of each individual unit, including installation is high. With four – six in small rooms and ten or more in large rooms the cost really starts to add up.
Because the light is directed down you don’t get much reflected light of the walls and none on the ceiling resulting in a very uneven light, not what you need for reading or general household tasks.
Because the down lights run hot its dangerous to cover them in insulation which means that the effectiveness of your insulation is reduced. .
Changing bulbs can be really fiddly and exasperating, especially with some of the cheaper fittings. Not good when you are working off a ladder.
Now LED downlights are common these are better than the old incandescent so if you love your existing downlights It could be worth upgrading to LEDs.
Here is a comparison of costs; A typical room will need at least 6 down lights at $100 each including installation, Total $600 and using around 50W. Compare this against a single $50 LED bulb on an oyster fitting costing $50 and using 15W.
With the main rooms covered in previous posts I will cover the remaining rooms with this post.
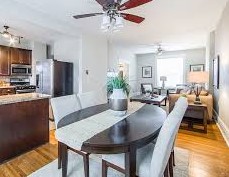
Dining
For a dining table in the kitchen area an extra double socket close to the table should be enough for any cooking gadget that you may want on the dining table.
If you have a separate dining room I prefer one double in each corner to give plenty of flexibility for dining.
It will also make the room more useful if you want to change the use later.
Its quite common to go for a pendant fitting for the dining table.
Remember the point is to illuminate the table but not to dazzle the diners.
If you have got a kitchen dining area make sure the lights are on a separate circuit so you can switch the kitchen lights off while you eat.
Hallways
In all hallways its useful to have a power socket for the vacuum.
For the front hallway a power supply for the bell and any CCTV system are recommended.
We also have a table light with a time switch on the hall table. This makes the house more welcoming in the evening and deters burglars by making it look more like someone is home.
Laundry
In our laundry we just have one four way power point. This allows us to leave the washer and the drier plugged in and to have two sockets spare, perhaps for the iron and a radio.
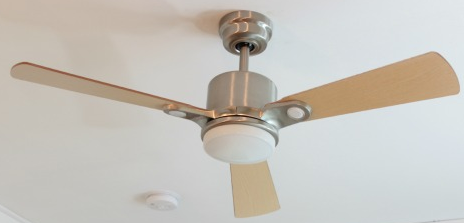
If you have tall rooms a ceiling fan can make a real difference to your comfort without large bills.
Summer
While a ceiling fan does not lower the temperature it will make the room feel cooler by:
The breeze improving the ability of your body to lose heat by perspiration.
It mixes the cooler air near the floor with the warmer air near your face.
The combined effect is that you feel several degrees cooler.
So you may not have to run the air conditioning as much.
Most ceiling fans use less than 100 watts, which equates to less than 3 cent per hour to run.
Winter
Ceiling Fans can also help lower heating costs in winter.
You can run the ceiling fan in the reverse mode.
This stops hot air staying in the top of the room by pushing warm air up against the ceiling and then down the walls gently re-circulating warm air through the room.
Fan Selection
It’s important to consider the size of the room when selecting a ceiling fan.
The larger the room size the larger the blade diameter and the more powerful the fan motor will need to be to generate enough cooling breeze.
Also a small fan in a large room can make a space look unbalanced whereas a large fan can look overpowering in a small room.
Room Area
Fan Diameter
Up to 7m2
92cm (36inches)
7m2 – 13m2
92cm – 107cm(36 – 42inches)
13m2 – 20m2
122cm – 127cm(42 – 44 inches)
20m2 – 36m2
127cm – 132cm(44 – 46inches)
Installation
Any ceiling fan should be at least 2.1 metres from the floor to the blades of the fan and at least 300mm from the ceiling.
This is a minimum and if you have some basketballers, or ruckmen in the family it may need to be higher.
If you are planning on ceiling fans for a new house it is well worth making the rooms higher.
If you have got cathedral ceilings you can get a ball type fitting to allow them to be fixed to the sloping ceiling.
You can also get extension rods to lower the fan if they are too high to give an effective breeze.
A lot of people forget all about outside electrical work. . . but it can make a big difference to how much easier it makes things.
I have listed some of the electrical things you might like to think about.
Weatherproof Lights
Light at the front door. ( A good security feature Time switch control is best)
Light to illuminate the driveway. (Sensor or time switch)
Light at the back door.
Lights on the deck/alfresco dining/patio/barby/pool deck/garden
Light for the washing line.
For lights at the side and round the back of the house I generally find bunker fittings work well. They are inexpensive, not as harsh as floodlights, and can be fitted with a low energy bulb.
Weatherproof Outlets
Back door (double socket)
Deck/al-fresco dining/patio/barby/area (at least one double socket)
Driveway (single socket or have a convenient double at the front of the garage)
Pressure pump for water tank (single switched outlet should be OK)
For Low Voltage Garden lights (double socket in a weatherproof box which can also house the transformers)
Shed or separate garage.
Underneath the front eaves. (Only if you are going to want to put up Christmas Lights, one double at least)
Other
Door Bell/ Security system
15 Amp socket for spa/pool
15 Amp switched Outlet(s) for future split system air conditioning outdoor unit.
15 Amp switched Outlet(s) for Heat Pump
Conduits under driveway/ paths for future garden lights, and fountains.
TV aerial point in the Alfresco dining area for a grand final or Melbourne Cup Barby.
What’s the best outside electrical fitting in your house?
There are two elements when considering Lighting levels for your new house.
Electrical Power (Watts)
Amount of Light (Lumens)
Watts
In the old days with incandescent bulbs it used to be simple, bulbs came in 40, 60 and 100watts and you were allowed up to 25 watts/square metre of floor space.
Now for your new build, in order to limit energy consumption, you are only allowed:
Indoors 5 watts /sqm (5W/sqm)
Outside 4 watts/sqm (4W/sqm)
Garages 3 watts/sqm
This doesn’t mean you have to have a gloomy house.
Modern light fittings such as Compact Fluorescent Lamp (CFLs) and Light Emiting Diodes (LED) give much more light than Incandescent Bulbs.
The above power consumption figure are for the initial construction. (After handover you can add additional lights)
Lumens
Probably the best way to think about lighting is to consider what task you are going to do.
Then look at how you will provide enough light in that area rather than the whole room.
Here are some suggested light levels for various tasks.
Under 10 lumens/sqm – Outside Security.
10-20 lumens/sqm – Conversation, Eating, Watching Television, General Circulation.
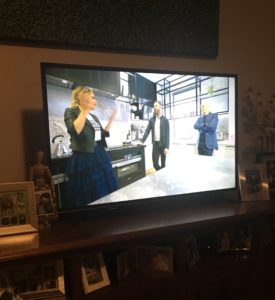
It is also certain that you’ll suddenly feel lost if an electrical problem causes your television to break.
At that point you’ll need to have the number of the Electrical Detectives to hand; the sooner they sort the issue the quicker you can get back to your favorite programs!
To help prevent problems it is essential that you care for your television and other accessories:
Cleaning
Dust is one of the biggest enemies of any electrical item.
This can cause chips to overheat and fail. In worst case scenarios the chips can actually catch fire.
You need to wipe your television down on a daily basis with a dedicated television wipe.
This will remove dust and other dirt without scratching the surface of the screen.
It is important to use the right wipe; many contain alcohol or ammonia which will damage your screen.
You can also gently vacuum the air vents on the back of your television to remove dust from inside the device.
Environment
Electrical items don’t generally like humidity or extreme cold or hot rooms.
You need to consider the environment in the room where your television lives.
Keep the temperature steady between 10 and 25 degrees Centigrade and if you notice excess humidity consider investing in a dehumidifier.
This will help to prolong the life of your television.
Power
It is also important to look at your power circuits.
Plugging too many items into one socket can cause an overload which could short out equipment and even cause a fire.
Equally no matter how good your power supply is there will be times when there are power surges.
These can destroy the sensitive electrical inside devices like your television.
To protect against this you need to invest in a surge protector for your sockets.
This will ensure the power supply to your television remains constant.
You can even get surge protectors to safeguard an entire circuit; allowing you to protect all your sensitive electrical gear.
Repair Early
Televisions can be repaired for a fraction of the cost of replacing them; especially if an issue is caught early enough. When you undertake your regular cleaning visually inspect the television.
You should also keep your eye open for any irregularities when you’re watching it.
If you notice anything, then get the television repair person to look at it sooner rather than later; it could save you a lot of money.
In the same way you should be vigilant about any accessories that are connected to your television; such as a DVD player or surround sound system.
Currently in Australia, there are just over 4000 electric cars on the roads.
They currently make up 0.1% of new car sales.
Having recently visited China I think that those numbers are going to change as I was amazed at the amount of electric cars and scooters I saw on the roads.
How much power is needed to charge an electric car?
Smaller electric cars have a battery with a capacity of 16 to 24 kWhours battery.
Larger cars such as the Tesla Model S have batteries in the 60 to 85 kWh battery.
Being ready for an electric car
Electric cars typically come with two charging options – slow and fast.
The slow charge option is the most commonly used as you will no doubt plug in at work or at home.
With a small car like a Nissan Leaf you can fully charge the car overnight at a rate of 2.5KW.
That means a simple 15amp socket in the garage will be adequate.
At the most it should cost a few hundred dollars.
If you think you might want a Tesla, or want to fully charge a small car in an hour or two you will need a special circuit and perhaps a 40 amp supply.
That could double the power supply to your house. . . . so you need to talk to your builder and their electrician at an early stage of your build.
The cost of a special charger and upgraded circuits could add $2,000 – $4,000 to your build costs,
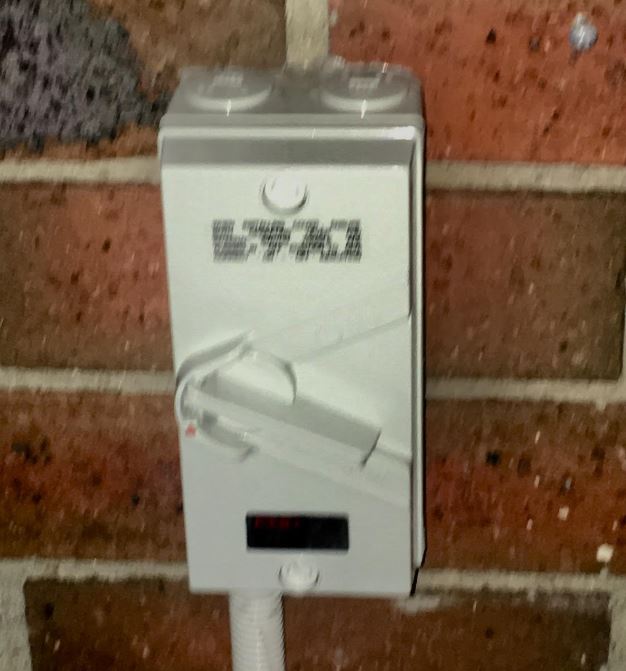
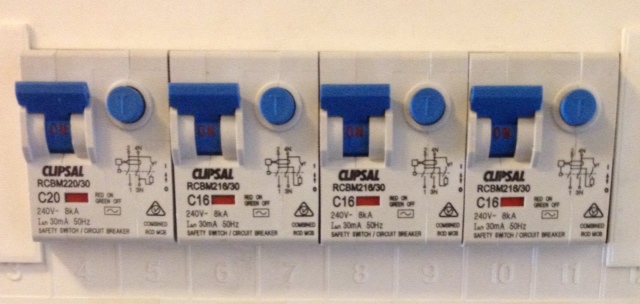
A lot of people don’t understand the difference between circuit breakers and safety switches so here is a video that explains the difference, and how important they are for your family’s safety.
If your budget for upgrades on your new house is tight I think that spending extra on electrical safety is much better value than cosmetic upgrades.
Compared with the overall cost of the house the additional cost is quite small.
Already moved in? . . . . . perhaps you should get the switchboard checked by a electrical contractor Perth.