7 Reasons to Install Flyscreen Doors at Your Home

Guest Post by Hubert Dwight

For generations, flyscreen doors have been an essential part of numerous homes in Australia.

Their simple mechanism effectively prevents those pesky intruders that can cause some serious iritation if they enter your home.

However, a significant number of people are still unsure whether they should invest in such doors or not.

If you haven’t used such doors previously, here are some of the major reasons why you should get one immediately.

Keeps Insects Away:

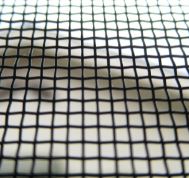
The primary purpose of these flyscreen doors is to keep out insects.

In certain parts of Melbourne, insect infestation is a massive problem.

Installing flyscreen doors in Melbourne homes can stop those pesky insects from entering the houses and causing health problems.

These screen doors also help you take care of the insect problem without using any harmful pesticides.

Adds an Extra Layer of Security:

When you invest in good-quality flyscreen doors, they help you deter more than just the insects.

They offer an additional layer of protection against intruders, and more.

If you choose flyscreen doors made with stainless steel, they are also resistant to damage from pets scratching

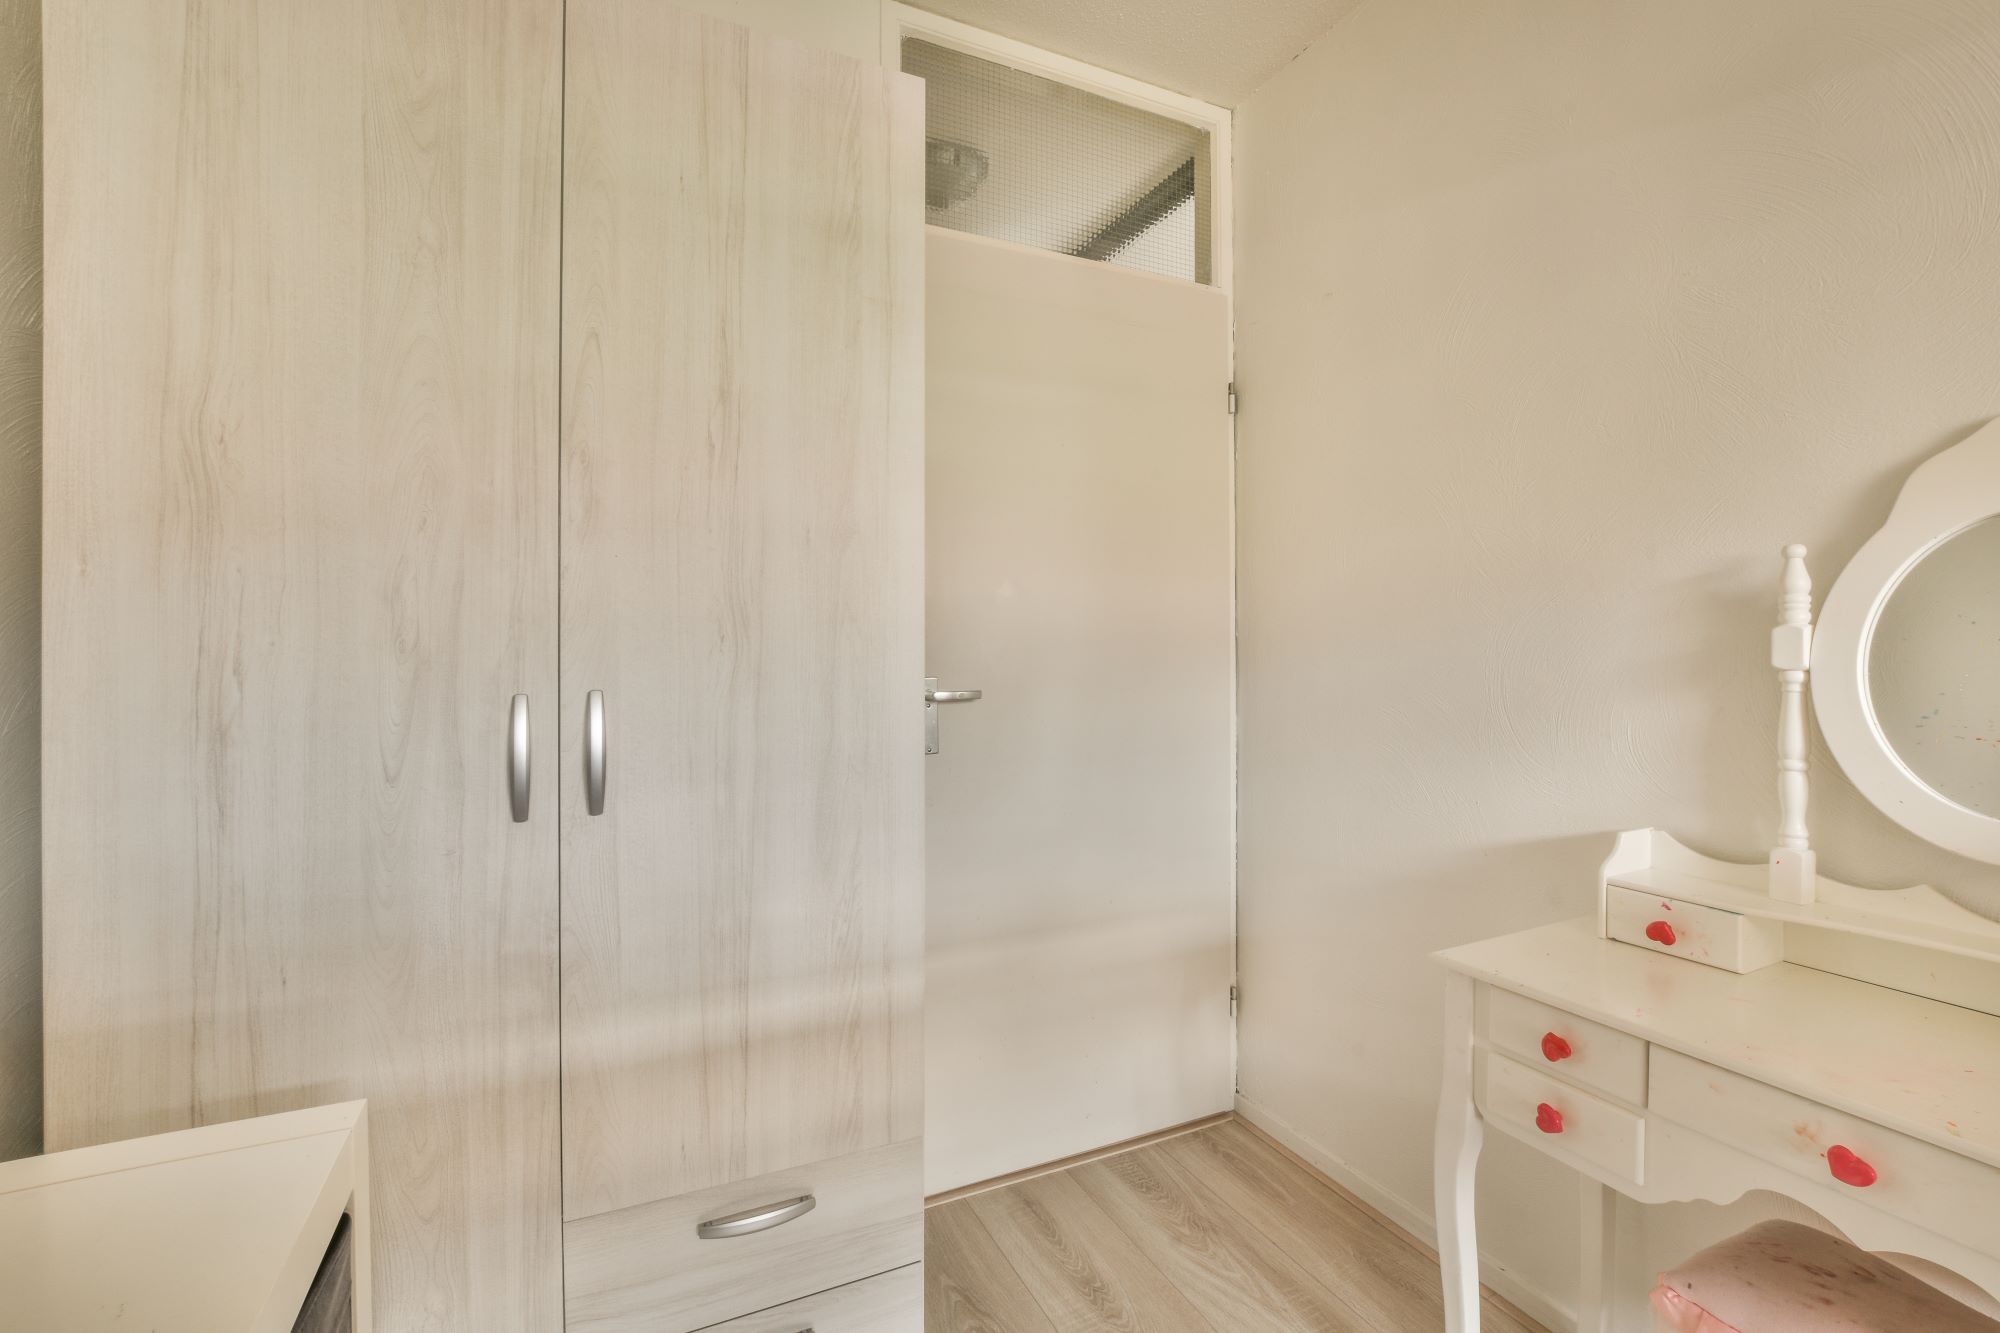
Keeps the Children Safe:

Apart from preventing insects and other intruders from entering your home, flyscreen doors also help you keep your toddlers safe inside your home.

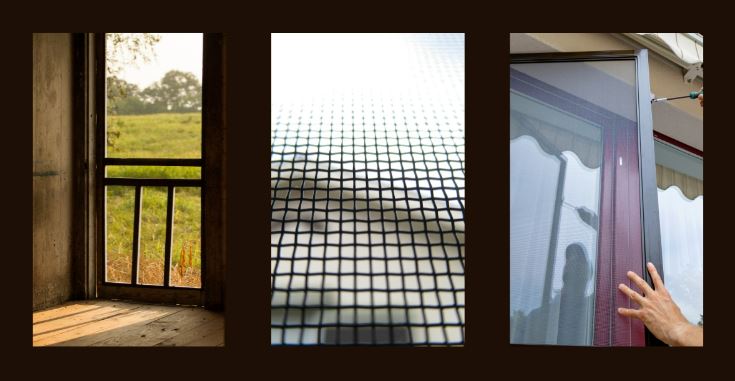
While solid doors give children the feeling of being “locked in the fortress,” the flyscreen doors offer a clearer view of the outside world, even through the mesh.

As such, these doors prevent children from venturing outside without help from an adult.

Ensures Privacy:

If you want to improve the privacy of your home while enjoying the view of the outside world, these flyscreen doors are a great option to consider.

These mesh doors allow people inside the home to look outside without any issues, but people outside the home cannot see what is inside unless they are close enough to the door.

So, it is difficult for someone to spy on your house from a distance when you have installed such doors at your place.

Allows Proper Air Circulation:

Installing flyscreen doors can help you save energy by keeping your home cool. The perforated design of these doors allows air to circulate properly.

As a result, your house feels cooler without using air conditioning for several months.

The screens also block some portion of the direct sunlight, which can often increase the temperature inside the house.

This way, you can save a significant amount of money on your energy bill.

Adds More Style:

You will find flyscreen doors in numerous designs that can add more style to your home’s entrance.

From colonial-casting screen doors to diamond grille screen doors – you have plenty of options to choose from.

Some flyscreen door manufacturers can also customise the design as per your personal preferences. Also, you have the option to choose the materials – from aluminium to wood.

So, choose the one that matches the style and decor of your home. It is even better if you are installing the flyscreen door as a part of home renovation.

Brightens Your Home with Natural Light:

Flyscreens are known for allowing significantly larger amounts of natural light into a room, thanks to their perforated design.

While natural light can improve your mood, the UV rays from the sunlight also help prevent germs buildup and mould.

Moreover, the natural brightness of the room makes the space look larger.

Additionally, it reduces your dependency on electric lights during the day, helping you save some energy along the way.

Conclusion

Flyscreen doors have evolved significantly over the years.

While their primary purpose is still to prevent insects from entering your home, the designs and functionalities of these doors have changed noticeably to meet the requirements of modern households.

Local manufacturers can also create customised solutions that blend seamlessly with the ongoing decor and style of your home.

Back to Real Grass?

The first artificial turf pitch was laid in Rhode Island in 1964, and started to gain attention when the Houston Astro Dome opened in 1966 with

It took another 20 years before an Australian artificial turf sports field was completed

It only seemed to me to get start getting popular in Australia in the 2010’s when artificial grass started to hit the domestic market.

Well with around 10 years experiance I have seen a lot of artificial lawns and I am not a fan.

What I Don’t Like

No Saving On Installation

If you want a high standard finish their is a lot more than just rolling the cheapest product.

If you want a nice flat lawn you need to spend some time on getting a flat stable base.

The base may need to be provided by a softer layer if it is going to be anything but oriental.

Expect to pay between $60 and $100/sq m for a reasonable product and quality installation.

Not No Maintenace

This photograph shows what can go wrong if you ignore maintenance

You may not have to mow it, but you do have to vacuum it.

Otherwise leaves just sit on top.

You still have to weedkill as windblown seed can still form roots and grow.

Heath Issues

Unfortunately, artificial grass can trap blood, skin, and animal waste and become a breeding ground for harmful bacteria, like staphylococcus.

If you have pets, you will need water to remove dog urine to keep things more sanitary.

Artificial grass can also be a major source of micro plastics which are considered a major environmental problem.

Not People Friendly

Two common complaints are;

  • The surface gets to hot in summer.
  • Likely to cause friction burns.

5 Pros And Cons Of Greenhouse Kits 

Guest Post

Greenhouse kits offer a convenient and efficient way for individuals to cultivate plants, flowers, and vegetables in controlled environments.

These kits come in various sizes, designs, and materials, catering to the diverse needs of gardeners and horticulturists.

However, like any product, greenhouse kits have their own set of advantages and disadvantages.

Understanding these pros and cons can help potential buyers make informed decisions before investing in a greenhouse kit.

Pros

Easy Assembly: One of the primary advantages of greenhouse kits is their ease of assembly. Most kits come with pre-cut materials and detailed instructions, simplifying construction. This feature mainly benefits individuals with limited DIY skills or who prefer hassle-free setups. Maze greenhouse kits, for instance, are designed to be user-friendly, allowing even novices to build their greenhouse quickly. Watch this video about assembling this kit:

Affordability: Compared to building a traditional greenhouse from scratch, greenhouse kits are often more cost-effective. These kits eliminate the need to purchase individual materials in bulk, saving time and money. Additionally, greenhouse kits typically include frames, panels, and hardware, reducing the overall cost of constructing a greenhouse.

Portability: Many greenhouse kits are designed to be portable, allowing users to relocate them as needed. This flexibility is especially beneficial for renters or individuals with limited outdoor space. Portable greenhouse kits are lightweight and can be easily disassembled and moved, making them ideal for temporary or seasonal use.

Climate Control: Greenhouse kits provide a controlled environment for plants, offering protection from harsh weather elements, such as frost, wind, and excessive sunlight. Users can regulate temperature, humidity, and ventilation with adjustable vents, windows, and shading systems to create optimal growing conditions for different plant species.

Space Optimization: Greenhouse kits maximize space utilization, allowing individuals to grow various plants in a compact area. Whether placed in a backyard, balcony, or rooftop, these kits enable gardeners to cultivate crops year-round without requiring expansive outdoor land. Vertical greenhouse kits are also available for those with limited horizontal space, further optimizing growing capacity.

Cons

Limited Size Options: While greenhouse kits offer convenience and affordability, they often come in standard sizes, limiting customization options for users with specific spatial requirements. This makes them not ideal for individuals seeking larger or custom-designed greenhouse structures.

Durability Concerns: Some greenhouse kits may lack the durability and structural integrity of traditional greenhouse constructions. Kits made from lightweight materials, such as PVC or thin aluminum frames, may be prone to damage from strong winds, heavy snow loads, or prolonged exposure to sunlight. Additionally, cheaper greenhouse kits may deteriorate quickly, requiring frequent repairs or replacements.

Temperature Control Challenges: Despite climate-controlled features, greenhouse kits may find it challenging to maintain consistent temperatures throughout the year because of their limited insulation. In extreme weather conditions, such as heatwaves or cold snaps, greenhouse kits may struggle to adequately regulate internal temperatures, leading to stress or damage to plants. Supplemental heating or automatic vents may be necessary to address temperature fluctuations effectively.

Limited Structural Integrity: Greenhouse kits are often made of lighter materials, so they may need more structural integrity than professionally constructed greenhouses. DIY kits assembled by inexperienced individuals may be more susceptible to leaks, gaps, or uneven foundations, compromising the overall stability and functionality of the greenhouse.

Maintenance Requirements: Like any outdoor structure, greenhouse kits require regular maintenance to ensure optimal performance and longevity. This includes cleaning panels, lubricating hinges, inspecting frames for rust or corrosion, and replacing worn-out components. Failure to properly maintain a greenhouse kit can result in reduced efficiency, diminished plant growth, and costly repairs in the long run.

Choosing a Greenhouse Kit

Choosing the fitting greenhouse kit involves considering several factors to ensure it meets your specific requirements and preferences. Here are some key considerations to keep in mind:

Size And Space: Determine the available space for your greenhouse and consider the size of the kit that will fit best. Think about the number of plants you want to grow and any additional space needed for storage or workspace.

Materials And Durability: Aside from considering the greenhouse design, it’s best to assess the materials used to construct the greenhouse kit. Opt for durable materials, such as aluminum or galvanized steel for frames and UV-resistant polycarbonate panels for glazing. These materials offer longevity and resistance to weathering.

Climate And Location: Consider the environment and location where the greenhouse will be installed. Choose a kit with insulation, ventilation options, and shading systems suited to your local climate. This ensures optimal growing conditions year-round.

Assembly Difficulty: Evaluate your DIY skills and the complexity of the assembly process. Some greenhouse kits are designed for easy assembly with minimal tools and experience required, while others may be more challenging. Choose a kit that matches your expertise and available time for assembly.

Budget: Determine your budget for purchasing and installing a greenhouse kit. Prices can vary significantly depending on size, materials, and features. Balance your budget with the desired quality and functionality of the kit.

Reviews And Recommendations: Research customer reviews and seek recommendations from other gardeners with greenhouse kits experience. Reading about others’ experiences can provide valuable insights into different kits’ quality, performance, and durability.

Warranty And Support: Check the warranty coverage and customer support the manufacturer offers. A reliable warranty ensures protection against defects or issues with the kit, while responsive customer support can assist with any questions or concerns during assembly or use.

Final Thoughts

Greenhouse kits offer numerous benefits, including ease of assembly, affordability, portability, climate control, and space optimization.

However, potential drawbacks—such as limited size options, durability concerns, temperature control challenges, structural integrity issues, and maintenance requirements—should also be considered before purchasing a greenhouse kit.

Ultimately, investing in a greenhouse kit should be based on individual preferences, budget constraints, and specific gardening needs.


Epoxy Coating: The Ideal Treatment for Your Garage’s Concrete Floors

Guest Post by Elisaveta Doncheva

More often than not, focusing on finding ways to increase a home’s resale value leads to obvious alterations and upgrades, such as furnishings that freshen up the interior and landscaping that gives the outdoors a nice finishing touch.

And yet, something as simple as treating the concrete floor of the garage with a little TLC could be the change that brings about the biggest impact.

In addition to the functional purpose this home’s feature has, which is handling the pressures from heavy-duty use from your vehicles or machinery, it also has an undeniable aesthetic role which may be somewhat understated.

To avoid deterring future buyers, or even an eyesore for yourself that could also be dangerous and risky for you, your vehicles, your machinery, tools, and what is not present in the space, it’s time to make some improvements.

Don’t worry, it’s as simple as adding durable epoxy coating for concrete to get the desired makeover.

You’ve got a range of versatility available, differing not only in price but carrier agents too, giving you the chance to choose from solvent, solid, and water based.

Is It a Good Idea to Put Epoxy On the Garage Floor?

It’s a type of coating that’s meant to last for years and years, and it truly can with proper floor maintenance.

If it’s good for commercial purposes in industrial applications that require the best of the best in terms of floor protection, why should it be any different from residential applications?

When applied, there’s a specific permanant chemical reaction happening which gives this material some exceptional qualities for the surface it’s added to.

To give you an idea, the following are just some of the benefits you can expect to reap once you treat your floors with the suitable resin and hardener mix.

The Smooth and Shiny Appearance

The floor can make or break the space’s appearance, and all it takes to get it from drab to fab is a nice layer of epoxy coating for concrete to get smooth and seamless elegance.

Even though elevated aesthetic may not be your goal, least of all for a utilitarian area like the garage which serves as a parking area, workshop, and storage for your seasonal equipment or home-brewing equipment, the sleek and elegant touch would surely increase the overall curb appeal.

And, you can have fun choosing the coating – for a polished ambience, why not pick one of the eye-catching metallic mixes?

A mixture with details from mica or quartz equally makes for a unique aesthetic that additionally doubles for better traction of the floor too, so you amp the look without sacrificing the function or convenience.

The Increase in Protection

Instead of serving as the base, the garage floor epoxy is a layer added over the already sturdy concrete floor, taking up the role of protector for the underlying surface, shielding it from impact as well as wear and tear that might result in cracking and crumbling.

Since there’s more than one layer added, usually you get a thick coating that covers your precious concrete flooring, giving it an increase in durability.

This explains why upon application the possible defects of the floor might have magically disappeared with each and every layer of the coating, offering a sleek and smooth finish.

It’s exactly this that gives you peace of mind since usually defects can be the opening points for moisture to make its way through and damage the concrete little by little.

The Increase in Strength

Impacts, shocks, extra weight – you name it, the coating can handle it all.

Unlike other coatings, epoxy stands out from the rest with its incredible tensile strength, and the secret lies in the addition of the hardener, specifically the polyamine material.

Depending on the type of epoxy and hardener you choose, you can significantly increase the concrete’s ability to stand up to all the pressure you’d put it through.

If the bonding with the underlay surface is good, you can expect there to be strength in the resistance to peeling and tearing too so you won’t have to worry about those heavy loads.

The Increase in Safety

The garage that doesn’t have windows or proper illumination can easily become a place that compromises the safety of anyone going inside, but this too could become a thing of the past with the simple addition of a few layers of an epoxy concrete floor coating of your choice.

This is due to the material’s ability to reflect the light, which results in the brightening up of the whole area.

Moreover, with certain mixes of epoxy and hardener, it’s possible to increase the safety to reduce the danger from slipping accidents.

If a slick surface isn’t your thing, and you wish to further boost the safety, you could add your own ingredients to the mix, including polymer grit, gravel or sand.

The Resistant Properties

It is more than resistance to water and moisture.

It is also resistance as well as heat, chemicals, and even impact, it’s an investment that more than pays off in the long run.

The thicker the layer of coverage, the more of these incredible properties you can expect.

The Long-Lasting Result

As mentioned, this is a covering option that keeps on giving time and time again if we keep its resistance properties, strength, and durability in mind.

As such, it’s a much more reliable and convenient option than other covers in the likes of concrete paint, or tiles, especially if we consider the lack of need to redo the epoxy layering for many years.

The Eco-Friendliness

Sure, it’s a chemical, but that doesn’t mean it can’t be eco-friendly in its own way.

As it’s not that difficult to install, needing only a few essentials, and it doesn’t need to be recoated that often, it’s more helpful for the environment than other alternatives.

If you think about it, it’s quite cost-effective too so your budget won’t be significantly impacted once you take care of the proper installation.

How Do You Take Care of Epoxy Floors?

We’ve already discussed the outstanding properties of epoxy, including its durability, but it wouldn’t hurt to get in the habit of maintaining it to ensure it lasts as long as you expect it to, or even more.

Sweeping to get rid of dirt, dust, and debris is the basic step you should implement, followed by mopping.

Getting rid of stains should be done immediately after they occur, with an emphasis on using epoxy-suitable products, from cleaners to the right tools for the job, to avoid scratching the coating yourself.

Also, remember that prevention is better than cure, and in the case of the coating, it’s advisable to protect it from heavy objects by using the appropriate mats and furniture pads. A little care goes a long way!

Hiring a Dingo Loader

Spreading a lot of topsoil or levelling a large garden yourself?

One of the best tools is a ‘Dingo’ or ‘Kanga’ loader.

These can usually be hired locally at very reasonable rates.

Can be a bit scary driving the dingo off the trailer.

Just go slow and you should be alright.

You will be jerky and wobbly at first but I found after 10mins I got the hang of it and started enjoying it.

These machines are narrow enough to go through most gateways (Less than 900mm wide),

As I was on a corner block it was easiest to take out a fence panel.

As well as the basic machine some attachments that may be worth hiring at the same time are:

  • A bucket with teeth if you are planning to dig compacted soil.
  • A large capacity bucket for moving compost and mulch.
  • A rotary auger if you are putting in posts, or even preparing to plant trees or large shrubs.

Safety Warning:
Even though it’s fun its a heavy powerful machine that needs to be treated with respect so:

    1. Don’t try to climb too steep a slope, go too quick or do anything, that will put it off balance or tip over. You don’t want it to roll on you.
    2. Make sure that pets and children are well out of the way.
    3. Don’t allow people to get behind you
    4. Take your time as you will feel like you are a cowboy riding a bull if you go too quick.
    5. Rest when you get tired.
    6. If you are crossing a footpath get some cones and rope to keep pedestrians away.

A final piece of advice “Don’t let the wife have a go or you will never get her off it”.

What piece of Hire Equipment have you found useful?


The Settling In Section contains lots of advice on what to do after

you have moved in your new house.


5 Power Tools You Need For Your Next Renovation

Guest Post by Rebecca Lee

Embarking on a home renovation project is always an exciting proposition.

Whether you’re planning a minor makeover or a major overhaul, having the right power tools can make a world of difference to its success and efficiency.

These tools simplify complex tasks and enable you to achieve professional-quality results.

From drilling and cutting to sanding and shaping, the right power tools can empower you to transform your living space with precision, confidence and a dash of flair.

This article will explore five essential power tools you should consider adding to your toolbox for your next renovation.

With these tools at your disposal, you’ll be well-equipped to tackle a wide range of tasks and bring your renovation dreams to life.

Power Drill

The power drill is one of the most versatile and indispensable power tools you can use in any renovation project.

Whether you’re installing new cabinets, hanging shelves, or assembling furniture, a power drill will be your go-to tool.

The ability to drill holes and drive screws saves you time and effort compared to manual tools.

So look for a cordless drill with a variable speed setting, as it offers convenience and flexibility.

The option to switch between different drill bits and screwdriver attachments makes a power drill an essential tool in any DIYer’s arsenal.

Whether you’re a seasoned renovator or a beginner, a power drill will undoubtedly become your trusted companion throughout your project.

Circular Saw

When it comes to cutting lumber and making precise cuts, a circular saw is an absolute must-have power tool for your renovation project.

When tackling framing, trimming plywood, or working on custom woodwork, a circular saw provides the speed and accuracy you need.

With its circular blade that spins at high speeds, it effortlessly slices through various materials easily including bricks and concrete if you buy stone saw blades in Australia

With adjustable depth and bevel angle settings, as it allows you to make angled cuts and achieve precise results.

From straight cuts to more intricate tasks, a circular saw is essential to help you achieve professional-level craftsmanship in your renovation endeavours.

Random Orbital Sander

Achieving a smooth and polished finish is crucial for many renovation projects, and that’s where a random orbital sander becomes an invaluable tool.

If refinishing furniture, sanding down surfaces, or preparing walls for painting, this power tool excels at removing material quickly and evenly.

The random orbital motion ensures that you won’t leave swirl marks or scratches on the surface, resulting in a flawless finish.

If you can, source a sander with variable speed control to match different materials and a dust collection system that minimises cleanup.

With a random orbital sander in your toolkit, you can transform rough and worn surfaces into beautifully smooth ones, adding a professional touch to your renovation project.

Jigsaw

For jobs requiring intricate shapes and curves or making delicate cuts in various materials, a jigsaw is an essential power tool to have available.

This versatile tool allows you to tackle tasks such as cutting out openings for electrical outlets, creating custom trim pieces, or shaping plywood quickly and precisely.

With its reciprocating blade that moves up and down rapidly, a jigsaw offers excellent control and manoeuvrability, enabling you to achieve intricate and accurate cuts.

Jigsaws with adjustable speed settings and orbital action are best for enhanced cutting performance.

Whether adding unique details or making precise cuts, a jigsaw is a must-have tool that empowers you to bring creativity and precision to your renovation project.

Angle Grinder

An angle grinder is a versatile and powerful tool that should be on your list of must-have power tools for your next renovation project.

With its ability to handle various tasks, an angle grinder is a true workhorse.

Capable of doing everything from cutting through metal and tile to grinding and polishing surfaces, this tool is indispensable.

With various attachments and discs available, it can tackle different materials and achieve professional results.

Whether you need to remove rust, sharpen blades, or shape stone, an angle grinder offers the flexibility and power to do the job.

However, it’s crucial to prioritise safety when using an angle grinder, so always wear protective gear, such as goggles and gloves.

That said, with an angle grinder in your toolkit, you’ll have the versatility and cutting power necessary to take your renovation project to the next level.

Conclusion

Having the right power tools can make all the difference in the success and efficiency of your renovation project.

The five power tools discussed in this article are all essential additions to your toolbox.

These tools enable you to tackle a wide range of tasks with precision, efficiency, and professional-quality results.

Whether drilling, cutting, sanding, shaping, or grinding, they empower you to transform your living space and bring your renovation visions to life.

Remember to also prioritise safety by familiarising yourself with the manufacturer’s instructions and wearing appropriate protective gear when using them.

With the right power tools at your disposal, you’ll be well-equipped to confidently embark on your next renovation project and achieve outstanding results.

How To Choose The Right Wardrobe For A Small Space

Guest Post by Lila Bennett

Wardrobe management can often feel like a strategic chess game, especially when space is a luxury you can’t afford.

Imagine trying to squeeze your unique fashion collection into a compact room.

It’s no easy feat. . . . . But fear not! . . . . Choosing a wardrobe that encapsulates your style and optimizes storage can turn the tide in this clutter war, making even the smallest spaces a haven for your treasured attire.

Here are some ways to select the ideal wardrobe for a confined space:

Understand Your Needs And Budget

When choosing the perfect wardrobe, it’s essential to assess your needs thoroughly.

Are your shoes taking up half your current storage?

Or do you own a variety of garments that require ample hanging space?

Possibly, a balance of shelves, drawers, and hanging areas is what you’re after.

Identifying your storage priorities is the first step toward making an informed choice.

It’s more than just about counting your shoes or clothing items.

Think about the variety of your belongings.

Do you have bulky winter coats, long dresses, or formal wear that need more vertical space?

Or are you a fan of neatly folded apparel that requires extra shelving?

Your wardrobe should not only store but also organize your items effectively, catering to your specific needs.

Lastly, considering your budget is crucial when hunting for the ideal wardrobe.

With the variety of options available, finding cheap wardrobes that don’t compromise quality or style is feasible.

Just remember, a wise decision balances cost, functionality, and aesthetics.

Get The Right Measurements

In a small space, every cm counts.

Therefore, it’s crucial to get the dimensions of the room and the proposed wardrobe spot on.

You’re not just fitting a piece of furniture but integrating it into your space.

But it’s not just about measuring the room and the wardrobe.

Consider also the doorways and staircases the wardrobe must pass through on its way to the room.

Remember, the goal is to make the wardrobe look like a natural part of your room, not an imposing intruder.

Getting the correct measurements ensures your chosen wardrobe enhances your room’s appeal.

Consider The Wardrobe’s Interior Layout

Don’t overlook the importance of the interior layout when picking out your wardrobe.

It’s not just a box to toss your clothes in; it’s your personal, organizational tool.

The layout dictates how easy it’ll be for you to store and find your items.

In the best scenario, each item has its dedicated space, eliminating the time-consuming hunt for that one shirt or pair of jeans.

Seek out a wardrobe that offers diverse storage options.

Multiple compartments, adjustable shelves, and built-in drawers can make all the difference.

Such features allow you to tailor your wardrobe to your unique storage needs.

For small spaces, maximizing the usability of each square inch of your wardrobe is essential, ensuring a place for everything and everything in its place.

Select The Right Type And Style

Style and type are as critical as size and layout when choosing a wardrobe.

The ideal wardrobe doesn’t just store your items; it also complements your room’s aesthetics.

Consider the type and style that best aligns with your space and decor, whether modern, vintage, or eclectic.

Here are some popular types of wardrobes:

  • Free-Standing Wardrobes: These are the most common type of wardrobe. Their chief advantage is their versatility; they can be moved around your room or even to another room entirely. This makes them ideal for renters or those who regularly change their room layout. However, they can be bulky and might take up more space.
  • Built-In Wardrobes: These are tailored to fit your space, making them a fantastic option for optimizing storage in smaller rooms. They can be customized to meet your needs, whether extra hanging space, more drawers, or additional shelves. The downside is their permanence; they can’t be moved, and altering them after installation can be difficult and costly.
  • Walk-In Wardrobes: The ultimate luxury in wardrobe design, walk-in wardrobes provide ample storage space and often include various options for organizing clothing and accessories. They are ideal for those with extensive clothing, shoes, and accessories collections. However, they require a lot of space, making them less suitable for smaller living quarters.
  • Sliding Door Wardrobes: These wardrobes are designed with doors that slide horizontally, eliminating the need for extra space to open doors. This design is especially beneficial in small rooms where space is at a premium. The sliding doors also provide a sleek, modern look, making these wardrobes a stylish and practical choice.

Each wardrobe type serves a different purpose.

A sliding-door wardrobe might be your best bet if your room is tight on space.

A free-standing wardrobe might be your go-to if you’re all about flexibility.

With careful consideration of your room’s size and style, you’ll find the wardrobe type that not only fits your space but enhances it.

Opt For The Best Material

The material of your wardrobe significantly impacts its look, durability, and portability.

Wooden wardrobes exude a timeless charm, offering sturdiness but can be hefty and pricier.

Alternatively, metal and plastic wardrobes present a more cost-effective solution.

They balance style with practicality, with metal being durable and plastic being lightweight and generally cheaper.

However, remember to factor in the wardrobe’s location.

For moisture-prone areas, metal or plastic options trump wood.

Thus, when choosing, consider your specific needs, the decor of your room, and your budget to ensure the ideal fit for your compact space.

Conclusion

Venturing into the world of wardrobe selection isn’t just about picking a piece of furniture.

It’s a strategic balancing act between style, utility, and space optimization.

Let these guidelines steer your decision, leading you to that perfect wardrobe—your small space’s game-changer, injecting charm while optimizing storage.

Ready to revolutionize your compact living quarters?


Author Bio

Lila Bennett is a seasoned interior design enthusiast with a knack for optimizing small spaces. With years of experience in the field, Lila specializes in creating functional and stylish wardrobes for compact living areas. Her expertise lies in maximizing storage solutions, selecting space-saving furniture, and incorporating clever organizational systems. When she’s not designing, Lila enjoys practicing yoga, attending art exhibitions, and exploring local flea markets for unique decor finds.

Street Numbering – Win!

You would think that some houses were owned by secret agents as there are no traces of a street number.

I have heard that ambulance drivers sometimes have difficulty finding there patients due to the lack of numbers.

You couldn’t accuse either of the properties featured in this post of being shy about letting people know the house number.

I particularly like the one below with the numbers fabricated out of Corten Steel with the post box built into the number 1 ( Sorry about the picture quality but the sun was very low and behind the number when I saw it)


For Fails and Unusual Houses go to What the………………….?

See Letter Box for more information on the standards.


Installing a Basic CCTV Camera

We recently thought about installing a CCTV system.
As we were not sure what was suitable we decided to buy a basic camera from the local DIY store, for just under $160.

The Unit

The unit was an Arlo  Camera, with the following features:

  • Rechargeable battery powered;
  • Wide angle lens;
  • Spotlight;
  • Microphone and Speaker allowing you to talk with people close to the camaera
  • Wireless communication via our internet router;
  • Linkable to our mobile phones.

In addition to the camera there was the adjustable mounting bracket, and a charging cable allowing the unit to be recharged through a USB charger.

Initial Setting Up

  1. Charge the camera.
  2. Download the app on your mobile phone which gives you access to the instructions;
  3. Connect the camera to your home internet internet and then ‘pair’ with your smart phone;
  4. Find a suitable mounting point and secure the bracket with 3 screws;
  5. Adjust the camera position until you are happy with view
Camera View

Overall the installation, after the camera was charged, took me around 30 mins.

Monitoring Settings

The camera is designed to start recording from as soon as movement is detected to  several seconds after movement is stopped.

The video clips are then stored in the ‘Cloud’ for 30 days. (After a 3 month free period this costs around $5.00/month for a single camera)

You can change the settings to:

  • Pick the area of main interest. (In our case we are only interested in part of the view)
  • Exclude animals
  • Decide if you want to be notified by movement.
  • Decide when you want to be notified (by setting a schedule)

Initial Impressions

  • Set up was quite easy;
  • After 4 weeks I can say we are very pleased with the camera;
  • If the Internet drops out the camera won’t record anything.
  • Although the battery looks as though it will last about a month before need recharging we decided to add a solar charger for an additional $90.

Brick Fences

As I travel around the Melbourne Suburbs I see lots of brick fences……….. A problem with a large proportion is that they have obvious cracks.

If you don’t believe me just walk around your neighborhood and look at a few brick fences yourself!

So why are there problems with brick fences?

    • The actual cost of the wall in both materials and labour is high resulting in people trying to minimise on wall, and supporting pier dimensions.
    • Although many people think of brickwork as an inert material it is still subject to expansion and contraction which needs to be accommodated with proper detailing.
    • Brick work is actually a fairly brittle structural material which relies on its weight for a lot of its strength. The jointing material of mortar is much weaker than the bricks.
    • Due to the considerable weight of brickwork it needs substantial (costly) foundations which will not be subject to any settlement.
    • If it’s built on clay there is more chance of movement……The soil below the narrow foundation can gain, or lose, moisture more readily than under a house slab.
    • Although it ‘feels’ as solid as a concrete wall it may only have a tenth of the structural strength of a well designed reinforced concrete wall.

Here are a few recommendations;

  • Don’t try to save money on the foundation. After all that’s what all those expensive bricks are standing on. A 500mm wide x 300mm deep concrete with trench mesh should be the minimum.
  • Brick piers a minimum of 320mm x 320mm with vertical steel reinforcement.
  • Minimum wall thickness should be 210mm (double brick)
  • Have articulation/expansion joints at 5m intervals.
  • Use horizontal steel reinforcement every 6 courses.
  • It you are using the wall to retain soil get the wall properly designed.

All sounds too expensive?,,,,,,,,,,,,,,,Perhaps brick piers with infill timber or steel panels may be the way to go!

Remember – “There is no such thing as a cheap brick wall”.

For sizes of brick walls see Brick Dimensions


Exit mobile version