Understanding Plans – Basic Floor Plan

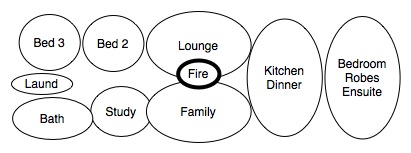
A basic floor plan is the sort of plan you will see in the developer’s brochure or on their web site.

Most people aren’t used to looking at plans and relating them to what they are going to get.

So here is a way of helping you understand.

1. Get a pad of metric graph paper. These usually have smaller squares with 2mm sides and heavier lines every 10mm.
2. If we are going to draw a plan at 1 in 100 then the side of every small square is equivalent to 200mm, or 20cm.
3. Start in a simple room, say a bedroom, and measure one wall. Draw a thin line along one of the lines of the graph paper.
4. From one of the corners measure to the next corner and draw this line on the graph paper, don’t worry about the doors or windows at this stage.
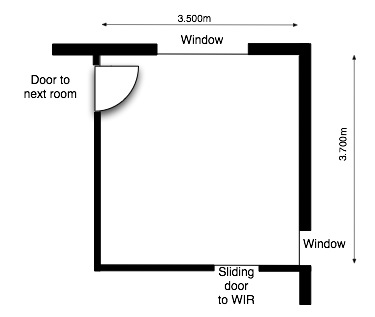
5. Carry on measuring and drawing until you have gone right the way around the room. You should now have drawn a box that looks something like the picture below.

6. Mark the position of the doors and the windows.
7. Thicken the outside of the lines to the thickness of one square for external brick walls.
8.Thicken the outside of the lines to the thickness of half a square for internal walls.
9. Draw in a quarter circle to show the way that the door opens. You should now have a drawing that looks something like the picture below.

10. This will help you relate the size of your existing room to one you see on a plan.

11. If you want to see how the furniture looks its better to cut out sections of graph paper the same size as the furniture rather than draw on the paper. You can then move these around.


Once you have got the hang of this you can expand the drawing to include all the rooms of the house.

For similar posts see Drawings and Floor Plans


Starting House Design 1- Bubble Diagram 1

A big mistake in designing a house is to get involved in detail too quickly.

Rough sketches of a floor plan, which you can easily change, are the best way to start. . . . Much better than using a computer drawing tool which can  ‘Lock You In’ and stop you considering different ideas.

  1. Decide what rooms you need and the approximate size of the house (see How Much House?)
  2. Draw some bubble diagrams. . . . These are drawings where each bubble represents a room, or a feature of the house.
  3. Work quickly, while thinking, and discussing, how you want the various rooms to relate to each other.
  4. As you develop the plans try to draw the bubbles to roughly represent the room sizes, but don’t try to be too accurate.
  5. Because the drawings are done quickly you can easily do new ones as your ideas develop.
  6. Don’t throw the old one out though! You might want to go back to a previous idea.

The collection of diagrams will be a demonstration that you have gone through a process of developing a design rather than infringing someone else’s Copyright.

The above illustration is a tidied up version of the initial bubble diagram for our first Australian house. It was based on certain things we wanted in the floor plan. These were:

  • A rectangular plan to keep things simple and economical
  • A passive solar house with the main rooms facing North
  • A wood burning stove in the centre of the house
  • Our bedroom at the opposite end of the house to the children.

Next  I will show how we developed the initial bubble diagram to a refined version which we could then use to develop the final floor plan.


For more Posts about Design see Floor Plans


Exit mobile version