

As we were not sure what was suitable we decided to buy a basic camera from the local DIY store, for just under $160.

The Unit
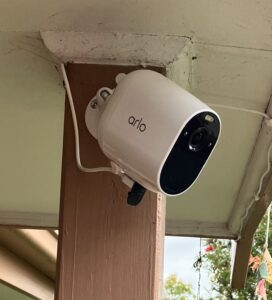
The unit was an Arlo Camera, with the following features:
- Rechargeable battery powered;
- Wide angle lens;
- Spotlight;
- Microphone and Speaker allowing you to talk with people close to the camaera
- Wireless communication via our internet router;
- Linkable to our mobile phones.
In addition to the camera there was the adjustable mounting bracket, and a charging cable allowing the unit to be recharged through a USB charger.
Initial Setting Up
- Charge the camera.
- Download the app on your mobile phone which gives you access to the instructions;
- Connect the camera to your home internet internet and then ‘pair’ with your smart phone;
- Find a suitable mounting point and secure the bracket with 3 screws;
- Adjust the camera position until you are happy with view

Overall the installation, after the camera was charged, took me around 30 mins.
Monitoring Settings
The camera is designed to start recording from as soon as movement is detected to several seconds after movement is stopped.
The video clips are then stored in the ‘Cloud’ for 30 days. (After a 3 month free period this costs around $5.00/month for a single camera)
You can change the settings to:
- Pick the area of main interest. (In our case we are only interested in part of the view)
- Exclude animals
- Decide if you want to be notified by movement.
- Decide when you want to be notified (by setting a schedule)
Initial Impressions
- Set up was quite easy;
- After 4 weeks I can say we are very pleased with the camera;
- If the Internet drops out the camera won’t record anything.
- Although the battery looks as though it will last about a month before need recharging we decided to add a solar charger for an additional $90.