There are two elements when considering Lighting levels for your new house.
Electrical Power (Watts)
Amount of Light (Lumens)
Watts
In the old days with incandescent bulbs it used to be simple, bulbs came in 40, 60 and 100watts and you were allowed up to 25 watts/square metre of floor space.
Now for your new build, in order to limit energy consumption, you are only allowed:
Indoors 5 watts /sqm (5W/sqm)
Outside 4 watts/sqm (4W/sqm)
Garages 3 watts/sqm
This doesn’t mean you have to have a gloomy house.
Modern light fittings such as Compact Fluorescent Lamp (CFLs) and Light Emiting Diodes (LED) give much more light than Incandescent Bulbs.
The above power consumption figure are for the initial construction. (After handover you can add additional lights)
Lumens
Probably the best way to think about lighting is to consider what task you are going to do.
Then look at how you will provide enough light in that area rather than the whole room.
Here are some suggested light levels for various tasks.
Under 10 lumens/sqm – Outside Security.
10-20 lumens/sqm – Conversation, Eating, Watching Television, General Circulation.
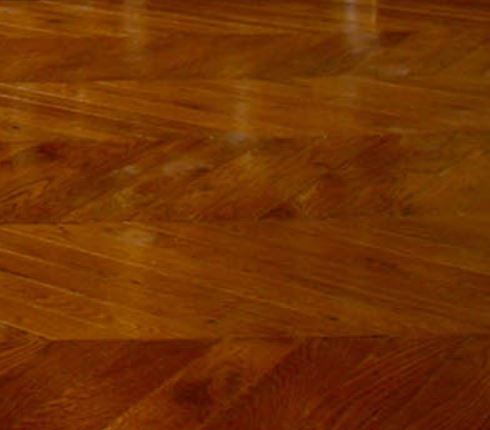
The next step is to vacuum your wooden floors at least once a week.
This will remove any of the dirt and dust that has been missed by the microfiber cloth. but, it is important that you use a soft bristle vacuum head; this will prevent it from scratching the floor.
It is a good idea to use the microfiber cloth first and then the vacuum.
However, you do need to keep an eye on the vacuum cleaner wheels; they could scratch your hardwood floor.
Mopping
You do need to mop your floor once a week with a damp mop. but, you should never use a wet mop.
It is important to get a product that is designed to clean wooden floors.
You’ll then need to follow the guidelines on the product to ensure you use just enough of the substance to get the floors clean.
The mop must only be damp; wet mopping a hardwood floor can damage its finish and the wood.
Polish It Up
To keep the shine on your wooden floor you’ll need to give the floor a polish every 2 or 3 months.
Again you’ll need to use a product that is specifically designed for it and follow the instructions given on the product.
The aim is to get a shiny floor and you should be able to remove any small scratches with the polish; helping your wooden floor to look like new.
It is also a good idea to consider the amount of sunshine that hits your wooden floors. The UV rays and the heat can damage the wood. If you’re not using a room you may prefer to draw the drapes or close the shutters; this will help to protect your floor.
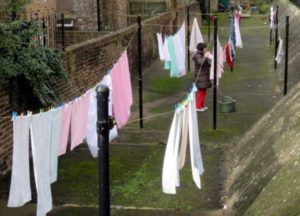
When I was growing up all the washing lines looked like this. . . . long straight nylon ropes.
Since then things have changed backyards have got smaller and some people don’t even have washing lines, everything goes in the tumble dryer
Well I think there are some good reasons why you should have a washing line.
Reasons for a washing line
Cost
A full cycle of a modern tumble dryer uses around $1 of power.
With just two of us at home now we would still do around 4 loads of washing a week. . . . That means tumble drying everything would cost around $200 a year.
Sustainability
As well as the cost there is also the sustainability aspect.
If the electricity from that full cycle comes from a coal power station it will release around 4kg of CO2.
Condensation
Unless you have got a venting kit you could be putting around half a litre of water into the air which can result in condensation problems.
If you start getting damp patches on the walls and ceiling mold can then become an issue.
Better Results
UV radiation from the sunlight kills bacteria and dust mites.
In addition nothing really beats the smell and feel of freshly air dried cotton sheets.
Less Wear Of Your Clothes
All that lint in the filter is the result of wear as the clothes rub against each other and the sides of the tumble drier drum.
Space
So how much space do you need?
The load from a typical front loading washing machine will take up around 10m of line, with a top loader it could be nearer 15m.
I would look at providing enough line for at least a couple of washes.
To get that amount of line in a typical backyard a good option would be a rotary clothes line (the traditional Hills Hoist) with line lengths ranging from 40 – 60m.
Limited on space? you could go for a wall, or fence, mounted rectangular folding frame which should give you around 20m of line.
Generally you don’t have to go far to find a front brick fence falling over like this one.
Normally they fall over in the direction of the street.
So why is this failure so common?
Reasons For Failure
People think “It’s only a brick fence” so don’t put a good foundation in, and only make it a single brick thick.
Simple brick construction is fairly brittle when any stress is placed at 90 degrees to the wall face.
Frequently the soil is built up on the garden side of the wall making the wall a retaining structure. with the consequent stresses which can be significant.
If the wall is built on reactive clay the street side of the wall is kept dry by the pavement while the garden side gets water seeping through and can be subject to soil heave.
What You Can Do
Construct a substantial foundation
Make the wall at least two bricks thick with steel reinforcement built into the wall.
It is also certain that you’ll suddenly feel lost if an electrical problem causes your television to break.
At that point you’ll need to have the number of the Electrical Detectives to hand; the sooner they sort the issue the quicker you can get back to your favorite programs!
To help prevent problems it is essential that you care for your television and other accessories:
Cleaning
Dust is one of the biggest enemies of any electrical item.
This can cause chips to overheat and fail. In worst case scenarios the chips can actually catch fire.
You need to wipe your television down on a daily basis with a dedicated television wipe.
This will remove dust and other dirt without scratching the surface of the screen.
It is important to use the right wipe; many contain alcohol or ammonia which will damage your screen.
You can also gently vacuum the air vents on the back of your television to remove dust from inside the device.
Environment
Electrical items don’t generally like humidity or extreme cold or hot rooms.
You need to consider the environment in the room where your television lives.
Keep the temperature steady between 10 and 25 degrees Centigrade and if you notice excess humidity consider investing in a dehumidifier.
This will help to prolong the life of your television.
Power
It is also important to look at your power circuits.
Plugging too many items into one socket can cause an overload which could short out equipment and even cause a fire.
Equally no matter how good your power supply is there will be times when there are power surges.
These can destroy the sensitive electrical inside devices like your television.
To protect against this you need to invest in a surge protector for your sockets.
This will ensure the power supply to your television remains constant.
You can even get surge protectors to safeguard an entire circuit; allowing you to protect all your sensitive electrical gear.
Repair Early
Televisions can be repaired for a fraction of the cost of replacing them; especially if an issue is caught early enough. When you undertake your regular cleaning visually inspect the television.
You should also keep your eye open for any irregularities when you’re watching it.
If you notice anything, then get the television repair person to look at it sooner rather than later; it could save you a lot of money.
In the same way you should be vigilant about any accessories that are connected to your television; such as a DVD player or surround sound system.
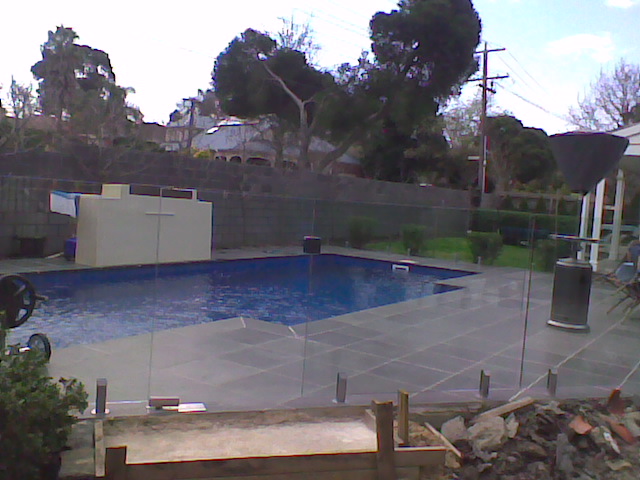
When you take the keys for your new home the house should comply with all regulations relating to falls. . . . . but after you move are you planning to do some improvements.
If you are planning a deck for entertaining or modifying the garden with retaining walls you need to think about protecting your family, and guests.
You can do a lot of damage with a fall from from a relatively low height.
If someone falls and you haven’t provided appropriate barriers you could be personally liable and the insurance company has the opportunity to avoid paying compensation.
National Construction Code
Here is a summary of the current regulations on protecting from falls:
Where people could fall 1 m from a floor, or through an opening a barrier must be provided.
The barrier must be continuous and extend for the full extent of the hazard; and be high enough to protect people from accidentally falling
The construction shall prevent people from falling through the barrier, including small children, and should be strong enough to withstand thee impact of people; and the pressure of people pressing against it.
It takes a lot of effort and works to till, plant and weed out your garden.
However the results are far worth it— vegetables, fruits, and flowers grow which you can proudly share with friends and family.
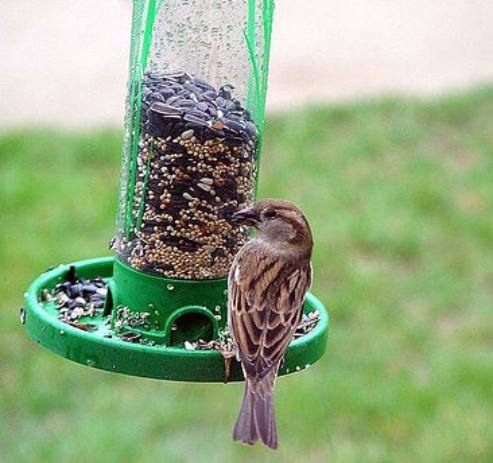
But, there is a pesky problem. . . .Birds— they love your garden, too.
Especially those seeds and fruits and vegetables they can put their beaks into.
Birds are not only a common hazard you can find destroying your gardens, and droppings are very unsightly!
So, what do you do? . . . Try these 5 strategies for a bird-free garden!
1. Bird Barriers
This is probably the most effective bird control strategy.
Bird netting can allow the sun or rain through while keeping pesky birds away.
They are simple to install and can just be tossed on top of your fruit trees.
For some common plants like blueberries, you can erect fence posts, bamboo or other stakes which the bird netting can hang on and sturdily anchor it to the ground with strong wires.
If carefully handled and maintained nets can be reused for several years.
Moreover, any bird guard material can be effective, like window screening and chicken wire (smaller birds can pass through).
If birds are pecking on your freshly planted garden seeds, then you can cover them with a layer of landscape tulle or fabric and removing them when the seeds have germinated enough.
You can also attach spikes to the building where birds love to congregate.
2. Get A Dog
https://www.flickr.com/photos/pandoozy/6334535751
Sheepdogs, border collies, and other breeds love to chase birds are quite good at it.
You can either hire a trained dog handler so they can patrol a bird-infested area or get a dog for yourself and train him.
Walk your dog in the early evening and early morning hours when birds are most active.
You not only control pesky birds but you also got yourself an adorable pooch to live with.
3. Scare Tactics
Birds are scared of humans, however, who likes the idea of standing in their garden all day long?
Well, a scarecrow can do the trick.
You can buy a pre-made one from your local garden store. Or, much better, create your own scarecrow by simply constructing a cross out of woods, cover it with clothes and stuffed it with straws to make it more realistic.
You can place your scarecrow in the vicinity of the birds and watch them fly away scarily.
You need to move your scarecrow around every few days in order to prevent pesky birds from getting too comfortable with it.
You can also change its clothes to scare birds more.
Like scarecrows, you can also place decoys throughout your garden.
Get a number of cheap, plastic animal decoys and place them on your garden.
Choose natural predators of birds such as coyotes, swans, owls, and snakes.
Re-position them every few days in order to keep the birds on edge.
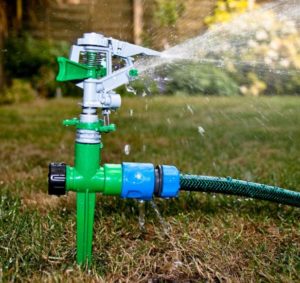
4. Activate Water Deterrents
This strategy might not be feasible in every space, however, it can be a great tool in keeping birds away from your plants and vegetation while also effortlessly showering them with water.
You can buy and install a motion-sensor sprinkler aimed at the infested bird area.
Every time a bird tries to land on your precious garden, the sprinkler will sense them and a spray of water will be sprayed, scaring them away.
Do not worry about the strength of the water stream since they are harmless and only keep birds away.
5. Build A Distraction
https://www.flickr.com/photos/kables/8367405
The only reason why birds love to hang out in your garden is that they are looking for an easy and convenient food source to nibble on.
Building bird feeders are a great way to attract these birds to a particular area in your garden and keep them away from other areas that you want them to avoid.
Just make sure that you monitor your feeds every day and give those birds an easy access in order for them not to look at other food sources in your garden.
Conclusion
Although some birds can be quite beautiful to look and enjoy at others can be downright destructive and pesky.
The tips above can help in order to deal with a pesky bird problem.
If these birds stubbornly decline to leave, then boost up your efforts by trapping or hunting them, or call in pest control pros in Pretoria.
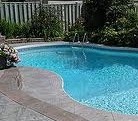
For a reasonable sized pool with a paved surround and proper fences you are unlikely to get away with less than $60,000.
Add it to your mortgage and you are going to be paying at least another $3,000 a year.
Running costs
Typical costs are:
Electricity is going to be around $1,000 a year.
Chlorine and other chemicals: $400 a year.
Maintenance of pumps covers etc $200 a year.
Plus much more if you are going to have heating!
Overall
Based on the above figure annual costs are going to be around $4,600.
But how many times a week will it be used over the 13 weeks of summer?
Well it could be 30 times during the summer holidays but over the whole 3 months 14-15 times a week is more likely.
$4,600 divided by (13 x 14) = $25.27 . . . and you don’t even get a decent swim, 2-3 strokes and you hit the wall.