Harvesting your own flowers and vegetables from your garden backyard is one of the most rewarding endeavours for homeowners.
You need to make good preparation if you’re to avoid making costly mistakes later.
A garden in your backyard has several benefits supplying you with fresh vegetable flowers whenever you need them.
A garden enhances the beauty of your outdoor space and gives a reason to spend more time outside than usual.
Let this be the year when you start growing your vegetables and flowers and stopping running to the grocery all the time.
The success of any garden depends on the soil preparation procedures.
You will need to plan well and prepare everything before you can start growing your first plants in the garden. . . . so here are some steps in starting a garden from scratch:
Mark the area you want to create a garden
The first step is to mark out clearly the area you want to start your garden.
You can make use powder to mark it or even wooden sticks.
Saw cut small wooden stakes and hammer them into the ground around the edges of the garden.
You can then tie a string from one stake to another to mark the boundaries.
The size marked depends on with the area available and the size of garden you want.
It is always advised that you start a garden bed that is easy to maintain as starting a garden is just a tip of the iceberg, as there is much hard work in maintaining it afterwards.
The area chosen must be experiencing at least six hours of sunshine a day as this are some of the requirements of flowers and vegetables.
Clear away the grass
Most probably the area is covered by grass.
Getting rid of the grass should be your next step as these will be competing for nutrients with your vegetables.
Starting a new garden means sacrificing on some part of your lawn.
Get rid of all the grass and its roots for excellent results with your vegetables.
Dig the grass with a spade or sod cutter.
However, if you have time, you can cover the grass with several layers of thick newspapers and inches of soil compost and wait for the grass to die.
Dig up the soil
Now comes tilling your new garden to remove unwanted materials like rocks and roots.
All debris can now be removed before you can test your soils.
Tilling the garden must be done to depths of 8-10 inches deep which helps completely break up the soil and loosen it. A steel rake might be used to remove all debris that remains after tilling.
Test, and modify, the soil
You need to test the soil for pH analysis and nutrients to see if the soil as the ideal conditions for growing flowers and vegetables of your choice.
You can use a self-test kit found in almost all garden stores.
These kits come with all the directions and how to test soil and the recommended pH and nutrient levels. This will also be a good time to add some compost to your garden.
Depending on the condition of your soil after testing, you can add nutrients to modify the composition of the soil.
Acid soils can be balanced by soda ash and lime while alkaline soils can be balanced by iron sulfate.
An even layer of nutrients can then be spread over the soil before tilling them into the garden soil with a shovel or tiller.
Edge your new bed
Edging your new bed is one of the best ways to prevent weeds from crawling into your garden.
Make a trench of about 8 inches deep and some inches wide all around your garden.
You can even sink an edging material around the perimeter of your garden which will help stop even the worst invaders from crossing through to your garden.
Edging your garden is a crucial procedure that not only stops weeds crawling, but also keeps plants in the garden safe as the edge clearly defines the garden and prevents mowers and weed trimmers from affecting the plants.
Allow the soils to rest for a week or two
You don’t plant immediately after finishing with the preparation of soils.
The soils must be allowed to rest for a week or two to allow the nutrients to settle and start working.
Even before planting, you still need to rake the soil smoothly with a steel rake to give the soil the final preparation.
Site your plants
Don’t just remove your seedlings and plant them immediately.
You need to site them if you are to get the spacing right. It takes a little time to site all your plants on the garden but it is worth the effort.
You are now in the final step of seeing lovely plants in your garden and want everything to come out just fine.
This will also help you know the plants to place next to each other.
Get planting
When every plant is in the right spot, it is time to start planting.
ALWAYS loosen or tease up the plant roots before placing them in the soil.
This is very crucial especially if the seedlings were root bound.
This gives the roots space to spread out and hold into the new soils.
The vegetables or flowers must be planted according to their won specific guidelines.
Add some mulch
Adding 3-4 inches or organic mulch is one of the best ways to keep your garden healthy and well-maintained.
There are several things you can use as mulch. Shredded barks of trees, dried leaves, straw or newspapers all work fine as mulch.
Mulch is essential helping prevent the growth of weeds and keeps moisture in the soil.
The mulch decomposes over time adding more nutrients to your garden.
You will probably see the benefits of mulch during the dry season when the soil needs to retain enough moisture to keep the plants going.
Water your garden
By now your garden is planted and well-mulched.
Giving the plants a good soaking is highly recommended to give them good moisture levels.
If you used dry mulch, the mulch would absorb most of the waters before the soils.
It is always better to soak the mulch before using them or water them after spreading them in your garden around your plants.
As you can see, there are a lot of things that must be done before one experience the rewards of a garden.
There is nothing complex about starting a garden from scratch as long as you follow all the steps.
You will be able to see healthy plants growing in your garden in a few weeks.
Dianne Lampe blogs about gardening at www.igardenplanting.com She is passionate about all things related to gardening and blogs about indoor and outdoor planting as well as offering useful information about the best gardening products.
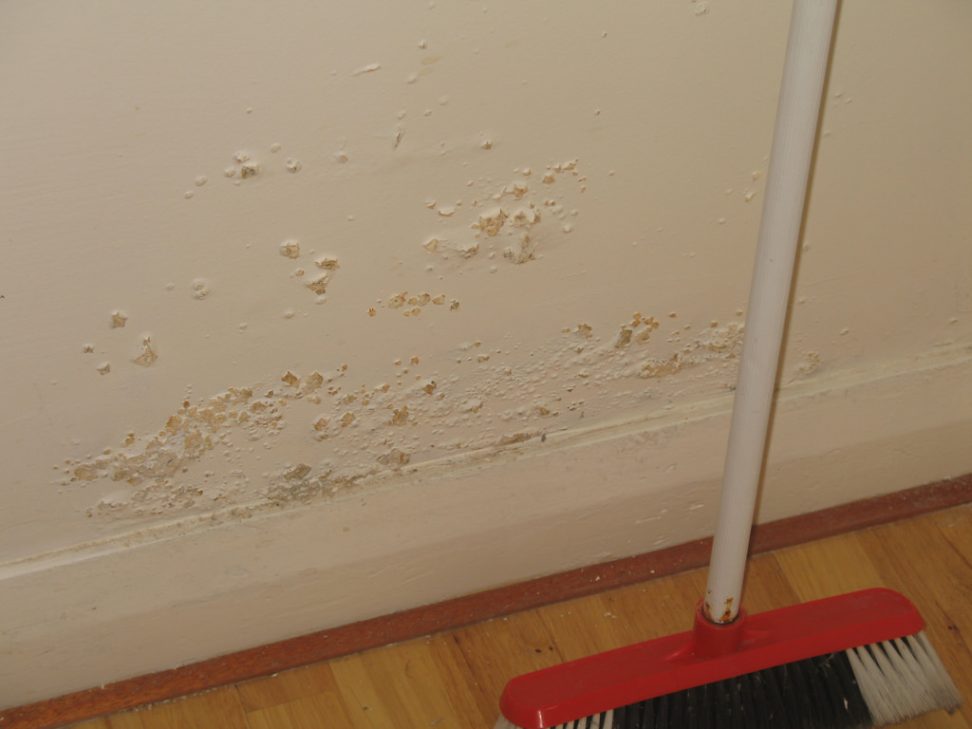
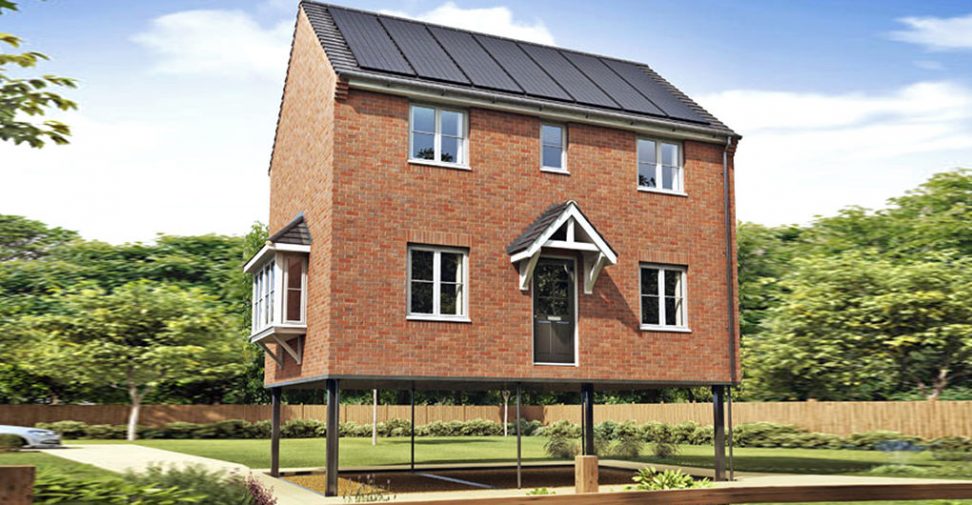
For anyone who thinks they can just leave everything to the builder this recent report in the Melbourne Age makes depressing reading:Faulty Building Crisis.
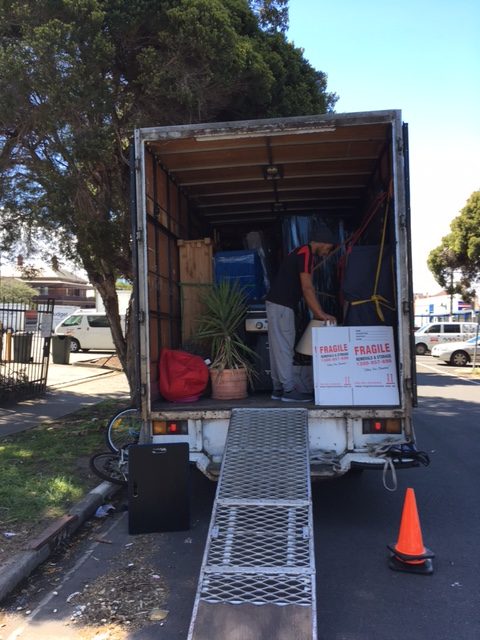
You’re finally getting out of the rental apartment and into your own home!
It’s an exciting time, but it can also be pretty stressful.
You have to make sure you’ve packed everything properly so nothing does missing or gets broken in the process.
You also make sure you want to tie up any loose ends you have around the old place, such as the thorough end of lease clean, at least with Whizz end of lease cleaning app you have one stress taken off your mind, but what about all the others?
With this being such an exciting and stressful time, it’s understandable for things to slip your mind. If you feel like you’re forgetting something, or don’t know where to start, here are 5 moving tips for the new homebuyer.
Make sure you’re connected
You’ve moved all the boxes and furniture into the house, now all that’s left to do is unpack.
Yet, when you go to turn on the lights you find you’re not connected to electricity yet!
Making sure your electricity, cable, and internet is all sorted out in advance so you don’t have anything extra to stress about once you’re finally in.
Have your boxes sorted out
It may be easy when you first start packing to just put anything and everything into boxes to quickly get it done, but when it comes time to unpack, this can make the process an unorganised mess.
You are also faced with the possibility that some of your items could break in the move if they haven’t been packer properly.
If you label your boxes and keep everything sorted together, unpacking will become an easy breeze.
Cull
When packing for a move to a new place, you should be prepared to do a cull of old possessions you may not use or want anymore.
Bringing old things with you that are no longer of use in your life can be dead weight to the move and just end up taking too much storage in your new home.
Go through everything you have as you’re packing it away and decide whether or not you’re going to use it.
If you choose to get rid of it why not give it away to a charity so it can be passed on to its next home.
Don’t rush your buying
When it comes to moving into a new home furnishing can be really expensive, especially if you don’t already have furniture that fits in with you.
Once you’ve moved in, figure out what you really need at the time so you can budget properly and not end up with nothing.
Simple decorative items can wait whereas chairs, couches, appliances, and bedding are definitely needed for a home.
Forward your mail
Before you move, it’s a good idea to notify any company that you receive mail from frequently, or at all, of your move, rather than just rely on a paid post office redirection.
Notify them of the address change so they can immediately start sending your mail to your new house, this saves the person moving into your old spot the hassle of sending your mail back, or just simply throwing it away.
While moving is a stressful time for anyone, it’s also extremely exciting.
Don’t let it get in the way of all the good things that are to come, you now completely have your own space to renovate, redecorate, and do whatever you want in.
The moving process is a small amount of a stressful time compared to all the amazing times you will have to come in your brand new home.
I’m just in the process of getting a solar power system for my latest house.
One of the changes since I last bought a system is that micro inverters are now more common than they used to be…….so I thought I would do some investigation.
What Are Inverters
Basically the solar panels produce Direct Current (DC) Electricity.
The DC electricity needs to be converted to Alternating Current (AC) and matched to the Grid.
Basically the inverter is a box of electronics that carries out this task.
Difference between a Traditional Inverter and a Micro Inverter
A traditional inverter is a single box, on the house wall, that combines the electricity from each ‘String’ (group of panels) and does the conversion in that box.
When you have a micro inverter system each panel has its own inverter which is mounted on the panel of right next to it on the roof.
This photo shows an Enphase micro inverter, one of the more common types available in Australia
System Differences
Probably the first difference that most people will notice is that a Micro Inverter system will be around 20% more expensive.
One of the issues with a Traditional Inverter is that if one panel in a string is partially shaded it affects every other panel in the string. (if one panel fails all the panels in that string will stop working) This means that a micro inverter system can be more efficient.
The cables on the roof will run at a much lower voltage with a Micro Inverter making it safer.
If a micro inverter fails it means you will have to get on the roof.
So What Did I Pick
With only the two of us we decided that a 3kw system would be big enough.
Looking around the house there are no trees or other shading to affect the panel locations.
We therefore decided that the traditional inverter system would be fine as far as efficiency is concerned.
With 2 strings each limited to 1.5kw we thought the voltages wouldn’t be unacceptably high.
There’s nothing wrong in improving your property from time to time, even if it’s spending money.
Ultimately, it’s your property and it’s going to stand strong with you as one of your prized possessions or a valuable asset.
This is not to say that one should give up on everything else and shove one’s savings into property maintenance; however, little changes can be more than enough to keep up your property’s worth.
Here are few changes you can apply to enhance your property.
Window Treatments
If your facade has windows that offer direct visual access to one of your bedrooms from the street, you should consider speaking to a window tinting Melbourne based expert to ensure desired level of privacy.
Don’t forget you also may not want to be seen through the front door.
Coloured tints and reflective films are available for this use.
Tinting those windows will also keep the sun from shining into your room during summers whilst offering ample light for your everyday tasks.
Other films available are frosted effects, and a security film that resists attempts to break in through the window.
Bathroom
Most people know that a bathroom definitely seeks repairs and maintenance more often than any other part of a property, but they still need to figure out where to start and when to stop.
Over time, taps, mixers, flush tank, jet spray and shower heads start to drip even if they are tightly closed,
Bathroom maintenance should be done on a regular basis to prevent uncalled hassles in the future.
If your bathroom tap ware has rotating handle, you should consider converting to ceramic disc tap ware.
Modern ceramic discs are less likely to leak and last much longer without without needing repair or maintenance.
Wallpaper
Wallpapers are a perfect way to give your property a unique, more inviting appeal.
If you want to highlight a particular wall to create a stunning backdrop for your decor, a wallpaper can serve the purpose right.
With the right colour and design pattern, any wallpaper can create an illusion of bigger, cosier space every property owner would love to have.
Besides walls, you may use wallpapers against your property’s ceiling to add to your designer fans and lights the desired ornamental value.
Glass Panels
Frameless glass panels can find their application in any part of your property – whether interior or exterior.
If you have a swimming pool, you can consider frameless glass fencing option to improve the overall aesthetics and promote safety around it.
On the other hand, if you have a large hall, you may construct a small, isolated cabin in the corner by installing glass panels using stainless steel spigots for greater durability.
The application of glass panels within a property is only limited to one’s imagination.
Conclusion
It is important for a property owner to make sure his property is maintained to the desired standards, if not the highest.
You can contribute to your property’s value in your own subtle ways without affecting the overall architectural appeal.
While the aforementioned points will certainly help you in a way or the other, you are suggested to take a walk around your property and look into things that might be improved – since you know your property better than anyone else does.