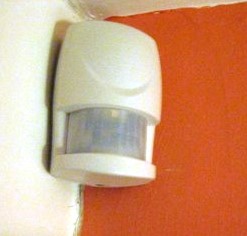
Why not plan some internal sensor switches for your new home.
Unlike the sensor lights commonly used for outdoors its common to have a sensor switch wired into the lighting circuit rather than a combined sensor and light.
For my last house I installed one in the Walk in Robe, which worked well.
Here are some things that I learned , from experiance, about installing sensor switches.
Location
Field of View
Make sure the sensor has a good view of the most of the room.
There is a temptation to have them mounted in the top back corner. . . . . In Walk in Robes the field of view may then be obscured by a high shelf and/or things stored on the top shelf.
Point into the Room
Its better to point into the room you wish to light.
The mistake I made was the sensor was opposite the door so everytime we, or our pets, walked past the open door the light came on.
Set Up
Most people don’t realise that sensors can be adjusted to improve their suitability.
Time
The time can normally be adjusted between around 10 seconds and 5 minutes.
When I first used the WIR and was looking for my shoes on the floor the light went out after a few seconds as I was below the field of view.
Adjusting the time to around 3 minutes gave a much better result.
Sensitivity
The sensitivity adjustment affects both the range of the Sensor and the size of the object that is being detected.
A lower sensitivity will avoid pets setting off the lights. (In the case of outside security lights this is really useful in avoid birds and possums causing the lights to continually going on and off)
Lux
This affects the amount of light at which the sensor will function.
At the lower level the light will only come on when it is completely dark, at the higher level it will come on during day light.
Usually a mid range setting will be best.
Finally
Make sure you choose the best light bulb for the room.
LED bulbs are better than compact fluorescent as they switch on quicker, and are at full brightness immediately.
Also check on Light Colour to check the light you are getting is the best to help you choose the best outfit.
Could you just heat the water by electricity generated by your Photo Voltaic (PV) solar cells?
I have carried out a desktop exercise to help you review the options.
Solar Water Heaters
There are now hundreds of thousands of solar hot water heaters installed around Australia so the technology is well understood.
One of the main reasons for their choice is they are fairly simple.
Also they are very efficient, as around 60% of the sunlight that falls on the panel is converted to usable heat.
This efficiency has meant that the panel size can be kept relatively small.
Direct Heating with PV Panels
Efficiency of Solar Photo Voltaic (PV) is much lower than solar hot water at around 20%.
To provide comparable direct heating using PV panels and an immersion type heater will need an area of panels larger compared with a solar hot water heater.
How Many Panels Will Be Needed
The equation for calculating the power to heat water is:
kW hours = litres x temperature rise in degrees centigrade / 853
Assuming the incoming water will be around 16ºC you are going to need to raise the temperature to around 60ºC
for 200 litres of water the equation becomes:
kw hours = 200 x 44 /853 = 10.3 kwhr.
1,000 watts of panel on average generates around 3.5 kw hours per day .
So to provide hot water by PV panels you will need around 3,000 watts, a considerable area, and expense.
Using A Heat Pump With PV Panels
One way of reducing the area of PV panels needed for water heating is to install a heat pump.
The most common hot water heat pump systems extract heat from the air.
Efficiency of heat pumps does vary between winter and summer but an overall Coefficient Of Performance (COP) is typically around 3.
That is for every 1 kW of electricity 3kW of heat are produced. (300% efficiency)
Since the National Broadband Network (NBN) became available in our area our story of customer service with Optus has been appalling!
Stage 1
At the end of March we tried to use the Optus on line system to book an installation.
After an on line discussions with an Optus representative we were told that the installation would be within 3 weeks.
Stage 2
Monday 19th of April, and the three weeks are up, and no sign of an installation. . . . . . We phoned Optus, after waiting on the phone for an hour Optus hung up on us.
Tried again and after another hour (My wife is very patient) we told that someone at Optus had cancelled the order the day after they had agreed to do the install. . . . would have been nice if they had told us!
The Optus representative agreed to arrange for NBN Co do some connections on the morning of 24th April with the modem being installed on Wednesday 24th April.
Stage 3
We received a text message saying the NBN installation would be in the afternoon of the 24th.
My wife spent more than 3 hours on three occasions trying unsuccesfully to contact NBN and Optus about when the connections would be done.
STAGE 4
Friday 24th April after my wife stayed in all day no one had turned up by 4.30pm.
After another hour waiting on the phone we were told “There is no appointment in their system.”
My Opinion
Well if you look on the Optus website you will find they say “Optus aims to lead Australia in delivering Outstanding Customer Service’. . . . . I DON’T THINK SO!
When I originally published this post I expected that with an installation appointment booked for 3rd May I wouldn’t have any further problems. . . . . . To see how wrong I was see Optus+NBN – Fail 2
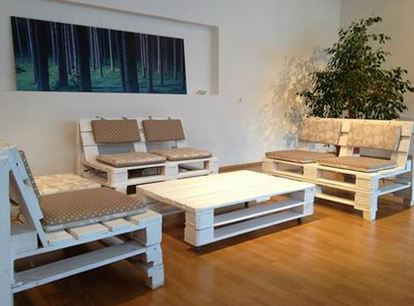
Green walls, known by a variety of names, including living walls, eco walls, vertical gardens or bio walls, are one of the biggest design trends of our era.
Originally developed in 1938, green walls were then known as “vegetative bearing architectonic structure and systems”. . . . A bit of a mouthfull and although an accurate description, the tongue-tying name has been shortened to Green Walls.
They are self-sufficient vertical gardens that are attached to either the interior or exterior walls of a building or structure.
Plants living in the green wall take root in a structural support directly attached to the wall itself and receive all necessary nutrients and water from within the vertical structure.
Living walls add many benefits to their environment, including overwhelming beauty, improved air quality, considerable savings in terms of energy costs, acoustics, sustainability, protection of the building, and increased property value.
Aesthetics
The most noticeable benefit of a green wall is its natural beauty.
A well designed living wall, compiled from a wide variety of plants and flowers, will add colour, texture and vibrancy to a space, and can be very visually appealing – essentially, a work of art.
Designs can be customised to enhance the look or theme of an existing space, adding beautiful touches of nature to anywhere.
Using green walls is an innovative way to accent a particular area, or to create a division of space as they are available in stand alone structures.
Quality of Air
Indoor green walls will drastically improve the quality of air in their environment.
The average person spends about 90% of their time inside where air quality is poor and there is constant exposure to harmful toxins and fumes.
Introducing a green wall will aid in absorbing and purifying the pollutants.
The efficiency of the wall will vary greatly depending on the size, and the particular species of plants used, as some species, especially tropical varieties, are highly efficient in air purification.
Having so many plants in a small area will create an oxygen rich environment, making it a healthier atmosphere for anybody in it.
Cutting Energy Costs
Both interior and exterior green walls offer significant savings in regards to heating and especially cooling costs, saving up to 20% overall.
Exterior green walls keep the outside structure an average of 10% cooler in summer, which means less heat radiates inwards, keeping the building cooler. Indoor walls have the same effect, however on a slightly smaller scale.
In the winter months, the microclimate created by green walls act as an extra insulation that reduces heat loss.
Sustainability
Introducing a green wall is a large step in sustainability, as it has hugely positive effects on the environment, as buildings become more eco-friendly and carbon emissions are minimised.
Outdoor green walls act as almost a small ecosystem, filtering air and rainwater and attracting butterflies, birds and useful insects.
Property Value
A green wall can increase property values considerably, as it adds so much to the property, both in visual beauty and the other benefits previously discussed.
Currently, green walls are on the cutting edge of design, therefore having one makes the property more marketable, and offers the area something to set it apart from the others.
How to Get Your Green Wall
Unless one has extensive knowledge of plants and the concept of a living wall, it is not recommended to attempt a project of this scale alone, especially indoors, as damage could be the result of error.
Inadequate fixing, or failure to provide a suitable watering system are two common failings.
Professionals like those at Gaddy’s Plant Hire can offer the knowledge and expertise required to incorporate a beautiful and useful green wall into your environment.
More options and information are available at Gaddy’s and a professional installation can offer longevity, as well as regular maintenance will ensure your green walls are effortlessly enjoyable.
I regularly hear the question “Where should the reinforcement mesh go in slabs?”
Well here is some advice. . . .
Understanding The Materials
Concrete – Strong in Compression, but weak in Tension.
Steel Reinforcement– Strong in Tension, and strong in Compression (As long as the concrete can stop it bowing)
Myth Busting
Lots of concretors will tell you “We put steel the reinforcement close to the bottom of a driveway slab because when you load a slab, the bottom is in tension,which needs the steel, and the top compresses.” . . . . . THIS IS WRONG!
Here Is The Explanation Why
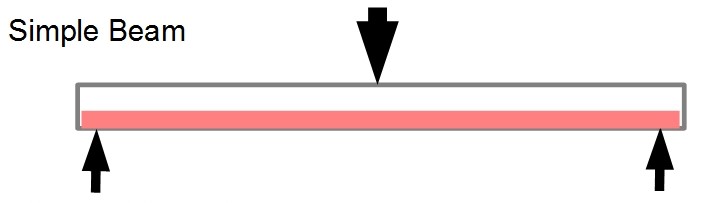
For a simple beam that is supported at the edges like the sketch below the bottom part, coloured pink is in tension as the load tends to push the centre downwards.
For this type of beam, or slab, reinforcement in the tension zone (the bottom) is the way to go. . . . . BUT THIS DOESN’T REPRESENT A SLAB ON THE GROUND!
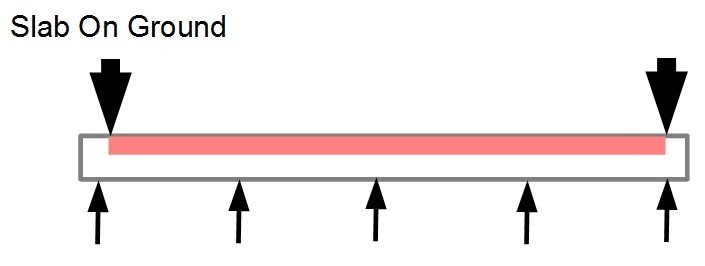
The sketch below does represent your typical slab on ground with the slab supported fairly evenly by the ground.
Typically the loading can come close to the edge of the slab; car tyres if it’s a driveway, brick walls for a house slab.
With the heavy loads on the edges but the support across the whole area the loads are trying to bend the ends down . . . so the tension area is the top.
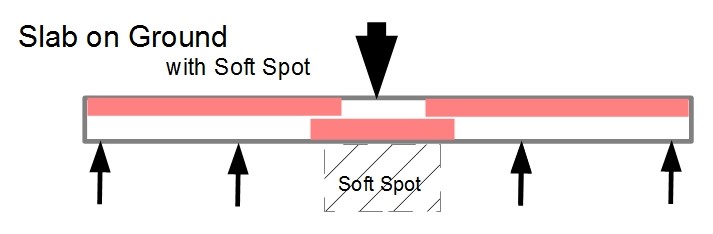
Finally here is the case where there is a load towards the middle of a slab over a soft spot such as a badly backfilled trench.
In this case at various points of the slab; the bottom, the top, or even the whole slab can be in tension.
What Is The Answer?
Well for a slab on ground the bending stresses (which cause tension) are actually quite low, as the concrete actually takes transfers the load to the ground by spreading it out over a wider area see sketch.
The main purpose of the steel reinforcement is to hold the concrete together and keep any shrinkage cracks as narrow as possible.
Conclusion
If you are concerned about the surface appearance, reinforcement is better closer to the top where it will better control surface cracks.
The best place to put steel mesh reinforcement in a concrete slab, cast on the ground, is about 1/3rd of the depth from the top. . . . . Unless you have an engineering drawing that says otherwise!!
Make sure the reinforcement is in the right position by insisting on Bar Chairs.
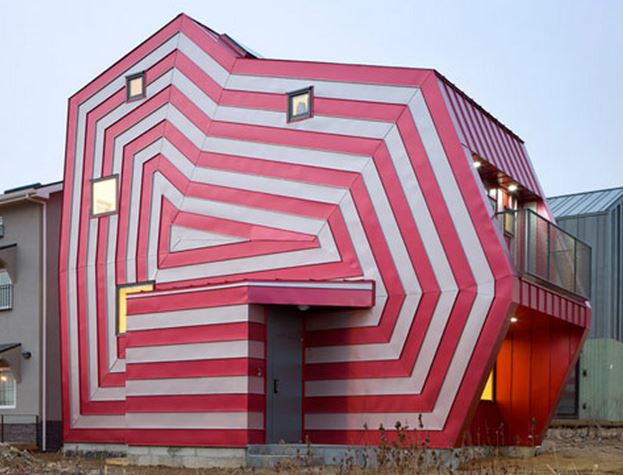
I saw this impressive shark hedge during a recent holiday.
It is in Railton, the Topiary Town, of Northern Tasmania.
I didn’t count them but there are 150 living sculptures around the town with some very impressive examples including a steam engine, a dinosaur, and an elephant.
There is even a shop selling topiary frames in the main street if you want to try your hand.
For more Unusual House Photos, Wins, and Fails, have a look at: What the………………….?
Have you ever tripped over electrical cable snaking across the floor?
I know I have . . . . more than once!
It’s a common problem if you want to use an electrical device well away from a wall, such as charging a laptop while you are sitting on a lounge chair.
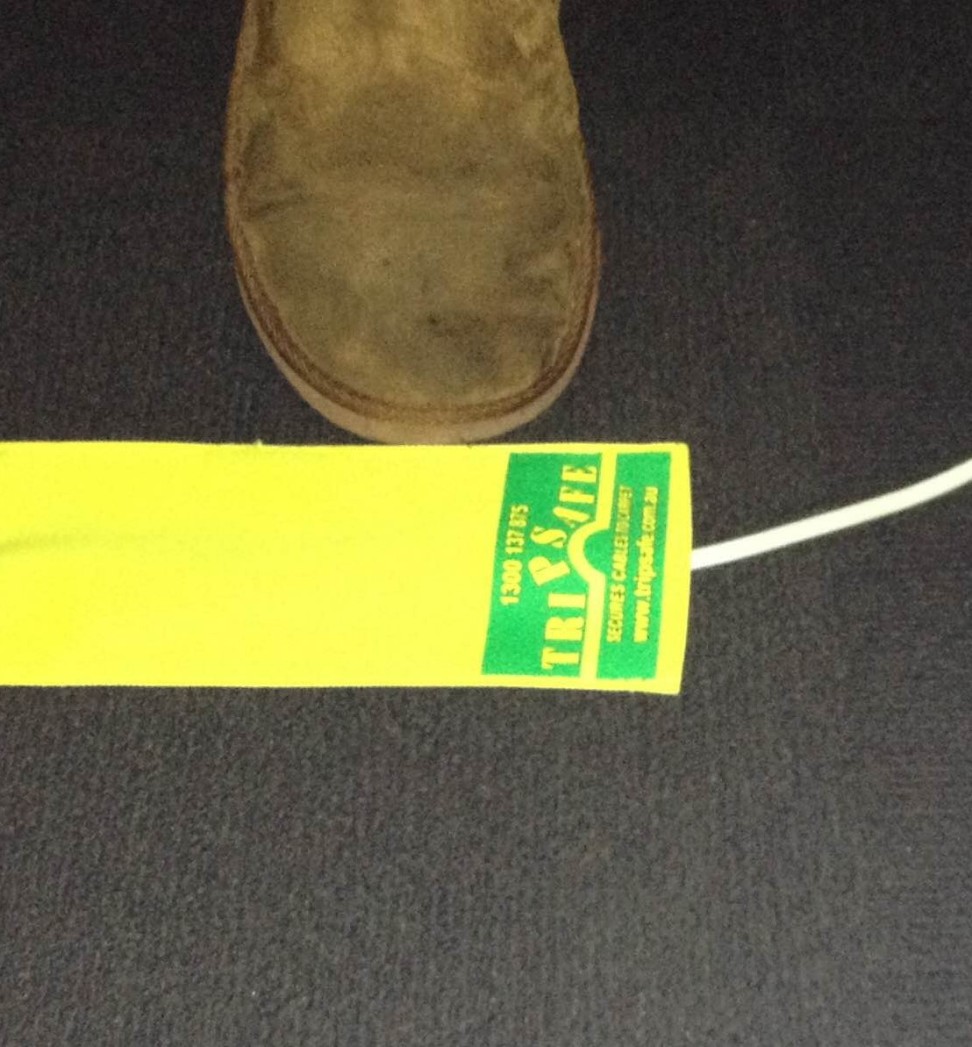
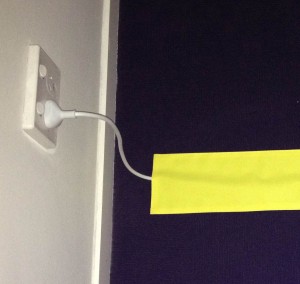
It consists of a woven top with Velcro right the way across the underside
It’s quite simple to use . . . just lay the cable on the carpet in a straight line and press the cable cover over it.
The Velcro, on the underside of the cover, grips the carpet tightly making it just about impossible to trip.
The model I tried was the 1.8m long and cost approx $45 including delivery.
Easy, and reusable, unlike my normal solution of Gaffer Tape.
Check Your Carpet
Although the Carpet Cable Cover is effective on a looped carpet, it is much less effective with tufted carpets so its worth testing first. (Get a piece of Velcro, hooked side, and lay it on the Carpet. . . . if it grips you should be OK)
No grip; then TripSafe do make a cover for hard floors, which is a bit more expensive at around $72 (including delivery).
Disclosure; I was sent a free Tripsafe Cable Cover to carry out this review, but received no payment. At the conclusion of the review the cover was donated to the Rotary Club of Hoppers Crossing for use at their meetings.
To get the best benefit from Grid Connected Solar Power you need to be up to date with the latest tariffs that apply to your installation.
These days the Feed In Tariff (FIT) is much less than a few years ago.
Power Tariffs
Here in Victoria the FIT for excess power put into the grid for new installations is $0.062/kwhr.
The above rate will also apply to existing installations that:
Are coming to the end of the initial scheme that had a higher FIT.
Have been eligible for a higher FIT but want to increase the number of panels.
This compares with my current tariff for power consumption of $0.248/kwhr. (I could get lower ‘Off Peak Power’ but it is a balance between paying more for ‘Peak’ and less for ‘Off Peak’)
Although these rates are specific to me the general relationship will be similar for most locations in Australia.
Change Your Usage Patterns
To maximise the benefit from the current tariffs you need to ‘Change Your Usage Patterns’ to maximise the use of the solar power when it is being generated.
To achieve this, during daylight hours, you should aim to:
Wash and dry clothes. (although drying clothes on the line is better than driers).
Cook meals and bake, for electric ovens, and cook tops. (or use a ‘Crock Pot’).
Run your swimming pool filter.
Recharge battery appliances.
When you are planning to change your usage patterns remember to stagger the operations times so you are less likely to exceed the output of the panels.
Although this does minimise power going to the grid. . . the real purpose is to minimise your power used when the panels aren’t generating and you are importing from the grid.
Consider Panel Orientation
If you are planning a new installation there are real benefits in installing a panel that will give maximum power generation when you would normally use the power.
For most of us that will mean considering a more Westerly Orientation, rather than the traditional north facing orientation.
This will means that you will be best placed to use the ‘Free’ Solar Power from, when you come home, until sunset.
If you find you use more power in the morning, then East facing panels would be of benefit.