Have you thought about bad weather when planning your move?
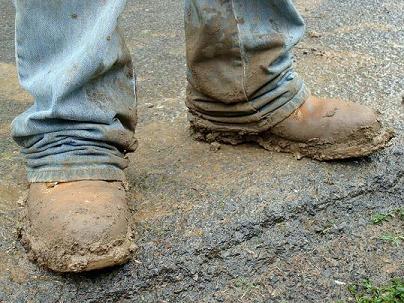
New house sites are not the cleanest and you don’t want to be treading mud and dirt into your new house.
Even just wet boots can make a mess of your brand new carpets.
So here are some things to think about before you move:
Outside
Are all the paths and driveways finished?
If not it might be a good idea to organise to get some gravel, delivered, spread, and compacted before the day. (If you don’t compact it will still easily get picked up on peoples boots)
Even if all the driveways are finished it might be worth giving them a pressure clean the night before, and making sure you have a stiff brush with you for the day of the move.
Inside
Getting one of those large floor mats to put at the front door could be a good investment. (Alternatively for around $50 you could make a mat out of a couple of square metres of outdoor carpet)
After the move you could put the mat in the laundry to intercept mud from the garden.
An extra precaution could be to put cardboard on the floor, in at least the hallway.
With sheets of cardboard tape them together to avoid your removalists catching their feet and tripping.
One good source of large flat sheets of cardboard is flat pack furniture, so it might be worth getting any flat pack furniture delivered in advance of the move.
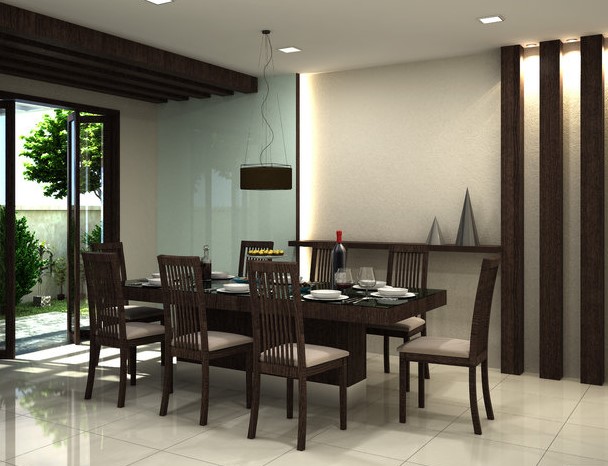
If you look round the options for eating a meal will be:
The ‘Island Bench’
The ‘Breakfast Table’
The ‘Formal Dining Room’
The ‘Al Fresco’ Dining Area/Barbecue Area
The questions you should be asking yourself are
“How many meals do you eat on your knee in front of the television?”
“How often will you really use each of these eating options?”
Original Reasons For Formal Dining Rooms
Historically Dining Rooms, which were only found in ‘Posh Homes’, were kept separate:
To keep cooking smells and steam away from the dinner table.
So guests wouldn’t see the clutter of the kitchen.
Most of the cooking was done by servants
Reasons For Not Having A Formal Dining Room
Modern extraction systems effectively remove smells and steam.
With dishwashers to hide the dirty pots and even ‘Butlers Pantries’ to hide the preparation work there is much less clutter.
As most of us can’t afford servants, why exclude one of the ‘cooks’ from the dinner table conversations?
The popularity of ‘Reality’ Cooking Shows tells us that cooking can be part of the ‘Entertainment’.
A dining room will be at least 12 sqm, so the extra area will add between $12,000 (Basic) and $24,000 (WOW factor) to the cost of your new home. A lot of money for something you may only use a couple of times a year!
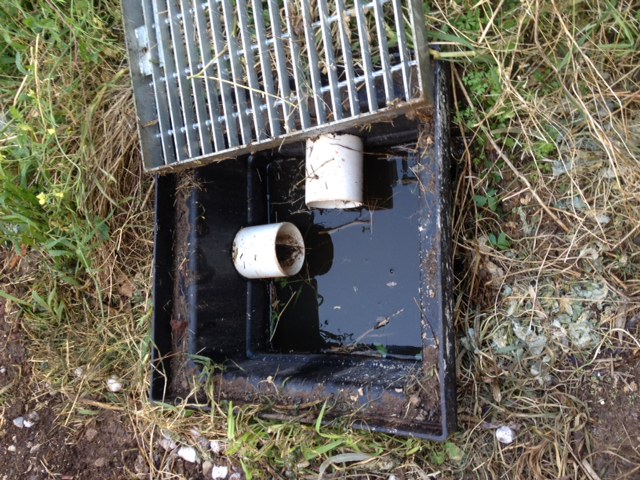
In the case of the above photo this is a combination drain and grate silt pit. (As the water can become stagnant this is a potential breeding ground for mosquitos!)
The pit may be either circular or square, with a base below the level of the inlet and outlet pipes. This means any sand or silt that gets into the drainage system will get washed into the silt pit where it falls to the bottom and can be easily removed.
Collecting the silt in the pit stops it being washed further along the system eventually causing a blockage,
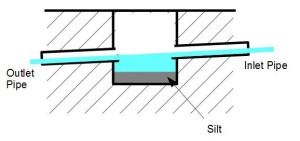
The following diagram illustrates how the silt pit works.
Part of your ongoing property maintenance, after you move in, should to check the silt pits every year. If the silt gets up to the outlet pipe the pit will need to be cleaned.
In Western Australia you are required to dispose of storm water on your block, rather than to a public storm water drain.
There are also many areas that don’t have public stormwater drains including many beach side areas.
In either case if this applies to your block then you will probably need soakwells, so here is some information.
How Soakwells Work
Basically the soakwell is an underground storage tank with holes in it so it ‘leaks’ into the soil.
The soakwell is surrounded by gravel which helps distribute the water ‘leaking’ out of the tank into the soil. It also prevents sand running into the tank.
Types
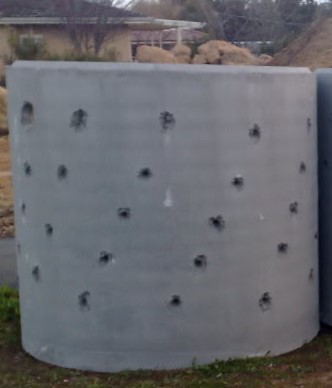
Traditionally soakwells have been constructed out of precast concrete like this round example on the right.
Now there are a range of options which include:
Plastic Tanks Made of Polyethylene, or Glass reinforced Plastic, these are really just a version of the concrete soakwells
Drainage Cells These are plastic mesh boxes that look something like plastic milk crates. They are stacked in the excavated whole wrapped in a geotextile. Make sure you have a Silt Trap before the drainage cells.
Location
In general soakwells should be further away from all buildings and boundaries than the depth of the soakwell (measured from ground level).
On restricted blocks I have heard of the soakwell being installed under the house. . . . perhaps OK on sand but not so good if there is clay soil (see Building on Clay)
Size
The size and number of soakwells required depend on the following:
Infiltration Rate The rate at which the water can be absorbed into the soil.
Maximum Rainfall The storage volume should be able to take the flow from the maximum rainfall less the amount of water that can ‘infiltrate’ into the soil.
Groundwater Level To be effective the entire volume of the tank needs to be above the groundwater level.
You should contact your local council to find out their requirements with regard to soakwells. A typical requirement is 1 cubic m of volume for every 80 sqm of roof.
For sites that have rocky or clay, the volume required will be much larger.
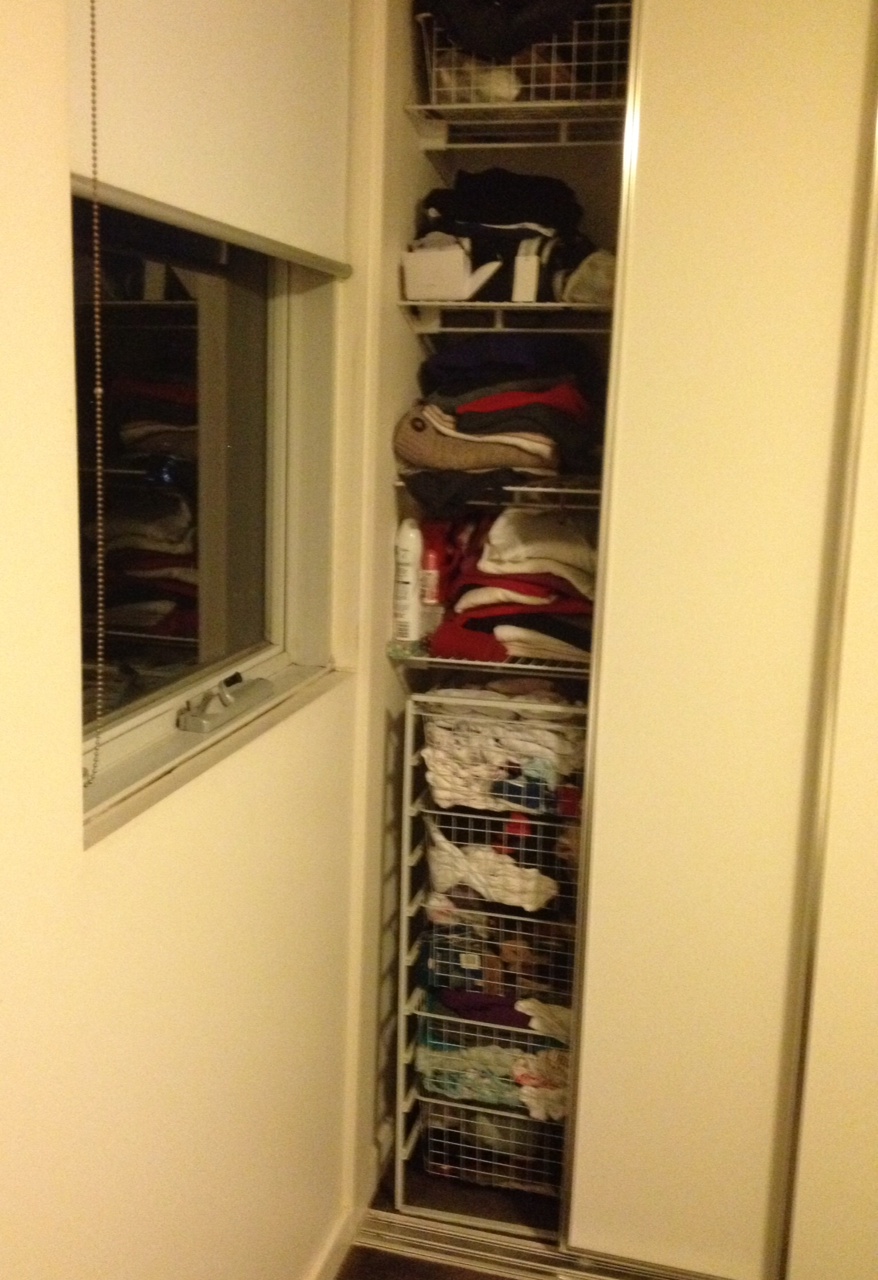
Get your wardrobe location wrong and you could finish up with mouldy clothes!
I have recently seen a few house plans with built in wardrobes along an external wall . . . . Not a good idea.
The Problem
Basically there is a lot of water vapour in the air in every house.
This water vapour can condense on surfaces that are cooler than the air such as outside walls, even if they are insulated.
The lack of air movement in the back of a wardrobe means that there is little chance of moisture drying out.
As a consequence the dampness gives mould the opportunity to grow on the walls and clothes that are touching the walls.
Although the wardrobe in the photo only has one end against the external wall we still have have problems when clothes have been allowed to touch the outside wall.
Some Solutions
Avoid having wardrobes backing onto an external wall.
Where a wardrobe does have an edge against an external wall think about how you will keep your belongings away from the wall.
Wire basket drawers, as in the photo, will allow air to circulate between the wall and the clothes
Finally
Another advantage of having wardrobes on internal walls is a wardrobe full of clothes will provide some extra noise insulation between rooms.
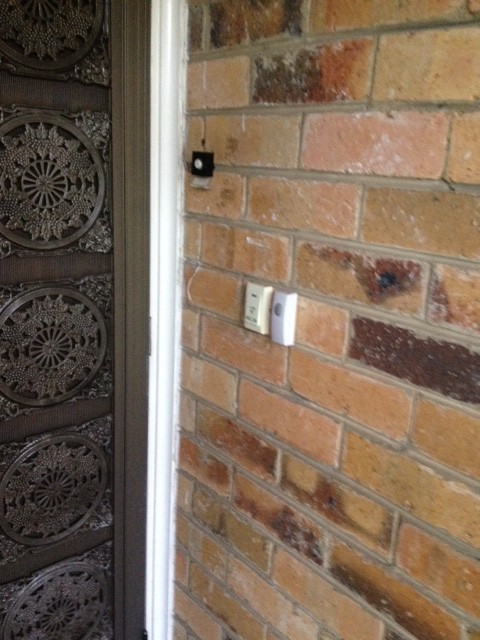
In my experience door bell buttons are unreliable, so I can understand that they need to be replaced.
The thing is if one isn’t working then wouldn’t it be best to remove it . . . . . something that doesn’t seem to have occurred to the people at this house.
I had to press all three before I got the right one (the left of the two white units)
For more Unusual House Photos, Wins, and Fails, have a look at: What the………………….?
Although a standard concrete can look good when polished there is also the opportunity to make the following changes:
Aggregate Talk with your specialist subcontractor who should be able to provide a range of different aggregates. (NB some porous aggregates such as sandstone and limestone are unlikely to polish up well)
Cement Paste In addition to the standard light grey a range of concrete colours can be provided with the addition of various oxide based pigments.
Typically if you want either, or both, of these options the slab will be laid with a layer of concrete with your selected finish as a final delivery of the pour, over a standard concrete.
Grind and Seal Finish
Suitable for indoor and outdoor concrete.
In this process the floor is generally ground twice . The floor can then be grouted (see below) followed by 2 coats of sealer to give the concrete a shiny appearance (The sealer will eventually wear and need to be sanded back and re-applied.).
There are typically between around 5 steps in the process.
An advantage of this process is that you are able to make it anti-slip by puting grit into the sealer. Great for around pools.
Mechanically Polished Concrete (MPC)
This high end process is really only suitable for inside concrete
This concrete polishing process the floor is generally ground twice depending, as above.
It’s then grouted (see below).
A densifier is then applied to harden the floors surface.
Next is up to 7 passes with diamond impregnated resin pads to get the desired shine (the concrete itself shines rather than a sealer which could scratch off).
Finally a penetrating sealer is applied to leave a stain resistant floor that that looks and feeling like glass.
The process has between 10 – 14 steps.
Aggregate Exposure
There are 3 levels of grinding exposing various levels of the aggregate commonly known as:
Nil Exposure –(less than 1mm) – Very little/no stone shows on the surface of the concrete (Difficult to achieve unless the concrete has been poured perfectly)
Minor/Random Exposure or Salt and Pepper Look (1-2mm) – Small amounts of aggregate visible on the surface – some areas may have minimal exposure while other areas some may have heavy exposure. – approx 1-2mm from surface.
Full exposure (5mm) – this is where you can see all the stones on the surface.
Grouting
Any insitu concrete will have some defects such as small ‘air’ voids or small cracks.
To get the best finish they need to be filled with grout.
With a natural cement concrete grouting may be carried out with a cement paste in the case of a grind and seal.
If you have a coloured concrete a better grout result is achieved by mixing a latex based product with the concrete dust from the grinding procedure to get a better colour match. This procedure should always be done for mechanically polished concrete.
Summary
There are a lots of options when thinking about ‘Polished Concrete’ so make sure that you understand the options and specify exactly what you want.
One of the reasons that people may choose a builder is the promise of a ‘Quick Build’ . . . . . but how realistic is that promise?
Getting the house finished quickly might be attractive to you so here are a couple of things to think about before you make a choice.
Is Obtaining Permits Included?
Builders will either want to say they aren’t responsible for any planning/building permit delays of over 1 month, or even exclude the planning/building permit period entirely from the period.
Approvals should be quick for a new major development subdivision and may only take around a month.
If you are building in an established area such as an single block subdivision, or Knock Down Rebuild (KDR), it can take several months.
What Are The Liquidated Damages?
Any ‘Quick Build Offer’ means nothing unless you are compensated for any time overrun!
The way this is done in a building contract is by specifying a Liquidated Damages amount.
Unless this amount is a reasonable sum (say close to what you are paying in rent) the offer isn’t really worth anything!