Concrete – After the Concrete is Laid

Concrete Myths

Some people think that concrete is strong enough the day after it is laid……..WRONG

Some people think that concrete ‘dries’……..WRONG

Hardening of concrete is a complex chemical reaction which requires time and moisture.

Concrete takes at least a month to reach its final design strength.

This time is known as the ‘Curing Period’.

During this time the concrete strength will increase but the slab will also shrink.

Strength

The typical slab laid and exposed to air after finishing will increase in strength as follows:

After 1 Day – The concrete will have about 20% of its design strength. Being still relatively weak it can easily be damaged. If you are going to have saw cut joints now is the time to cut them. You can also remove any formwork.

After 3 days – The concrete will now be at around 60% of design strength. You should be able to walk on it and use wheel barrows without damaging it. This is the earliest time I would like to see frame erection start on a house slab.

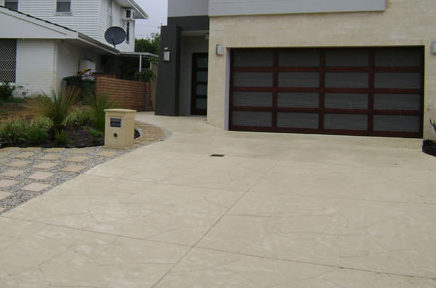
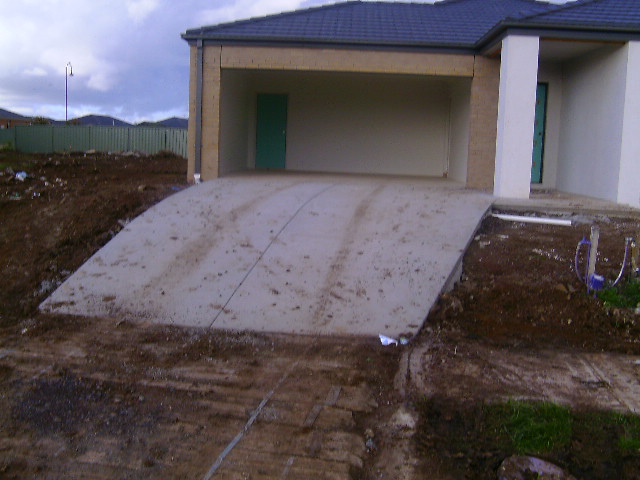
After 7 days – Around 80% has now been achieved. At this stage you should be able to use a driveway for cars

After 28 days – Design Strength Reached.
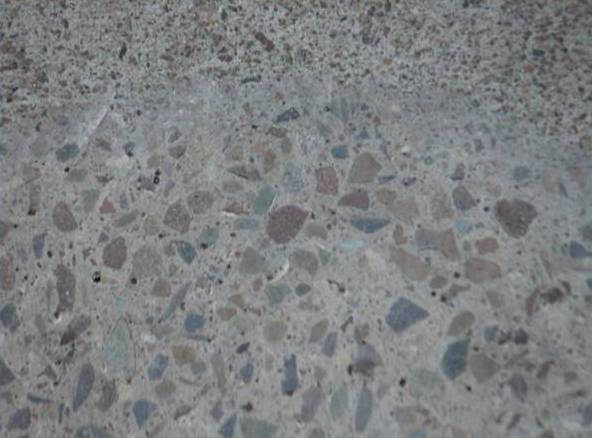
Shrinkage

During the 28 day curing period the concrete will shrink by 0.8 – 1.3mm per metre. That’s 2.4 -3.9mm for a 3m slab. This means:

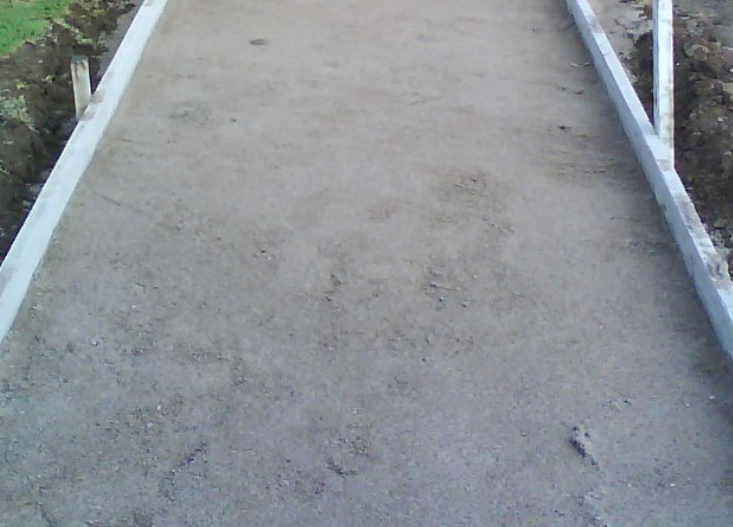
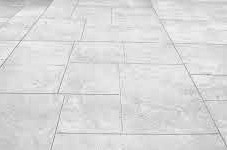
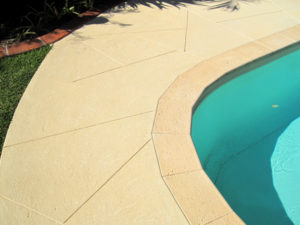
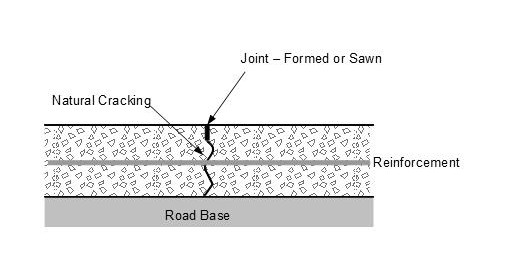
  • Paving – Unless you have adequate joints this shrinkage will stress the slab causing cracks.
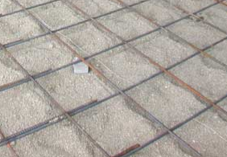
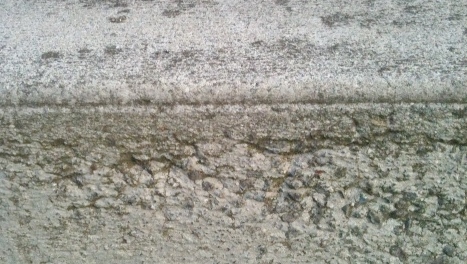
  • House Slabs – The slab is normally cast without joints so its usual to find that there are fine cracks. As long as there is adequate reinforcement in the slab these cracks should be less than about 1mm and are not an issue.

Curing Best Practice

Proper treatment of the concrete will improve the final result.

If treated properly during the curing period concrete can be up to 50% stronger than the Design Strength, and will also be stronger at each stage of the curing period.

There is also less likely to be fine cracking of the surface.

The most important thing during curing is to stop the concrete drying out too quickly.

Ways to achieve this include:

    • Covering with material such as sacking, sand, or Old Carpets, which are kept damp.
    • Covering with Plastic sheet.
    • Apply a Curing Membrane (You may need to go to a specialist supplier for this)
    • Regularly spraying the slab.once the initial set is achieved (wait at least 12 hours.

Frost

Frost can damage curing concrete reducing the final strength.

If you are in one of the colder states during winter protecting the concrete by covering it at night is a good idea.


For more posts on on getting your paths and driveways correct see Concreting


Concrete – What is It?

Concrete is an artificial stone that you can make yourself.

It has four ingredients that all contribute to the overall strength.

  • Large stones (Aggregate) – The aggregate provides shear strength to the concrete. In other words the concrete has to crack around rather than through the stones. A good aggregate will have a mix of stone sizes rather than just one size of stone, this help the aggregate lock together
  • Sand – acts to fill in the spaces between the aggregate and further helps lock it solidly.
  • Cement powder – Is the basis for the ‘cement paste’ (glue) which coats the surface of the first two components and holds them together.
  • Water – Reacts with the cement powder to form the cement paste

Just like baking a cake its important to get the proportions of the various components right for the best results.

Too Much Aggregate compared with the sand and the cement paste will be be just cement coated stones stuck together where they touch. (known as ‘Boney’)

Too Little Aggregate, or Too Much Sand and the mixis called ‘Fatty’ There will be too little aggregate to provide shear strength and much of the aggregate will sink to the bottom.

Too Much Cement will cost you money without adding to the strength of the concrete.

Too Much Water will dilute the cement paste meaning the ‘glue’ has less strength and will also cause increased shrinkage as the cement cures. (It is very unusual to use too little water as the concrete will be very dry and as a result be hard to place and finish)

If you are going to lay large areas of concrete its probably be best to get premixed concrete which should have the ingredients in the correct quantities.

For small quantities you can buy bags of dry concrete mix where you just add water. Make sure you follow the instructions.

If you have got a job that is of a reasonable size but too small for premixed concrete here is a suggested mix:

  • Cement = 1 part.
  • Sand = 2.5 parts.
  • Stone or gravel = 3 parts.

This should be fine for paths, garden wall foundations, fence posts, washing poles, and driveways.

If you are going to order Ready Mix N25 (Normal 25) should be fine for a driveway, pathway or shed foundation.

For  similar posts see Concreting


Concrete – Preparing The Base

It seems to me that many people think that a concrete driveway or path will cover any number of shortcuts and other sins.

Well if you want a good finish, that will last, you need to make sure that preparation isn’t skimped.

Without a good base for the slab to sit on cracks will soon spoil the finished look of your drive or path.

This is what I would regard as the minimum preparation for laying a concrete driveway or path for a new home.

Well prepared base for concrete path.
  1. The area of excavation, and base, should be a minimum of the area of concrete plus 150 mm all round, except where the edge is against a wall.
  2. During dry weather excavate the area to a depth that will allow for the depth of the slab plus for a gravel base of at least 100mm.
  3. Check the excavated surface for soft areas. Typical soft areas can be; water logged, topsoil, and badly backfilled trenches.
  4. Excavate any soft areas and backfill with gravel well compacted in 100mm layers.
  5. Lay the gravel base to the required level making sure its well compacted, preferably with a vibrating plate compactor.
  6. Keep people and equipment off the area and make sure surface water is not allowed to flow across the area.
  7. Cover with a polythene layer. You can normally buy this off a roll by the m at a building suppliers for small jobs.


For more posts on on getting your paths and driveways correct see Concreting

Concreting – Bar Chairs

No we are not talking about seats in a pub.

Bar Chairs are used to make sure the steel reinforcement in concrete ‘sits’ in the right place.

Here is a typical plastic ‘chair”

And here is a different type.

Getting the steel reinforcement in place is very important in making sure you get the best quality slab. . . .and the only way to make sure is to ‘sit’ the reinforcement mesh, or bars, on these chairs.

The chairs need to be 800mm apart unless the bars in the mesh are greater than7mm diameter.

The reinforcement  in paths and driveways should be a minimum of 40mm from the top and bottom of the slab. (This typically means around the middle of the slab)

Some concreters, especially the one who give you a cheap price, will tell you you don’t need bar chairs as they can pull the reinforcement up to the right position with special hooks while they are pouring the concrete*.

This is completely wrong.

Below is a picture of the underside of a concrete slab that had to be dug up due to excessive cracking after using this money saving** ‘technique’.

You can clearly see the rusting reinforcement that was on the underside of the slab was doing nothing to stop the slab cracking.

To ensure you get the best slab make sure there are bar chairs in place while the concrete is being poured…………. I have been told its not unknown to put the chairs in place for a pre-concrete inspection and then take them out before the pour!


*Footnote 1: Many concretors disagree with me. . . but in America where they lay huge amounts of concrete roads they have developed special machines to pull the steel up into place. . . .In 300mm thick slabs they have found that the steel can be 75mm out of place (Federal Highways Administration).

So how can workers correctly “hook and pull” mesh reinforcement accuratly While Standing On The Reinforcement?

**Footnote 2: The actual cost of the chairs works out at around $1/m2 of concrete!

For more posts on on getting your paths and driveways correct see Concreting


Concrete – Reinforcement Mesh

Purpose of Steel Mesh Reinforcement

A lot of people believe that the steel mesh adds substantially to the strength of concrete paving.

This is a myth!

The truth is large areas of concrete paving will crack.

What well thought out reinforcement steel does is:

  • Limits cracking where you don’t want it (in the middle of slabs)
  • If some cracking does occur it holds the cracks tightly closed.
  • A reduced amount of steel across joints helps to make sure that cracks do occur at the joints (where you want it to crack).

Sizes and Types of Mesh Reinforcement

A single full sheet of mesh is 6m by 2.4m.

Many local suppliers will sell you half a sheet, or less, for small jobs if you plan on doing it yourself.

These are the common types of mesh that you can buy in Australia for paving work, with my opinions on what mesh to choose.

Type

Description

Comment

SL52

5mm dia bars @ 200mm spacing

For garden paths (max joint spacing 2m)

SL62

6mm dia bars @ 200mm spacing

For plain paths or patios (max joint spacing 3m)

SL72

6.75mm dia bars @ 200mm spacing

Caravan or Boat parking areas

SL82

7.6mm dia bars @ 200mm spacing

Front Driveway minimum for plain concrete

SL92

8.6mm dia bars @ 200mm spacing

Front Driveway best for patterned concrete

RL81

7.6mm dia bars @ 100mm spacing

Polished concrete floors

There are many more types of mesh but they are more specialised, the above will be fine for typical concrete slabs around your home.

Depth of Cover

The minimum cover from the top and bottom surfaces of the slab should be 30mm.

This will prevent the steel rusting once the concrete is placed.

To make sure you get this cover see this link: ‘Bar Chairs‘.

Overlap

When you need to join two pieces of mesh the overlap should be 2 squares.

Do Not overlap mesh across the site where a joint is going to be. That will stop the crack forming at the joint.

Rust

Don’t worry about a bit of surface rust on the mesh, although you should remove any rust flakes. The roughness of the corroded area help the concrete grip the reinforcement.

The alkali nature of the concrete will stop any further rust, as long as the 30mm cover is maintained.


See this link for advice on the thickness of concrete slabs: Concrete Thickness

For more posts on on getting your paths and driveways correct see Concreting


Cement

Some people confuse concrete with cement, but cement is just the ‘glue’ which holds the other constituents of concrete, sand and gravel, together.

There are a range of different cements but these are the three you will most commonly come across:

General Purpose Cement

This is consistent, versatile and cost effective product which makes it a good choice for most building works.

It is suitable for Domestic concrete slabs, driveways and footpaths

Trivial Fact -You may hear standard cement referred to as Portland Cement – This is because the finished concrete has an appearance similar to stone quarried from Portland in England.

Sulphate Resisting Cement

Sulfate Resisting Cement is a blended cement designed to improve the performance of concrete where the risk of sulfate attack may be present.

It also provides improved durability for concrete, and the steel reinforcement, in most aggressive environments, such as seawater exposure.

It has an additional cost, but it is much better for:

    • Geothermal areas
    • Soils containing sulphates
    • Saline Areas
    • Area that are frequently wet such as concrete swimming pools

Rapid Set Cement

Normally found in dry premixed concrete mixes.

This is a cement with various additives that speed up the reaction to give an initial hardening within 15 minutes.

Speeding up of the cement reaction time does lead to lower final strength.

This makes this product good for things like setting fence posts………… but NOT for significant structural applications.

Water Cement Ratio

One of the most important issues with cement is ensuring the ratio of water and cement is correct as this affects both the final strength and the durability. For instance:

  • Water cement ratio 0.5 (10L water to 20kg cement) is needed for high strength 35MPa.
  • Increasing the Water cement ratio to 1 (20L water to 20kg cement) will reduce the strength to 10MPa.

To ensure they don’t add too much water premix companies usually measure the water content in the sand and gravel piles and reduce the water content accordingly.

This means ading water to a premix lorry will affect the strength of the concrete

For more information see Concrete.


Liquid Limestone

You might have heard of Liquid Limestone as an alternative paving material…….But what is it?

Really its just a different type of concrete.

It is much more common in West Australia than other states.

The differences between conventional concrete and Liquid Limestone are:

  • Instead of standard Portland ‘Grey’ Cement it uses White Cement.
  • It uses crushed limestone rather than other types of rock gravel and sand.
  • Quite often a plasticiser is added. This means the mixture can be poured without having to add too much water.

Various patterns can be applied to the surface as the concrete sets. (see above photo)

As well as the standard limestone appearance the supplier can add various pigments. If you want a strong colour I think you would be better off  just going for coloured concrete.

Because it can be laid in large slabs like concrete there are less joints than in conventional brick or concrete slab paving. (There will still need to be some joints. For joint spacing see: Concrete Joints 1)

With the lighter colour it can be cooler underfoot than other pavements.

To maintain its appearance liquid limestone will need to be sealed around a week after laying.

Thanks to Concept Concrete WA. for these two great examples of  Liquid Limestone Paving

For  posts on on getting your paths and driveways correct see Concreting


Concrete Pavement Thickness


The concrete pavement comprises the actual slab and its foundation known as the ‘Subgrade’

Subgrade

A lot of concreters will say a concrete slabs don’t need any foundations……That’s Bulldust!

The area around your new home is likely to have had service trenches dug across it and be churned up by construction activity, which is not going to provide a strong enough base.

Basically you need to get rid of all unsuitable (soft) material including topsoil.

It needs to be replaced  with a minimum of 100mm of suitable subgrade material such as roadbase.

See Preparing the Base for more information,

Slab Thickness

Here are some recommendations for the minimum concrete slab thickness:

  • 75mm  – Paths and Patios
  • 100mm – Parking for Cars, Caravans and Utes
  • 150mm – Footpath Crossover and Main Driveway

The reason why I suggest 150mm for the main driveway is because this has the biggest risk of something like a delivery truck using it.


For another post on on getting your paths and driveways correct see Concreting


Concrete – Pavement Joints 2

Contraction Joints have been previously described in Pavement Joints 1

The second most common form of Joint is the Expansion, or Isolation Joint.

Although concrete does shrink as it cures, in hot weather it will expand.

Unless an allowance is made for  the expansion the concrete paving can push foundations. In long runs of concrete it can create a hump in the paving like the photo below.

The following sketch shows a typical Expansion Joint against a building.

Holes are drilled into the concrete and steel ‘dowel bars are grouted in, so they all face the same direction. In order to stop the concrete holding onto the dowel and stopping the expansion the dowel is fitted with a close fitting plastic sleeve both the joint and the end cap are also fitted with a compressible foam.


For more posts on on getting your paths and driveways correct see Concreting


Concrete – Pavement Joints 1

I have previously talked about Concrete Cracking …….but how do you stop random cracking across your driveway concrete?

Well the best way is to control cracking by making sure it cracks where you want it to and the cracks are neat.

To do this you need  ‘joints’  which ensure the cracks in the right place.

A good rule of thumb for a reinforced concrete slab is the joint spacing should be no more than 25 x the depth.  That is for a 100mm thick slab the joints should be every 2.5m.

Un-reinforced and I wouldn’t be happy with a joint spacing of more than 15 x the depth.

Contraction Joints

Contraction joints, sometimes called control joints, are the most common type of joints. They are formed to ‘break up’ slabs poured over large areas into the smaller final slabs.

The following sketch shows some of the characteristics of a contraction joint.

The key features are:

  • A joint is either formed, or sawn, to weaken the concrete at the joint position. Below is a picture of a joint forming tool

  • Below the formed joint the concrete naturally cracks with a rough surface. This rough surface stops one slab moving up or down relative to the other slab.
  • Reinforcement continues across the joint to hold the joint closed. This reinforcement should be be weaker than the main slab mesh. One way to achieve this is by cutting out alternate bars in the reinforcement mesh.

Problems

Here are some of the the things that go wrong and mean you get random cracking spoiling the look of your concrete paving.

  • Too Much Steel
    This can be;
    • The mesh has not been weakened across the joint by removing alternate bars.
    • Two sheets of reinforcement mesh have been overlapped across the joint.
  • Shallow Initial Formed Joint This joint should be 1/3rd the total depth of the slab other wise it may not weaken the slab enough to form the crack at the intended position. When I have used a formed joint I usually run an angle grinder along the bottom of the groove  the morning after the pour to make sure it is deep enough.
  • Joint Not Sawn At Right Time If the joint is to be a saw cut it should be done 16 -24 hours after the pour. Too soon and the saw will pull stones out of the concrete leaving a rough edge. Too late and the concrete will have cracked at a place other than the intended joint.

You may think your concreter will know all this.  It’s a sad fact that a lot either don’t know, or don’t care, judging from  the jobs I see!


For more posts on on getting your paths and driveways correct see Concreting


Exit mobile version