Insulation Basics – Reflective Finishes

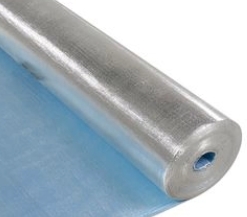
There are a number of insulation products with reflective surfaces now available but how do they work?

Why do the instructions tell you to put the more reflective surface on the underside rather that the top?

Here is some information to help you understand what’s happening.

All surfaces have different levels of ability to reflect heat with black and matt finishes being very poor and shiny metal surfaces being very good. Most reflective surfaces are also poor emitters of heat. This characteristic is called emissivity (normally written as ‘e’).

An example is clean aluminium foil has an ‘e’ value of around 0.03. This is much less than common building materials such as:

  • bricks ‘e’ = 0.9 ; or
  • Building membrane ‘e’ = 0.5

Low emissivity finishes are generally considered to have an ‘e’ value of less than 0.05.

As dust can increase emissivity by 0.25 Aluminium foil is only considered to be low emissivity on vertical surfaces or the underside of a inclined or horizontal surface such as a roof or ceiling, where it will remain clean.

The emissivity acts with the surface layer of air on the building material to give an overall R value for the surface.

The following table shows how the ‘R’ values increase with a Reflective (low emissivity) surface compared with a high emissivity surface.


Cavity Width

Direction of

Heat Flow

Low Emissivity

R value

High Emissivity

R value

Horizontal

Up

0.23

0.11

Down

0.8

0.16

Sloping 45 degrees

Up

0.24

0.11

Down

0.39

0.13

Vertical

Horizontal

0.3

0.12

You will see that low emissivity insulation such as aluminium ceiling insulation has better performance (Higher R values) when the the Hotter air is above the insulation than the reverse.

This means that in summer it resists heat during the day but allows the house to cool more quickly at night. In winter, however the performance in keeping the heat in the house will not be as good.


See Insulation for similar Posts

For Posts about Green Building see Sustainability
 

Insulation Basics – Weather Effects

When you are considering how much heat you will gain in summer, or lose in winter its not just the outside temperature you need to think about.

It’s actually the surface temperature of the outside wall, or window as it can be different to the outside measures air temperature.

Here are some thoughts on how weather can change the thermal performance of your new house exterior.

Wind Chill

Although people normally talk about wind chill with respect to clothes it applies to buildings as well.

Typically the most affected surfaces are windows.

For an exposed windy site the R value of the windows can be 25% lower than on a sheltered site.

Things such as changes to the micro-climate of you house will reduce wind chill.

Rain Wetting Walls

Once a wall gets wet the rate of heat loss to the outside in winter will increase due to evaporation cooling the wall.

This affects porous surfaces such as brick and wood more than impermeable surfaces like steel.

For a typical brick wall a moisture content of 5% can lower the termperature of the outer skin by around 25%.

The most effective way of avoiding this by keeping the walls dry is to have at least 450mm wide eaves.

Summer Radiant Heat

Have you ever felt a brick wall after the sun has been shining on it for a while?

The radiant heat absorbed by the wall can make the wall surface 5-10 degrees hotter than the surrounding air.

If you are doing calculations for air conditioning this can make a difference to the required cooling capacity of the unit.

So keeping the summer sun off the north and west facing walls with wide eaves, verandas or pergolas will help keep your house cool.


See Insulation for similar Posts

For Posts about Green Building see Sustainability


Insulation Basics – Vapor Barriers

When you are thinking about installing insulation you also need to think about Vapour Barriers.

Although I frequently saw mention of vapor barriers in books and articles it was a long time before I understood why there were needed……………. Here is my explanation:

  1. Warm air, inside the house, contains a lot of moisture (water vapor) which comes from people breathing, cooking, showers, flueless gas or oil heaters, and house plants.
  2. If this air is allowed to pass through the building structure it cools.
  3. As the air cools it can’t hold as much moisture and water condenses in the structure and in the insulation.
  4. The water can:
    • Waterlog the insulation reducing its effectiveness.
    • Cause rot in wood.
    • Cause corrosion, Particularly on the underside of a metal roof.

To stop the problems you put a vapor barrier………….Which is really an airtight barrier……….on the inside face of any insulation.

An Exception

You Don’t usually need a vapor barrier on the ceiling if you have a ventilated roof space as the air flow above the insulation will dry out any moisture in the insulation.

Cathedral ceilings  and flat roofs are a different matter and Do Require a vapor barrier as there is no ventilated space above the insulation.

Types of Vapour Barriers

Vapor barrier don’t have to withstand any pressure so they can be quite thin. Examples are;

    • Polythene sheet,
    • Reflective foil,
    • Foil backed plasterboard,
    • Water resistant painted surfaces,
    • Impermeable insulation such as sheets of polystyrene.

All joints and overlaps in the vapor barrier should be taped or glued to make sure no air gets through.

See Insulation for similar Posts

For Posts about Green Building see Sustainability

For more about Moisture Problems see this link: Condensation.


Insulation Basics – ‘R’ and ‘U’ Value

R Value

R1.5 Batts, R2.0 Batts……. all the way up to R6.0 Batts, but what does it all mean?

The R value is a measure of the thermal resistance of the component of the material. In other word how hard it is for heat to pass through that component.

U Value

Once you have the R value  you can calculate the Heat Transfer Rate, the U Value.

The calculation is U = 1/R (The units are watts/degree C for each square m)

To get the R value of a structural element, for example a ceiling, you add the total of all the R values of each of the components.

The following table shows the effect on the value of ‘U’ for various levels of Insulation for a ceiling.


Table 1. Ceiling ‘R’ and ‘U’ values

Batts

Total R value

U value

No insulation

0.36

2.78

R1.5

1.86

0.54

R2.0

2.36

0.42

R4.0

4.36

0.23

Examples

So how do you use these figures?

The following two examples are for a house of 150m2, which you want to keep at 22 degrees C

  1. On a summers day the temperature in the roof space is 50 degrees C (not unusual in Australian summers) and you want to cool it to 22 degrees C, a difference of 28 degrees C.

Heat transfer through ceiling = 150 x 28 degrees x ‘U’

  1. On a winters day the temperature in the roof space is 5 degrees C and you want to heat the house to 22 degrees C, a difference of 17 degrees C.

Heat lost through the ceiling = 150 x 17 degrees x ‘U’

The results of the heat gains and losses for the various R levels of ceiling insulations are shown in Table 2 below.


Table 2. Heat Gain / Heat Loss Through Ceiling.

Insulation

Summer Heat Gain

=

Cooling Required

Winter Heat Loss

=

Heating Required

No insulation

11.6kw

7.1kw

R1.5 Batts

2.3kw

1.37kw

R2.0 Batts

1.8kw

1.1kw

R4.0 Batts

0.97kw

0.6kw

You can see from the above table that by providing insulation you will need considerably less cooling in summer and less heating in winter.


See Insulation for similar Posts

For Posts about Green Building see Sustainability

Understanding Ceiling Insulation

I frequently see comments like “Ceiling insulation is next to worthless in summer.”

I have even heard people say “With a hot roof space it will be overwhelmed.” and “After the sun has gone off it stops the house cooling down.”

Here is the truth:

  • All insulation works by slowing the rate of heat transfer. If the roof space is hot some heat will pass through to the room below. The insulation will slow the rate that the room heats up from the roof space.
  • Ceiling insulation isn’t enough to keep the room cool by itself. The room will still get hotter if heat is leaking in through poorly insulated walls and windows.
  • Ceiling insulation, by slowing the heat gain from the roof space, will reduce the cost of mechanical cooling.
  • In a well insulated conventional ceiling minimal residual heat remains in the plasterboard and ceiling insulation. The heat in the room is just hot air. The best way to remove the hot air is to open the windows when the air temperature outside is less than inside, or run the air conditioning.


See Insulation Basics – Ceiling Insulation to see the difference it makes.


Condensation

Condensation,  a minor inconvenience,  or a major problem?

A little condensation on windows is easily dealt with, . . . . . .  but heavy condensation in poorly ventilated corners can lead to mould damaging your walls, ceilings, or even your clothes.

Why does Condensation Occur

Condensation in a building occurs when warm air, containing water vapour, comes into contact with a cold surface.

As the air cools it can’t hold as much water vapour so the excess changes into liquid water which is deposited on the cold surface.

The  water usually appears as surface condensation as water droplets or water film on cold surfaces, typically windows.

Condensation occurring on cold walls and ceilings is a major issue as it is when mold problems start. Of particular risk are wardrobes on  an external wall as there is a cold surface and a lack of ventilation.

Sources of Water

Here are five main sources of water vapour in the home

  • People A typical adult will lose around 0.8L/day of water, half from skin evaporation, and half from breathing.
  • Bathrooms Not just the obvious showers and baths, its also those drying towels and bathrobes 
  • Kitchen – Kettles, Pans, dishwasher, and the microwave will add water vapour
  • Un-Flued Combustion – Portable Gas Heaters, Gas Hobs, Bio Ethanol Heaters, even Candles, all emit water vapour into the room as they burn.
  • Laundry – Unvented Tumble driers, Airing Clothes.
  • Evaporative Cooling – Because it is mainly used in summer less of a problem, but can be an issue on cold nights.

Preventing Condensation Damage

Action to prevent condensation damage involves looking at both insulation and ventilation.

Insulation. Additional insulation in walls or ceiling will keep those surfaces warmer which will reduce the risk of condensation damage in most rooms .

Ventilation In bathrooms and kitchens the more moisture laden air means that insulation by itself will not be enough. The moist air needs to be effectively extracted to prevent condensation being an issue. (Although I have previously posted about Heat Loss due to Ventilation some  ventilation is  needed throughout the house)

Role of Double Glazing

Double glazing is often suggested as an answer to condensation however this is not really the case. As the windows are now less cold there is less surface condensation on the windows, so it looks like the issue has gone away. The problem is that without removing the moisture laden air the risk of condensation on walls and ceilings is increased.

See this link to find out why I prefer a separate Extraction fan in the Bathroom: 3 in 1 Bathroom Heaters

To keep moisture out of the insulation materials see this link: Vapour Barriers


Insulation Basics – Ceiling Insulation

Without effective insulation more heat is lost through the roof than either the walls or floor.

There are a range of options for insulating your new home roof with some insulation materials having different effects in summer and winter.

Here are the calculations for my last new house which had a tiled roof with R3.5 Ceiling Batts.

Element

R Value

Winter

R Value

Summer

Outside surface air layer 0.04 0.04
Tiles 0.02 0.02
Roof Space 0.00 0.46
R3.5 Insulation 3.68 3.35
Plasterboard 10mm 0.06 0.06
Inside surface air layer 0.11 0.16
Total R value 3.91 4.09
U value = 1/R 0.26 0.24

The heat losses in winter for a 200 sq m roof  with rooms at 15 degrees above outside temperature will be:

  • Area x ‘U’ x temperature difference = watts
  • 200 x 0.26 x 15 = 780w
  • Heating Requirement = 0.78kw/hour

The heat gains in summer for a 200 sq m roof  with rooms at 10 degrees below outside temperature will be:

  • Area x ‘U’ x temperature difference = watts
  • 200 x 0.24 x 10 = 480w
  • Cooling Requirement = 0.48kw/hour

Remember this isn’t the total heating and cooling requirement as heat is also lost through windows, ceilings floors and ventilation.

To find out about different options have a look at the Insulation Council Handbook.

See Insulation for similar Posts

For Posts about Green Building see Sustainability

Reducing External Noise


It’s not always possible to build in a quiet area so there are a number of techniques for reducing noise that you can use in your new home.

Here is a quick review of the options:

  • Minimising  windows facing the noise. OK  as long as the noise source isn’t on the North side otherwise you loose the effect of sunlight in the house.
  • Screen walls. These reflect sound. If you are going for this approach at the front of the house put some thought into the design of the wall. A plain wall just looks ugly.
  • Buffer zones. I’ve previously talked about Buffer Zones in relation to heating and cooling but they can work well in keeping some rooms quieter.
  • Soft landscaping. Absorbs sound, rather than paving which reflects sound. If possible a landscaped bund (low embankment) can be effective.
  • Roofing material.  Tiles will absorb more noise than a colorbond roof.
  • Acoustic Plasterboard. It’s possible, on special order, to get a range of Plaster boards including ones with a denser core that help to reduce sound transmission. A second layer of plasterboard at a different thickness to the original can help.
  • Ceiling  and wall insulation. Ordinary heat insulation batts will absorb noise but for the best performance it is better to use ƒspecialist acoustic insulation.
  • Glazing. Thicker glass will help but double glazing with a larger air will give better performance. The use of  laminated glass can also improve performance.
  • Curtains Heavy curtains can be effective, when they are closed.
  • Solid Doors. Better performance than the standard lightweight doors.
  • Windows and door seals. Need to be  properly fitted, and maintained.
  • ƒRefrigerated Air Conditioning.  Unlike evaporative cooling this doesn’t rely on open windows.
  • Sound absorbing materials Although acoustic tiles, carpets, underlays don’t stop noise getting in they will absorb it better than hard surfaces like tiles or wood floors.

To get effective performance  will require a range of the above options rather than a single ‘Magic Bullet’.

When you are considering these options its also worth bearing in mind that most of these improvements will also improve the thermal performance of your new house.


For more posts about plans see the Design Category.

To save money on Heating and Cooling see Insulation


Slab Insulation

I have previously posted about the relatively small heat loss from a slab on ground
But what if you have got in slab heating, or just want to minimise heat loss/gain from your house?

Before Construction

This sketch shows the placement of the insulation, if you can arrange for the builder to install it before construction.

The way this is installed is the insulation foam is installed inside the slab formwork.

A 40mm foam board with an R value of 1.0 will typically reduce the heat loss from the slab by 50%.

If you have a small builder or are having a custom home built this should be possible……some project builders however will probably be unwilling to do this installation.

After Construction

If you want to insulate after construction this detail is as effective as the previous method.

It works by using the soil as insulation.

Although soil is not a great insulator by stopping the heat escaping upwards 1m of  soil will provide a R value around 1.


See Insulation for similar Posts

For Posts about Green Building see Sustainability


Insulation – Heat loss Suspended Timber Floor

I have previously posted about the Heat Loss from a Slab Floor so how does that compare with a suspended timber, or particle board, floor?

Well its not as bad as you might think because the the space under the floor acts as a Buffer Zone between the room and the external temperature. (Unless you have got a pole house or a Queenslander.)

The main considerations are:

    1. The amount of external wall compared with the area of the floor, ‘ Perimeter to Area Ratio’ (PAR).
    2. The height of the floor above the ground (the calculations below are based on this height being 0.5m or less)
    3. The amount of ventilation expressed as m2/ m length of perimeter wall.

Heat loss Calculations

Perimeter to Area Ratio.

For a 10m x 10m house the PAR = 40/100 = 0.25

For a 20m x 5m house the PAR = 50/100 = 0.5

Ventilation

Low ventilation = 0.0015m2/ m length of perimeter wall

High ventilation = 0.003m2/ m length of perimeter wall.

The  table below provides some values of ‘U’ for the floor .

PAR

.2

3

.4

.5

6

7

8

.9

‘U’ low ventilation

0.4

0.51

0.59

0.66

0.72

0.77

0.82

0.86

‘U’ high ventilation

0.42

0.53

0.62

0.7

0.76

0.81

0.86

0.9

So for a typical single storey house of 20m x 10m

The PAR = 60 / 200 = 0.3

From the table ‘U’ is 0.51 -0.53 depending on ventilation

The heat loss from the slab = Area x ‘U’

= 200 x (0.51 -0.53)

= 102 -106 watts/degree C

The heat loss for this floor is 4 – 8% higher than the same sized slab on ground. The suspended floor will however have a lower thermal mass.


See Insulation for similar Posts

For Posts about Green Buildings see Sustainability


Exit mobile version