Bushfire Reserve – Volume

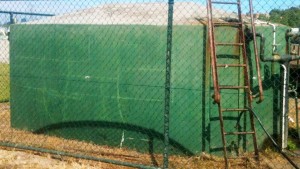
I have previously talked about Bushfire reserve supplies. . . . But how much?

I see various minimum water volumes put forward for bush fire reserves. For example in early 2014 the following applied.

  • Victoria, regulations for new builds require 10,000Litres.
  • South Australia the country fire service suggests 22,000Litres.

Just because there is a minimum requirement that doesn’t mean that is going to be enough water to deal with an incident for your property. Here are some thoughts on what I feel is appropriate.

  1.  10,000litres which can only be accessed via a fitting that meets the requirement of your local fire fighting service. This varies from state to state so check with your local brigade. This supply is really a last ditch supply available to the fire brigade when they are activly defending your property from direct attack.
  2. 2 – 4,000litres to assist you in dealing with ember attack with a hand held hose, in advance of the fire front reaching the property, and following the passing of the fire front.
  3. Adequate Volume to run a sprinkler system from starting the system until the fire front has passed. This volume will depend on the number of sprinklers, and the time you intend to run them. In other words Flow and Time:
    • Flow For a small house you could be using around 2,400litres per hour (Say 2  impulse sprinklers on the roof and 6 spray nozzles on the side of the house under attack) For larger Houses or those with several outbuildings the volume will be much larger.
    • Time The time will vary depending on your Fire Plan.
      • If you are planning to stay and defend your property you will want enough volume to defend your property during severe ember attack, while the fire front passes through your property, and to damp down afterwards. (Say 2 hours, 5,000litres)
      • If your Fire Plan is to set all the sprinklers running and leave early on days of high fire danger you will probably need to allow 12 hours running time per day of fire danger.(Say 28,000litres per day)

The above figures are indicative and any spray system should be properly designed.

Photo from Blazecontrol.com

Concrete – Adding Extra Water

A ‘Dirty Secret’ of the Construction Industry is;  adding of extra water to concrete mixes.

The ready mix concrete suppliers carefully design mixes with appropriate water cement ratios, which are loaded onto the delivery truck by computer controlled batching systems. . . . . . . All this effort on getting the mix right goes out of the window when the truck arrives on site and a hose comes out to arbitrarily add water to the mix.

Problems

Here are some of the problems adding extra water causes:

  • Too much water will cause settling and segregation of the aggregate to the bottom of the slab (with more sand at the top) which results in a lower strength slab.
  • Water that is not consumed by the chemical reaction will eventually leave the concrete as it hardens, resulting in holes that will reduce the final strength of the concrete.
  • As the excess water leaves there will be more shrinkage, resulting in larger internal cracks and visible fractures.

Reasons Why Extra Water Is Added

  • Easier To Lay A ‘wetter’ mix is said to be more ‘Workable’, in other words it can be spread and a top surface formed with little or no vibration. (Fully vibrated concrete will minimise voids in the concrete without the need to add water) Adding water saves the concretor time, effort, and hire costs for a vibrator
  • Delivery Drivers Time A ‘wetter’ mix comes out of the drum faster allowing the driver, who is paid per load, to fit an extra delivery in his day.
  • Material Costs Improved workability can be achieved by adding a plasticiser, rather than adding water, but this adds significantly to the cost.

Solutions

I have worked on big construction projects where every concrete delivery has been been tested before pouring. Any load that was too wet, or any driver seen adding water, and the load was sent straight to the tip. ( I once saw 5 consecutive deliveries sent to the tip)

For you, organising your own concreting, the best advice I can give make sure that anyone you ask for a price knows that are not prepared to accept added water.   Be prepared to pay extra for a plasticiser added to the mix.


For more posts on on getting your paths and driveways correct see Concreting


Missed The Bath – Fail

But when was this stuffed up?

  • When the bath was selected
  • When the tapware was selected?
  • When the bath was installed?
  • When the tapware was installed?

It does show how carefully you need to thick about things at Selection/Pre-Start.

Thanks again to Herman Fong for submitting this photo. (If you see something funny on a house send it in and give us all a laugh)


For more Unusual House Photos, and Fails, check out: What the………………….?


Bushfire Water Storage

If you live in an area that could be subject to wildfire having a bushfire water storage is important . . . . . .  Even if you have mains water supply!

Public water mains only have limited capacity. . . . . . . . In a bush fire situation Fire Trucks will be sucking water out of the mains and your neighbours will want to have their hoses running. The result can be you get nothing, or just a trickle of water.

If you are building a new house in an area that has a bushfire risk then there will often be a council requirement to have a bushfire storage tank. With an existing house in the bush you also should consider adding a bushfire reserve water tank

Your Bushfire Reserve supply should be set up so the water cannot be used up in normal domestic use.

Suitable materials for above ground tanks are either concrete or steel. In ground GRP tanks would also be acceptable emergency supplies.

The tank should be located where the it can be readily seen and accessed by the Fire Brigade.  The outlet with a connection that meets the State Fire Brigade requirements. (Check your local State Fire Service website for current details of minimum size, location, arrangement, and signing ).

For similar posts see Bushfire


Thermal Mass for Heating

If you read up about energy efficiency you will come across the expression ‘Thermal Mass’ . . . . . . but what is it? . . . . . and how does it work?

Materials with Thermal Mass

The most common materials with Thermal Mass in new houses are; Concrete, Stone, Slate, Tiles and Brick. In some cases water tanks can also be used to provide Thermal Mass. (But not easy to use as evaporation can  reduce the effectiveness, and the resultant humidity can cause damp)

A key characteristic of these materials are they are dense(heavy) and have the ability to absorb excess heat and then release it in cooler periods.

Thermal Mass need to be exposed. Covering with carpets or timber floors insulates them and prevent it from being as effective.

Heating

The trick is to put either ‘Free  or Low Cost Heat’ or ‘Spare Heat’ directly into the thermal mass which is released to keep your house warm longer.

Free or Low Cost Heat

Direct winter sunlight on a floor or a wall is a great source of free heat.  Just make sure you have Properly Designed Shade to keep the summer sun out.

Sources of low cost heat are things like using off-peak power, or excess solar power.  This can provide either direct heating, or run heat pumps circulating hot water into a slab.

Spare Heat

Each time a wood heater is filled with wood  it should initially be run with the vents fully open to minimise build up of creosote and soot in the flue . Without a thermally massive surround to help absorb the excess heat you can quickly over heat your room.

Any exposed thermal mass that is not heated may feel cool to the touch as it will be no warmer than the room temperature. However as the room cools this thermal mass will still release its heat back into the air to slow down the rate the room cools down. (This is known as ‘Thermal Lag’).

See Passive Solar for more posts

Is Modern Kitchen Design Making Us Fat

When I was young (about 50 years ago) obesity wasn’t really an issue.

In those days most houses had a small kitchen where a meal was cooked. We either ate in the kitchen or a small dining room. The rest of the time indoors was spent in the living room.

Since then there has been a move to more open plan houses and big kitchen with lots of food storage.

Now, for a lot of us, the most used room in the house is a family room containing the kitchen and a big television. Meals are often eaten at the kitchen counter.

What all this means is that we spend a lot more time sitting near cupboards, and jars, full of  tempting snacks like:

  • Cake
  • Crisps
  • Nuts
  • Biscuits
  • etc, etc.

We are also a lot closer to that fridge with those sugary drinks, and the freezer with tubs of ice cream.

I don’t know about you, but the only way I resisted temptation, and lost 12kgs a few years ago, was to keep biscuits and ice cream out of the house.

Will you be too close to temptation in your new house?

See Kitchens for more posts

Front Path – Fail 2

What an imposing facade!

But why is it spoiled by that letter box in the middle of the path? . . . . . Perhaps it’s because the letter box is hiding the water meter!

It’s funny how those water meters always seem to be in the wrong place. We had the same issue at my last new house, but solved it by widening the driveway to avoid the meter entirely.

Thanks to Herman Fong for submitting this photo. (If you see something funny on a house send it in and give us all a laugh)


For more Unusual House Photos, and Fails, check out: What the………………….?


Block Retaining Wall – Loose Lay

Loose lay retaining wall blocks are concrete blocks that have a nib cast on the underside. (see photo) This stops each block slipping forward of the block below.

There are a number of different manufacturers and most produce more than one type of block. You will normally find several different types of block in any of the big DIY Stores.

The sketch below shows a typical construction detail for this type of wall. (check the manufacturer’s web site as most provide comprehensive design and installation guides)

The most critical aspect of building a wall is to get the foundation and the first course right. Although you can use gravel I would probably go for a concrete foundation and then lay the first course on mortar to allow for adjustment.

Although this type of wall will be more expensive than a sleeper wall it can be laid in curves as well as straight lines.


See: Retaining Walls  for more posts


The Risk Of Too Much Security

As I visit lots of houses I often wonder if some houses have too much security.

I see lots of houses with roller shutters or even steel gratings over the windows like these.

Quite often when I ring the bell the owner seems to spend ages unlocking the various locks and bolt on the front door.

Yes they are keeping people out . . . . . but what happens if there is a fire in the house?

In a typical year around 70 People die in Home fires in Australia.

So before you put more security in your house . . . .Think about how you would get out in a fire!

Here are some thoughts about making sure you keep safe:

  • Although I typically have two locks on my doors I only lock the deadbolt when I am going out.
  • If you do want to lock the deadbolt while you are inside always leave a set of keys where it is easily accessible in an emergency.
  • Think about how you would escape through the window if you couldn’t get to the door. I would be able to smash a window and get out . . . But would shutters or bars lock you in, with the flames!


See : Doors and Glazing for more posts


Split Level Bedroom – Fail

Why would you go to the effort of building that platform for the bed? . . . . .and why the curves?

This could be a major hazard if you need to go to the toilet in the night! . . . . . . Fall off the step on the way to the bathroom, and trip over it on the way back to bed.

I found the photo on Hooked on Houses an interesting site with a mixture of funny and interesting posts.


For more Fails and unusual houses go to What the………….?


Exit mobile version