Did you know that around 90 Australian children are admitted to hospital each year due to scalds from the water from the tap, with many will requiring skin grafts.
Disabled and the elderly are also more at risk of scalding injury.
The water doesn’t have to be boiling!
Water at a temperature of 65 degrees C will cause full thickness burns in 1 second, even at 60 degrees it only takes 5 seconds.
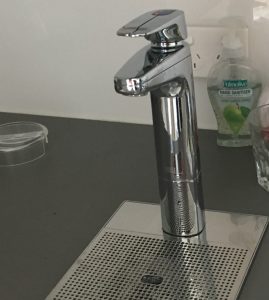
Those boiling water taps (pictured) for making tea are particularly dangerous
Solar hot water systems can be a problem particularly in summer
They can heat water up to much higher temperatures than the normal maximum of 65 degrees for gas or electric hot water systems.
Making it Safe
If you have a gas or electric system set the maximum temperature to 50 degrees C. If you are not sure on how to do this get a plumber to make the adjustment.
This will not only improve safety but save you money as the system won’t loose heat as fast.
If you have a solar hot water system make sure the tempering valve is fitted and set it at 50 degrees which will automatically mix cold water with the hot water if the hot water is above the preset temperature.
If you ‘must’ have a boiling water tap do set it right at the back of the counter where tiny fingers can’t reach!
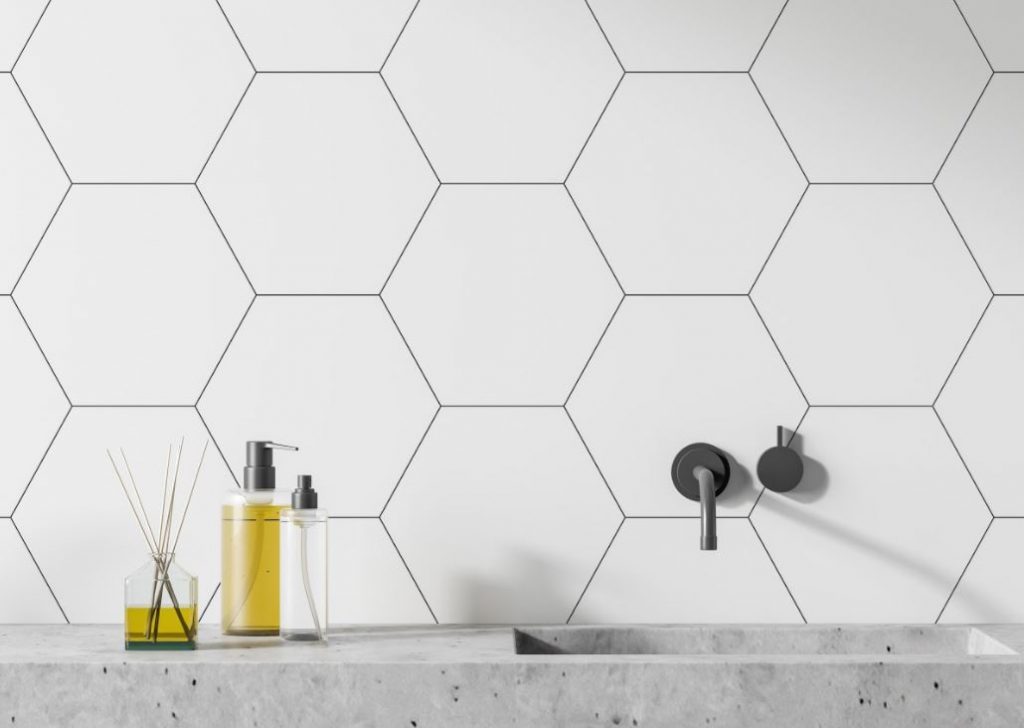
If you’re planning to replace the tiles in your bath or kitchen, besides choosing the right tiles, you’ll also need to find the tile grout that perfectly fits the look you’re going for. (Tile grout refers to the paste that seals the gaps between the tiles)
Although choosing the tile grout may seem like an insignificant part of the process, your choice will have a significant impact on the overall aesthetic and durability of the tiling job.
Tiles and grout work hand in hand to make the design shine.
That’s why it’s important to equally pay attention to the grout for your tiling project. For excellent grout options, check out Ardex Tile Grout.
In this article, you’ll find a few essential things to consider when you’re choosing the grout.
Type of Grout
Cement and epoxy are the two most common types of grout.
Both these types come in sanded and un-sanded varieties.
Cement grout is easily available and doesn’t cost much.
Epoxy grout, on the other hand, is more expensive and difficult to install, but is more durable and is more resilient to damage caused by water or chemical cleaners.
When choosing between sanded or un-sanded grout, keep in mind that sanded grout is more resistant to cracks, which is why it’s used for grout lines that are wider than 2 mm.
When sealing grout, the breathable sealers are ideal for light-colored tiles, especially in high moisture areas, since they don’t darken due to moisture.
If you’re checking out alternate design options, opt for brass or stainless-steel metal inlays.
Choosing the Color
While choosing the color of the grout, the tile design you have in mind is a crucial consideration.
You’ll have to decide if you want the tile and grout design to be matching, complementary, or contrasting.
Matching Grout: Using a grout color that matches your tiles will produce a subtle overall effect, making the tiles look more pronounced. This can also make the place look more spacious. Matching grouts work well if you have beautiful tiles you want to showcase, while keeping the layout basic.
Neutral Grout: Grouts in neutral colors like grey or beige work well to compliment almost all tile layouts. Neutral grouts are the safest design choice, especially when you’re going for a traditional and simple tile layout.
Contrasting Grout: Grouts used in colors contrasting the tiles are best when you want to accentuate the overall tile pattern. Dark tiles with contrasting grout can make the area look busy and are great for geometric design patterns.
The Shade of the Grout
When choosing the right grout color, consider both the aesthetic and practical aspect of each option.
Darker grout color can conceal the stains, but it also tends to fade quickly.
On the other hand, a lighter grout color may get dirty quickly and can be high maintenance.
That’s why neutral grout colors like beige and grey are popular, as they are easier to clean and don’t get discolored easily.
Overall Appearance
While choosing the right tile grout, consider the overall appearance of the area.
This will help you visualize how the grout will look in terms of the overall design.
Consider the location where you’ll be placing the tiles.
Wall tiles are more ornate and may require complementary or neutral grouts to highlight the tiles, whereas darker grouts for floor tiles can work well to define the space.
The spacing of the grout will also play an important role in the overall tile design.
Narrow-spaced grouts can give a seamless, blended appearance, while, wider grouts can make the tile grout stand out.
Maintenance Required
Since light-colored grouts tend to stain easily, they require frequent cleaning.
If you’re choosing darker colors, keep in mind that dark color grouts can produce efflorescence that would also need cleaning.
It’s important to seal your grout with a breathable sealant so the grout doesn’t peel off.
Your sealed grout will also require regular cleaning for maintenance.
Tile grout is much more than just a substance that fills the space in between the tiles.
It has a significant impact on your overall design.
That’s why, it’s vital to do your research and choose the right color, material, and sealant, instead of leaving it as a last-minute purchase.
You can get a few samples and try it with your tiles before you go for the final layout, which will help you get a clear picture of how the tile grout will look in the overall design.
Most house plans show a toilet in the master bathroom but a separate toilet in the other bathroom……………. Why?
Maybe it’s because you don’t want visitors to see the bathroom, but where are they going to wash their hands?
Is it because you want somewhere quiet to go and read?
In England the only time people generally had a separate toilet was downstairs when the main bathroom with a toilet was upstairs.
I used to hang my college certificates in the downstairs toilet in one house. . . . That’s because I think you should never be in a dignified position when you are reviewing your achievements.
To make your house more accessible for a disabled visitor, or even old or injured family members, it’s easier for the toilet to be in the bathroom.
To get an idea go and look how a disabled toilet is organised in your local shopping centre.
I suppose if you have a big family queuing for the bathroom it might be a problem but then I would have though the best thing would be, rather than have a bathroom and a toilet to have two shower rooms each having a washbasin and a toilet.
With the shower rooms being smaller than a bathroom they probably wouldn’t take up much more space than a bathroom plus toilet.
Perhaps in one room you could have a half bath rather than a shower tray so you could still be able to give small children and babies a bath.
Must have a separate toilet
If you really want a separate toilet, as many people do, here are a couple of reasons why you might think of opening the door outwards rather than inwards as is typical.
You can make the toilet area a bit smaller which can help fit it in.
If someone passes out they will most likely fall forward against the door. If the door opens inwards how would you get them out?
One question I haven’t resolved is how should you decorate a separate toilet and should you install magazine rack?
After all reading on the toilet is the only time most of us men do any multi-tasking.
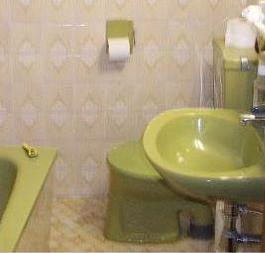
N.B I hope you liked the photo of the Avocado Bathroom. . . it was very trendy when we were re-modelling our first home
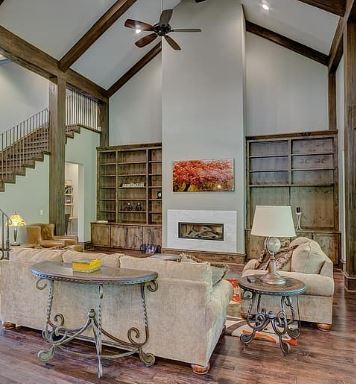
Rooms with higher ceilings always seem lighter and more spacious.
They can feel cooler in summer as the heat rises above your head, not so good in winter though!
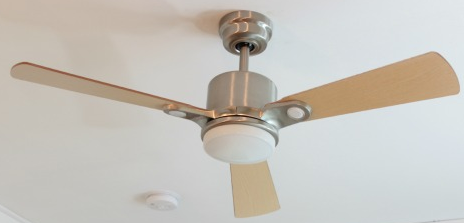
They are better for fitting ceiling fans, probably the cheapest form of mechanical cooling. (see this link: Ceiling Fans)
There is more choice of light fittings for tall rooms.
Most builders will normally provide a 2.4m ceiling height as standard. However there are a lot of people who are willing to pay extra for a 2.55m, 2.7m, or even 3m ceilings.
So what are the issues?
According to the Building Code of Australia (BCA) there are certain minimum height regulations.
For most Habitable Rooms (for definition see this link: Habitable Room) – The minimum height is 2.4m
For the kitchen (which is also a habitable room) 2.1m is the minimum allowed. Considering how much time we spend in the kitchen I think it’s strange that this should be considered different to other habitable room.
For Non-Habitable Room – For example bathroom, laundry, hallway, garage, cellar, storeroom then the minimum height is 2.1m.
You do get some dispensation for attics where you are allowed to have a bedroom with a sloping roof as long as 2/3rds of the floor area has a ceiling height of 2.2m. However you are not allowed to include in any floor area calculation any area with a ceiling height of 1.5m.
It can add significantly to your budget when you are Choosing a House or going through the Selection / Pre-Start. For every 300mm that you want to increase the ceiling height for a typical house you can expect to pay in the order of $8,000-$10,000 in 2020 prices. That covers the cost of extra courses of brickwork additional frame cost, and dry lining.
It can affect the Outside appearance of the house. (See this link: Outside Appearance for more information)
Although you can fit a ceiling fan in a room with a ceiling height of 2.4m the fan blades will then be at a height of 2.1m, so you will need to be careful about waving your arms in the air! See the following link for more information: Ceiling Fans
Some builders quote ceiling heights in brick courses so the post on Brick Dimensions explains how to compare brick courses with ceiling height
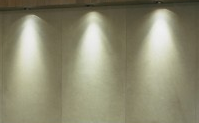
Downlights are very popular and can give dramatic light effects so you seem them a lot in show houses, and shops ……but I won’t have them again.
A but harsh? . . . . here are my reasons why.
The dramatic effect means that the light from each fitting is fairly limited in area so you need lots of them.
The cost of each individual unit, including installation is high. With four – six in small rooms and ten or more in large rooms the cost really starts to add up.
Because the light is directed down you don’t get much reflected light of the walls and none on the ceiling resulting in a very uneven light, not what you need for reading or general household tasks.
Because the down lights run hot its dangerous to cover them in insulation which means that the effectiveness of your insulation is reduced. .
Changing bulbs can be really fiddly and exasperating, especially with some of the cheaper fittings. Not good when you are working off a ladder.
Now LED downlights are common these are better than the old incandescent so if you love your existing downlights It could be worth upgrading to LEDs.
Here is a comparison of costs; A typical room will need at least 6 down lights at $100 each including installation, Total $600 and using around 50W. Compare this against a single $50 LED bulb on an oyster fitting costing $50 and using 15W.
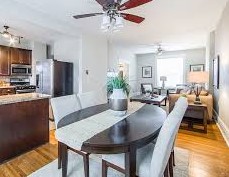
With the main rooms covered in previous posts I will cover the remaining rooms with this post.
Dining
For a dining table in the kitchen area an extra double socket close to the table should be enough for any cooking gadget that you may want on the dining table.
If you have a separate dining room I prefer one double in each corner to give plenty of flexibility for dining.
It will also make the room more useful if you want to change the use later.
Its quite common to go for a pendant fitting for the dining table.
Remember the point is to illuminate the table but not to dazzle the diners.
If you have got a kitchen dining area make sure the lights are on a separate circuit so you can switch the kitchen lights off while you eat.
Hallways
In all hallways its useful to have a power socket for the vacuum.
For the front hallway a power supply for the bell and any CCTV system are recommended.
We also have a table light with a time switch on the hall table. This makes the house more welcoming in the evening and deters burglars by making it look more like someone is home.
Laundry
In our laundry we just have one four way power point. This allows us to leave the washer and the drier plugged in and to have two sockets spare, perhaps for the iron and a radio.
If you have tall rooms a ceiling fan can make a real difference to your comfort without large bills.
Summer
While a ceiling fan does not lower the temperature it will make the room feel cooler by:
The breeze improving the ability of your body to lose heat by perspiration.
It mixes the cooler air near the floor with the warmer air near your face.
The combined effect is that you feel several degrees cooler.
So you may not have to run the air conditioning as much.
Most ceiling fans use less than 100 watts, which equates to less than 3 cent per hour to run.
Winter
Ceiling Fans can also help lower heating costs in winter.
You can run the ceiling fan in the reverse mode.
This stops hot air staying in the top of the room by pushing warm air up against the ceiling and then down the walls gently re-circulating warm air through the room.
Fan Selection
It’s important to consider the size of the room when selecting a ceiling fan.
The larger the room size the larger the blade diameter and the more powerful the fan motor will need to be to generate enough cooling breeze.
Also a small fan in a large room can make a space look unbalanced whereas a large fan can look overpowering in a small room.
Room Area
Fan Diameter
Up to 7m2
92cm (36inches)
7m2 – 13m2
92cm – 107cm(36 – 42inches)
13m2 – 20m2
122cm – 127cm(42 – 44 inches)
20m2 – 36m2
127cm – 132cm(44 – 46inches)
Installation
Any ceiling fan should be at least 2.1 metres from the floor to the blades of the fan and at least 300mm from the ceiling.
This is a minimum and if you have some basketballers, or ruckmen in the family it may need to be higher.
If you are planning on ceiling fans for a new house it is well worth making the rooms higher.
If you have got cathedral ceilings you can get a ball type fitting to allow them to be fixed to the sloping ceiling.
You can also get extension rods to lower the fan if they are too high to give an effective breeze.
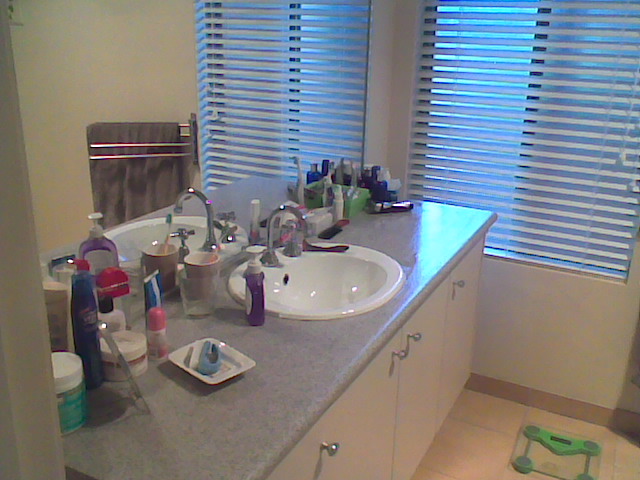
When we first came to Australia and started looking at display houses we often saw En-Suites with two wash basins.
We thought it looked fairly classy so that’s what we got in our first Australian new house.
Ever since we have always gone for a single basin. . . here’s why:
We found that we are never in the bathroom at the same time. Even when we used to travel to work together I always got up first to take the dog for a walk which gave my wife a clear run.
Having a single basin gives more counter space on the vanity. (sometimes too much!) We do have fairly strict demarcation lines. My wife’s stuff is on the left and my stuff is only allowed on the right.
Having one basin with only one set of waste plumbing leaves more room in the vanity cupboards for fresh towels, hair dryer, toilet rolls, spare toiletries, etc, etc.
Cost saving of basin, tap fittings, and labour. Even with basic fittings this gave us a few hundred dollars we could use on things we really wanted. If you have expensive plumbing fittngs the savings could be thousands!
A common standard builder’s cooling option is evaporative cooling.
This is probably because they are relatively cheap to install.
They also have fairly low power consumption as you are basically only running a fan.
So whats the down side?
Evaporative systems work best in areas of low humidity so they will be less effective in coastal areas where most of us Australians live.
They can only cool up to the ‘wet bulb’ temperature. (Check with the Bureau of Meteorology to find out what this may be, it might be OK for you)
To be effective you really need a door or window open in each room that you want to cool. Not too good if security is a concern, or you want to come home to a cool house.
A central unit will use around 25L per day which might be a significant consideration if you are on tank water. You can however shut the water off and rely on the breeze alone on some days.
There are some bush fire risks in having a large plastic structure on the roof. (DO NOT RUN AN EVAPORATIVE COOLER IF THERE IS A BUSH FIRE – It will suck flying cinders to the unit increasing the risk to your home)
Personally I am not a big fan of these units, because of the humidity they add I always feel a bit clammy. (In the USA they call Evaporative Coolers ‘Swamp Coolers’ for good reason!
If you have
Good House Orientation
A well Insulated house
Solar cells on the roof (which generate lots of power on hot sunny days)
The power use of a refrigerated system should be largely offset.