Kitchen Renovation Tips: Things To Consider Before Doing An Upgrade

Guest Post by Chad Singson

The kitchen is the heart of many a happy home.

Unfortunately, it’s also the most complex room in the house, and can be the most expensive to maintain if problems arise.

Issues in kitchen design are nigh impossible to ignore, but many people are too intimidated to address them with a remodel.

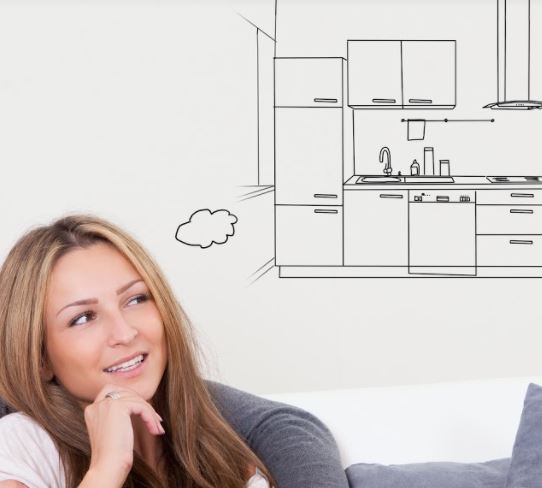
Fortunately, with a few vital considerations, you can undertake kitchen renovation with confidence and get the dream kitchen you’ve always wanted.

Plan A Budget

As with any remodel, you’ll want to lay out a comprehensive plan before you start demolishing any countertops.

This will help you end up with the kitchen you really want and keep you from making costly mistakes down the road.

The biggest part of planning will involve outlining your budget.

You should consider the costs of any changes, supplies, and professionals that you will need to hire, which will help you determine where you can save by taking on certain tasks yourself.

Should You Do It Alone?

There are plenty of renovation tasks, from demolition to painting, that you can potentially handle yourself.

A handy DIY approach can teach you plenty and save you even more.

That being said, some tasks are best left to experts. Electrical and plumbing alterations and the like typically require professional insight, and hiring the right person can help you avoid costly mistakes.

Similarly, trusted contractors or designers are well versed in the dos and don’ts of kitchen renovation of your new kitchen. 

For The Family, Or For A Fix And Flip?

The first question to address is the fate of the house.

Are you fixing it up to resell, or for your family to enjoy?

An updated kitchen can bring up to a 90% return on investment, but if you’re not planning on putting your house up for sale in the next year or two, remodel with your personal preferences in mind.

Rather than worrying about what might attract future owners, pay attention to how you use the kitchen and what your needs are.

If you’re planning to resell shortly, do plenty of research to learn more about current design trends.

Consider preserving what makes your kitchen unique aesthetically, so everything will need to match, and a set of rustic cabinets, for example, may be the key to your kitchen’s charm.

Identify Your Kitchen’s Strengths Or Weaknesses

While there may be plenty you dislike about your kitchen, there are likely a few things you appreciate.

List any important issues your kitchen has, such as;

  • Is there enough counter space?
  • Is the sink too far from the stove?
  • Are the cabinets outdated?
  • Perhaps you’ve always wanted to include a table or island in your kitchen.

This helps to prioritize urgent changes and preserve any strengths that your kitchen already has.

Be Prepared

Before you actually start working on the upgrade, make sure you have everything ready to go.

Order supplies ahead of time so that you don’t have to pause work while you wait for a delivery.

Have professionals, such as plumbers or electricians, scheduled to come in on days that work best for you.

You want to limit the length of time you have to live without a kitchen, so efficiency is the name of the game.

In the meantime, move essential appliances into the dining room so you can still cook basic meals.

Grill out if you can—another good reason not to remodel in the dead of winter if you live in cold climates!

To Move Or Not To Move

Most homeowners assume that sinks and appliances have to stay where they are, even during renovations.

Sinks and appliances can be moved, but pipes and wiring have to be moved to accommodate.

If your plans involve relocating your sink, make sure to factor in the extra costs that will entail.

A job best left to the professionals, moving a sink and other plumbing infrastructure is time consuming and costly but possible if you feel it’s worth the investment.

Similarly, make sure that any electrical changes in your kitchen remain up to code.

Get Rid Of Dead Space

In a kitchen, empty space is wasted space.

Maximizing storage space, especially headspace, has a number of benefits.

Not only will this free up space on your countertops,  but it also will eliminate hard-to-reach spots that are impossible to clean.

Similarly, open shelving can save space but makes dusting and preventing clutter more of a chore.

Deep drawers and dividers, on the other hand, can help keep your future kitchen become well-organized.

Plan For Your Needs

You may not need the Ferrari of stoves to be a happy cook in the kitchen.

Functionality, however, can make or break a kitchen.

Buy appliances with your new kitchen design in mind.

Experts recommend paying special attention to the ‘triangle,’ that is, the space between the sink, stove, and refrigerator.

Since this is the busiest part of your kitchen, you will want to make sure you can move efficiently between them.

Having to cross the kitchen every time you need to use the sink can really make cooking an unwelcome workout!

Devil In The Details

It can be easy to get carried away with the heavy lifting of kitchen remodeling.

While elements like countertops and cabinets make up the bulk of your kitchen’s aesthetic, small elements can make a big impact.

Lighting can emphasize design elements, and an eye-catching backsplash makes a wonderful centerpiece for even smaller kitchens.

Making small changes can help you make big alterations in style without having to spend too much.

Have Fun!

Kitchen renovation is a big, intimidating job, but it’s your chance to experiment and personalize a space to completely fit your needs.

Keep in mind the considerations enumerated above before going through with the upgrade, but also remember to get creative—you can even involve the whole family!

It’s your kitchen, after all, and you might as well have a good time designing the kitchen you’ve always dreamed of.
Winter Sun

If you are going to get as much winter sun inside your house you want to minimise shading.

That could be from neighbour’s houses or even and boundary fences/hedges.

Here is how to check…………………..

Ideally you should be aiming for around 6 of hours of sunlight into your house on the shortest day (21st June).

To get the exact angle for your location you can get solar calculators on the net that will give you the suns angle for every hour of the day for any day of the year.

The diagram below shows the how to begin working out the effects of shade from a 1.8m fence to the North of a window


I have provided a TABLE that shows approximate midwinter shade angles ‘A’, and shade slopes ‘H/D’ for various positions of latitude.


Latitude Locations

Noon

9.00am -3.00pm

Slope H/D Angle Slope H/D
38 Melbourne 29.5 0.57 16 0.29


  1. The Bottom of the window is 0.15m above ground level
  2. The top of the fence ‘H’ is 1.65m above the bottom of the window(1.8m -0.15m)
  3. To make sure you get 6 hours winter sun in the window, divide the height of the fence above the bottom of the window by the ‘9.00am -3.00pm’ Slope (0.29).
  4. D = 1.65/0.29 = 5.7m. The fence needs to be 5.7m from the window for full sunlight for 6 hours.
  5. If the fence needs to be closer than 5.7m it worth checking if any sun gets to the bottom of the window. To check divide 1.65 by the ‘Noon’ Slope (0.57)
  6. D = 1.65/0.57 = 2.9m. If the fence is closer than 2.9m you may be better reducing the window size by raising the base.


This information also applies to Solar Panels for Heating and Power Generation

To provide summer shading see Shading Northern Windows


Block Boundary Pegs

Your block location is defined by its boundary pegs.

It all looks quite simple when you are looking to buy the block. You can go out to the site and see tall pegs with tape at every corner.

A few months later when the builder is looking to start it can all be very different.

The pegs may have been stolen, or damaged, and your builder will be asking for $800 or more to re-establish the site boundaries.

Here is how you might save that money………………….

The first thing to understand is the tall pegs are indication markers, the actual boundary peg is normally driven down to just above ground level. (See photo below)

While the pegs are still obvious

    • Take measurements so you can find or relocate the pegs accurately, this involves taking measurements to each peg from at least two points that are unlikely to be damaged. Examples are joints in concrete paths, drain covers, existing fences.
    • Where possible you can use paint to mark concrete paths or fences.
    • Make sure the boundary peg is knocked down to ground level.
    • Cover the peg with gravel or sand so it looks different to the surrounding soil.
    • You should now be able to find the boundary pegs, even if the marker pegs go missing.
    • Don’t worry if one peg goes missing the builder only needs three pegs to do their set out.

If you want more information its worth reading the post on Reading Title Plans


For similar posts see Blocks

Do It Right: The Golden Rules of Bathroom Design

Guest Post by Atanas Gjorgiev

Are you planning to build a new bathroom from scratch or remodel your existing one?

If you already visited some bathroom showrooms, I’m sure you’ve noticed how varied bathroom design is nowadays.

It’s 2020 and you could say that anything goes in bathroom design – from colourful bathroom basins to wooden bathtubs.

If a wooden tub is where you want to soak in the morning, I’m not here to judge.

But despite the differing styles of bathroom elements you can use, there are still some design principles that you should adhere to if you want to achieve a functional and beautifully cohesive bathroom.

The following rules are key to creating a terrific bathroom, no matter its style or size.

Always Aim for Functionality

Despite how much Instagram and Pinterest romanticise bathrooms, in its essence, the bathroom is primarily a utilitarian space.

That being said, your main focus when creating your bathroom should be functionality.

A hard-working bathroom should be easy to use for everyone.

Make sure that all the elements in the bathroom are accessible to different users.

Installing sinks, mirrors and tapware that can suit everyone is both smart and thoughtful.

For instance, if there are small children or elderly and frail people in your household, monobloc taps with a single leaver only require applying a small amount of pressure to use.

Additionally, a handheld showerhead will be convenient for users of different heights, as opposed to a wall-mounted showerhead.

Install Water-Saving Fixtures

Considering how the bathroom accounts for more than half of residential water usage, fixtures with a sustainable design can go a long way when it comes to reducing your home’s water bills.

At bathroom showrooms across Australia, you can come across a vast range of WELS regulated products – from taps to toilets, showerheads and washing machines.

For instance, you can purchase a showerhead with a low flow rate, rated 3 or 4 stars. For a family of four, it’s estimated that installing a 3-star showerhead can save around $210 each year, whereas a 4-star showerhead can cut around $315 from your water bills.

Add to this the savings on electricity because less water will need to be heated, and this simple change can be significant for your budget.

Make Sure the Layout Fits the Space

The bathroom is often the smallest room of the house.

So, you need to consider the amount of available space before you can plan out what to include.

For instance, some people love a separate tub and shower, but this isn’t a good idea if you don’t have much room.

Combining the two can allow you to save some space.

Additionally, you also need to go for a smart layout.

Remember, in the bathroom, you need to have enough room to move around.

For instance, a three-wall-layout where fixtures like the toilet, sink and bathtub are all installed on separate walls may not be a good idea for a narrow bathroom.

The three-wall layout generally works best in spacious bathrooms with a round or square shape.

For a small or long and narrow bathroom, a two-wall or single-wall layout may be the most space-efficient choice.

The bathroom should be a place to relax, not a room chock full of elements that make you feel cramped and uncomfortable, so make sure you invest a great deal of effort in planning a suitable layout.

Add Plenty of Storage

The bathroom is the home of an ever-growing collection of shower gels, body scrubs, creams, makeup, grooming tools and all kinds of other personal-care items.

Leaving all of these things sitting on the counter or lining the edges of the bathtub sure makes for visual clutter. And no matter how attractive your

bathroom design is, clutter can undo all your efforts in creating a calm space., but growing your personal-care collection won’t be a problem, as long as you have enough storage to hide it neatly away.

When adding storage, try to think in all directions – a vanity under the sink, a medicine cabinet above it,shelves mounted on the walls and woven baskets on the floor.

If you have the space, you can also add a chest of drawers for storing clean towels and extra toilet paper rolls.

Not only do storage solutions help you keep clutter at bay, but they can also be used to add a decorative touch to the space.

Design a Space That’s Easy to Clean

Bathrooms get wet and dirty quick, but your design choices can have a big impact on how easy to clean your bathroom is.

For instance, grout lines can be some of the most demanding chores when cleaning a bathroom.

That being said, if you want to save yourself from scrubbing grout in the future, you may want to line your walls with some solid surface choices instead of tiles.

For instance, stone slabs tend to have few seam lines which do not attract dirt as much, but if you do love the look of tiles, then at least reduce
the number of grout lines and their thickness by choosing large-format porcelain tiles.

Another way to make sure the bathroom doesn’t get dirty as often is to prevent the floors from getting wet.

This can be done by enclosing your shower area with a shower curtain or a glass screen.

However, shower curtains are notorious for attracting mould, which means a glass screen will be easier to maintain.

Frameless shower screens are easier to wipe clean, plus there are a variety of coatings that can be applied to glass and help it repel water and soap scum.

Don’t Forget the Power of Good Lighting

Lighting is important in the bathroom.

Not only does good lighting help you apply your makeup better, but it also helps magnify the space as it bounces off tiles, the bathtub, the mirror and the sink.

Unfortunately, bathrooms tend to get the leftover space after all the other rooms take up the best spots and windows.

As a result, bathrooms struggle with a lack of natural light, and then there are bathrooms that have no windows at all.

If this is the case, to bring in some natural light into your bathroom, you can install a skylight if the design of the home permits.

Skylights are a great way to flood the room with sunshine while saving the walls for other bathroom elements.

If you’re really not able to add a window, turn to artificial light that will illuminate the space in a natural way.

To do so, pay attention to the bulbs you use.

Avoid yellow lights and cold or fluorescent hues, and instead, choose daylight toned LED bulbs which are perfect for simulating the effects of soft sunlight.

Additionally, since the bathroom is also a place where you want to relax, installing a dimmer switch can help create a more serene atmosphere.

Passive Solar – What Does It Mean?

Do you want a house that is filled with natural light in the summer without overheating, and minimises your heating bills in winter? ……….If you do, then a passive solar house is what you need.

Here are some of the things you consider.

Get The Winter Sun Into The House

From Wikimedia Commons

This means having most of the main living rooms facing North with lots of windows.

It also means making sure the Windows aren’t shaded by fences, trees etc.

Maximising Thermal Mass

This means having dense absorbent materials like concrete  and brick inside the house.

  • In winter the thermal mass heats up during the day and releases the heat during the evening.
  • During summer if you open the house in the evening/night the thermal mass cools and helps keep the house cool the next sunny day.

Ideas for increasing thermal mass include:

  1. Have the house on a concrete slab rather than stumps.
  2. Have tiles or a slate floor especially in front of the north facing windows.
  3. Brick feature walls and or brick fireplaces.

Keeping the Summer Sun Out

  • Minimising West and East facing windows. These windows are the worst for heating up the house with the low morning and evening sun.   (In winter they hardly get any benefit from the sun)
  • Shading North Facing Windows.
    Typically the shading will be in the region of 1 m from the outside wall. It can be either deep eves, a veranda, or a pergola.

Minimise Heat Transfer

That’s transfer of heat from outside to inside in Summer days, and inside to outside in Winter.

To minimise heat transfer:

  • Provide good insulation to walls and ceilings.
  • Have small windows on the South Side.
  • Closing curtains at night in winter.

The first house we built in Australia was built according to these principles. Although we lived in it for 10 years we never felt the need to fit air conditioning. We didn’t require awnings on the windows or wanted to shut the curtains on hot days.

The above advice applies to Australia and other Southern Hemisphere Countries such as New Zealand and South Africa. If you live in the Northern hemisphere you need to have the Large windows on the south side of the house.

What Passive Solar ideas have Worked for you?

For more Green Ideas see Sustainability


5 Things To Consider When Choosing The Right Tile Grout

Guest Post by Chad Singson

If you’re planning to replace the tiles in your bath or kitchen, besides choosing the right tiles, you’ll also need to find the tile grout that perfectly fits the look you’re going for. (Tile grout refers to the paste that seals the gaps between the tiles)

Although choosing the tile grout may seem like an insignificant part of the process, your choice will have a significant impact on the overall aesthetic and durability of the tiling job.

Tiles and grout work hand in hand to make the design shine.

That’s why it’s important to equally pay attention to the grout for your tiling project. For excellent grout options, check out Ardex Tile Grout.

In this article, you’ll find a few essential things to consider when you’re choosing the grout.

Type of Grout

Cement and epoxy are the two most common types of grout.

Both these types come in sanded and un-sanded varieties.

Cement grout is easily available and doesn’t cost much.

Epoxy grout, on the other hand, is more expensive and difficult to install, but is more durable and is more resilient to damage caused by water or chemical cleaners.

When choosing between sanded or un-sanded grout, keep in mind that sanded grout is more resistant to cracks, which is why it’s used for grout lines that are wider than 2 mm.

When sealing grout, the breathable sealers are ideal for light-colored tiles, especially in high moisture areas, since they don’t darken due to moisture.

If you’re checking out alternate design options, opt for brass or stainless-steel metal inlays.

Choosing the Color

While choosing the color of the grout, the tile design you have in mind is a crucial consideration.

You’ll have to decide if you want the tile and grout design to be matching, complementary, or contrasting.

    • Matching Grout: Using a grout color that matches your tiles will produce a subtle overall effect, making the tiles look more pronounced. This can also make the place look more spacious. Matching grouts work well if you have beautiful tiles you want to showcase, while keeping the layout basic.
    • Neutral Grout: Grouts in neutral colors like grey or beige work well to compliment almost all tile layouts. Neutral grouts are the safest design choice, especially when you’re going for a traditional and simple tile layout.
    • Contrasting Grout: Grouts used in colors contrasting the tiles are best when you want to accentuate the overall tile pattern. Dark tiles with contrasting grout can make the area look busy and are great for geometric design patterns.

The Shade of the Grout

When choosing the right grout color, consider both the aesthetic and practical aspect of each option.

Darker grout color can conceal the stains, but it also tends to fade quickly.

On the other hand, a lighter grout color may get dirty quickly and can be high maintenance.

That’s why neutral grout colors like beige and grey are popular, as they are easier to clean and don’t get discolored easily.

Overall Appearance

While choosing the right tile grout, consider the overall appearance of the area.

This will help you visualize how the grout will look in terms of the overall design.

Consider the location where you’ll be placing the tiles.

Wall tiles are more ornate and may require complementary or neutral grouts to highlight the tiles, whereas darker grouts for floor tiles can work well to define the space.

The spacing of the grout will also play an important role in the overall tile design.

Narrow-spaced grouts can give a seamless, blended appearance, while, wider grouts can make the tile grout stand out.

Maintenance Required

Since light-colored grouts tend to stain easily, they require frequent cleaning.

If you’re choosing darker colors, keep in mind that dark color grouts can produce efflorescence that would also need cleaning.

It’s important to seal your grout with a breathable sealant so the grout doesn’t peel off.

Your sealed grout will also require regular cleaning for maintenance.

Conclusion

When you’re planning to tile your bathroom or kitchen, remember to also focus on getting the right tile grouts.

Tile grout is much more than just a substance that fills the space in between the tiles.

It has a significant impact on your overall design.

That’s why, it’s vital to do your research and choose the right color, material, and sealant, instead of leaving it as a last-minute purchase.

You can get a few samples and try it with your tiles before you go for the final layout, which will help you get a clear picture of how the tile grout will look in the overall design.

Separate Toilets?

Most house plans show a toilet in the master bathroom but a separate toilet in the other bathroom……………. Why?

Maybe it’s because you don’t want visitors to see the bathroom, but where are they going to wash their hands?

Is it because you want somewhere quiet to go and read?

In England the only time people generally had a separate toilet was downstairs when the main bathroom with a toilet was upstairs.

I used to hang my college certificates in the downstairs toilet in one house. . . . That’s because I think you should never be in a dignified position when you are reviewing your achievements.

To make your house more accessible for a disabled visitor, or even old or injured family members, it’s easier for the toilet to be in the bathroom.

To get an idea go and look how a disabled toilet is organised in your local shopping centre.

I suppose if you have a big family queuing for the bathroom it might be a problem but then I would have though the best thing would be, rather than have a bathroom and a toilet to have two shower rooms each having a washbasin and a toilet.

With the shower rooms being smaller than a bathroom they probably wouldn’t take up much more space than a bathroom plus toilet.

Perhaps in one room you could have a half bath rather than a shower tray so you could still be able to give small children and babies a bath.

Must have a separate toilet

If you really want a separate toilet, as many people do, here are a couple of reasons why you might think of opening the door outwards rather than inwards as is typical.

    • You can make the toilet area a bit smaller which can help fit it in.
    • If someone passes out they will most likely fall forward against the door. If the door opens inwards how would you get them out?

One question I haven’t resolved is how should you decorate a separate toilet and should you install magazine rack?

After all reading on the toilet is the only time most of us men do any multi-tasking.


N.B I hope you liked the photo of the Avocado Bathroom. . . it was very trendy when we were re-modelling our first home

For other posts about House layouts see Plans

For Toilets see Plumbing

More plumbing information and 24 pages of Check Lists in the ‘Selection / Pre-Start Guide’


4 Reasons Why Using Mesh Banners Are Useful In Home Construction Sites 

Guest Post from Marketplace

Home construction involves a lot of processes before you can enjoy a brand-new house.

You have to prepare the construction site, complete the rough framing, and install the drywall and other interior fixtures.

Until you can have the final walk-through, the list goes on as home constructions are time-consuming.

During this time you are expected to keep your site secure fortunately, mesh banners can make the task easier and lighter.

As the name suggests, mesh banners are signs that come with small holes that allow winds to pass through.

Mesh banners are often used by businesses to advertise their products and services.

But if you plan to have your home constructed soon, it’s best if you start looking for banner mesh as this can are very useful in home construction sites because of the following reasons:

Safety 

A lot of things take place during home construction.

Often, you’ll have to hire different contractors who’ll take care of different things on the construction site.

The more complex your house plan is, the more people you’ll have to hire.

Providing safety to the people who’ll spend time in and around the home construction site is one of the biggest reasons why mesh banners are important.

By investing in mesh banners, you, passers-by, and the people working on-site can experience the following:

    • By blocking any loose debris, dirt, and other items from entering, or leaving, the construction site, mesh banners can effectively prevent injuries.
    • With passers-by kept away from the home construction site, it’ll be easier for contractors to focus on their safety while at work. Without distractions, contractors can properly use the necessary tools and pay attention to risks when working.

Cleanliness 

Because of the number of people working for a home construction project, expect that the site will be messy all the time.

More often than not, the home construction site will have several piles of cement, stacks of bricks, and a lot of wood.

The contractors will also use bulky equipment and acquire different vehicles in the construction site.

A mesh banner can hide all of the mess in the home construction site, making the neighborhood look cleaner and more organized.

With a mesh banner, all of the debris produced in the construction site will stay in the same place.

This will surely make your future neighbors very happy as the aesthetics of their properties aren’t ruined by your home construction project.

Versatility 

As mentioned, home constructions will require a lot of time.

Usually, it’ll take about five months to complete a home construction project but can last longer if the homeowner wants to install more fixtures and features.

A mesh banner is a very versatile material that you can use throughout the entire duration of your home construction.

Mesh banners are easy to put up, take down, and add more panels–you can basically adjust the coverage of your mesh banner without any help from professionals.

For instance, if your house plan started small, and you eventually decide to expand once the construction starts, mesh banners can be very useful since you can conveniently adjust it.

Provide A Glimpse Into The Future 

It’s common for passers-by to be curious whenever a construction takes place around their area.

Usually, they’ll wonder what the construction is, who manages the construction, and when the project will be completed.

Nosy individuals will even ask the contractors that are working on-site just to learn more.

For you to easily provide these individuals with a glimpse into the future, and easily answer their questions about the home construction, invest in mesh banners.

You can have your mesh banners customized to provide details about the construction, and give them an idea of what the finished project will look like.

Aside from informing the neighbors about the details of the home construction project, customized and well-designed mesh banners can also make the area more appealing.

With mesh banners, the people around the site won’t have to look at bland or boring fences.

Choose The Best 

Mesh banners are common today, so expect that you can easily find businesses that sell this product.

However, if you want to experience value for your money, make sure to buy mesh banners from trusted brands in the industry.

This will give you peace of mind knowing that you’re using high-quality mesh banners for your home construction.


Bedroom Pool

This has to be one of the most impractical ideas I have seen.

  • All that water means lots of evaporation, so the bedclothes will feel damp all the time!
  • What happens if you are sleepwalker, or just stumble when you get out of bed?
  • You are going to blow a few circuits if you knock something off the bedside table, or ruin your I-phone!

I found this photo on www.architecturendesign.net

For more unusual and funny construction pictures go to  What the………………….?


Tips for Mixing and Matching Your Outdoor Furniture

Guest Post by Marketplace

When summer comes, it’s time to soak up the sun and relax in the spectacular warm weather.

The outdoor furniture that wasn’t in use throughout the winter is now ready, simply because it’s time to switch activities to outdoors–from hosting parties to dining. 

When it comes to picking your outdoor furniture, it’s all about mixing and matching.

Therefore, the furnishings, other than serving their purpose, also need to blend with the surrounding space.

In case you’re wondering how to choose the perfect outdoor pieces that suit your space while staying within the price range, it’s not as hard as it may sound.

With the help of companies, such as Dreamo, you have a range of options to help make up your mind.

Nonetheless, if you’re looking to mix and match your outdoor furniture, then read through this guide for some tips.

Incorporate Umbrellas

The use of umbrellas in not only for shade.

For instance, in beach houses, where the outdoor space faces the ocean, umbrellas regulate the amount of light.

Umbrellas come in different colours and patterns, So choose the one that presents a colour splash to the surroundings while also providing a focal point.

If the umbrella’s colour is bright, the chairs can offer contrast by being dim.

Better yet, match the umbrella’s colour to that of the chairs to create a colourful pattern.

Bring the Indoors Out

As the easiest way to elevate your outdoor space with furniture pieces with your indoor furniture, there shouldn’t be much disparity between the indoor and outdoor furnishings.

When it comes to cohesive arrangement, you may choose to go with matching sets of furniture to bring harmony.

Colour

Colour coordination is important.

Before adding a new color to the outdoors, take note of the surroundings; for example, use the house colour as a guide to give you an idea of the hues that match well.

Further, the surrounding trees and flowers should help you decide whether you want to harmonize or prefer contrast.

Even if cushions and pillows present many colour options, you can still explore using chairs in different materials, styles, and shades.

Additionally, plastic as a material offers a wide range of colour options.

As a tip, use vibrant bright colours to bring out a happy theme, especially in the summer, where the sunlight bounces off the furniture.

Use the same colour for all the pieces to bring a matching effect, as using different colours for each piece makes the space look disjointed.

Nature of Your Space

It’s possible to have an outdoor space that’s not in nature–there are no trees or vegetation around.

The best example is the outdoor space by pool-sides.

Such a space can use a touch of wooden furniture because it contrasts well with the surrounding.

If the outdoor space is close to trees, wooden furniture won’t blend perfectly with the environment.

Instead, materials such as metal mix well with this kind of setting.

Do note to place wood, such as pine, on the grass because wood isn’t suitable for exposed areas.

The moisture coming from the ground will cause the wood to damp and rot. and can corrode some metals.

Material

It’s always advisable to go for a material that requires little care.

For instance, the furniture material should withstand weather conditions since the furniture stays outdoors.

So, consider outdoor-friendly materials, such as aluminium, teak, and resin.

Metallic furniture is easy to blend with the rest of the space because it’ll contrast with the other materials in the outdoor space, bringing different perspectives and finishes.

To provide strong accents, you can also introduce fabric since it’ll incorporate into pillows.

However, choose comfortable cushion designs that can bring out a fresh look without changing the furniture.

Remember, the material covering your pillows should resist weather changes for them to suit outdoor usage.

Switching Shapes

Instead of using a matching dining set, add in a different chair as it helps in breaking the monotony in the space.

Matching furniture from different collections and interplaying shapes of pillows and accessories provide an exciting look; a break away from the normal setting.

Cost

Above everything, determining what furniture to buy within your budget is important.

Some options, such as aluminium and resin, offer quality furniture for less money as they’re cheaper than wood.

Also, to achieve a new look, furniture pillows are inexpensive and easy to change around.

Bottom Line

Mixing outdoor furniture involves incorporating different aspects, like shapes, colours, materials, and furniture pieces.

The essence is to break away from boring and monotonous settings because matching provides a blend.

Since there are no rules, interplay the ideas above to achieve that sweet spot between match and mix.

Ultimately, beauty lies in the beholder’s eyes, and what you opt for your furniture depends entirely on your preference.

Exit mobile version