Practical Completion Inspection

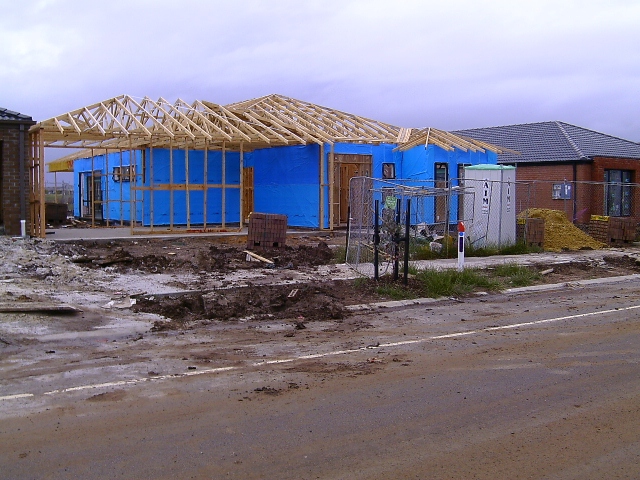
The Practical Completion Inspection (PCI) is probably the most important inspection, your chance to identify any faults and get them fixed before handover.

It’s a lot simpler to get them fixed before you move in!

If you have employed an architect or project manager for the whole project, or you get an inspector for the PCI only they should run the whole exercise.

If not it will be up to you.

Procedure

The normal procedure is to meet with the site supervisor and go around the house noting any defect.

The site supervisor, will then normally put a red sticky paper dot on any problems and record the defects. You then counter sign the defect list.

The builder should attend to all defects in about 10 working days so handover can occur.

Preparation

To make sure you are prepared here is what you should have for the inspection:

      • A copy of the contract and the drawings so you can tick things off.
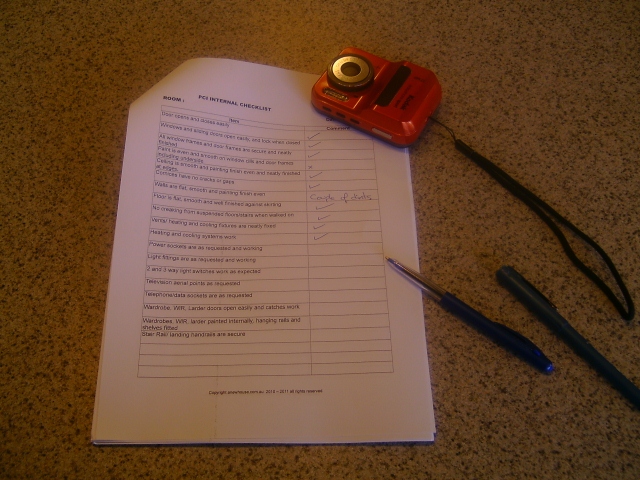
      • Checklists (For only $4 you can buy the anewhouse PCI Guide complete with checklists of hundreds of items.)
      • A couple of light bulbs to check light fittings.
      • A lead lamp so you can check power sockets.
      • A cloth so you can make clean dust off the kitchen counters and vanities counters to inspect for scratches and chips.
      • Some boots so you can walk round the outside if its muddy.
      • A torch, tape measure and spirit level
      • A packet of dots in case the Site Supervisor’s supply runs out.
      • A camera

Also make sure the supervisor will have a ladder, or bring your own.

What you won’t be able to check

Most builders don’t fit Appliances and the Hot Water Service until handover to prevent theft.

Remember to check these on Handover Day.

Also it won’t be clean!

More information at PCI – 12 Hints

For similar posts see Getting it Right


Why not buy the PCI Guide for more advice and extensive checklists….only $4


Keith, Hero of ‘The Block’

If you are having a new house built Keith should be your hero too!

Over the years, foreman Keith Schleiger “The Blockinator” seems to be cast as the bad guy.

The guy who causes delays, disruptions, and upsets the contestants.

The Real Bad Guys

The real bad guys are the tradies who have spent most of their careers getting away with things such as:

  • Poor waterproofing;
  • Removing important structural elements;
  • Shoddy workmanship;
  • Working unsafely;

You would think knowing they are in front of the camera they would try and lift their game . . . . . but old habits die hard . . . and they still think they can get away with things.

What Keith Does

Keith protects people like you who are buying a new house

He makes sure everything is built with care, and meets all the building codes.

Your House

Who is protecting you when your new house is being built?

  • The Site Supervisor is responsible for perhaps 15 or more builds so you will be lucky if they visit more than twice a week!
  • The Building Surveyor will only visit 4 or five times!

Both are paid  by the builder, whose main interest is getting the house finished quickly!

That leaves plenty of opportunity for tradies to cover over their dodgy methods before anybody sees the issues.

If you can’t check things yourself perhaps you need to employ a ‘Keith’ and engage an independent inspector.

Cement

Some people confuse concrete with cement, but cement is just the ‘glue’ which holds the other constituents of concrete, sand and gravel, together.

There are a range of different cements but these are the three you will most commonly come across:

General Purpose Cement

This is consistent, versatile and cost effective product which makes it a good choice for most building works.

It is suitable for Domestic concrete slabs, driveways and footpaths

Trivial Fact -You may hear standard cement referred to as Portland Cement – This is because the finished concrete has an appearance similar to stone quarried from Portland in England.

Sulphate Resisting Cement

Sulfate Resisting Cement is a blended cement designed to improve the performance of concrete where the risk of sulfate attack may be present.

It also provides improved durability for concrete, and the steel reinforcement, in most aggressive environments, such as seawater exposure.

It has an additional cost, but it is much better for:

    • Geothermal areas
    • Soils containing sulphates
    • Saline Areas
    • Area that are frequently wet such as concrete swimming pools

Rapid Set Cement

Normally found in dry premixed concrete mixes.

This is a cement with various additives that speed up the reaction to give an initial hardening within 15 minutes.

Speeding up of the cement reaction time does lead to lower final strength.

This makes this product good for things like setting fence posts………… but NOT for significant structural applications.

Water Cement Ratio

One of the most important issues with cement is ensuring the ratio of water and cement is correct as this affects both the final strength and the durability. For instance:

  • Water cement ratio 0.5 (10L water to 20kg cement) is needed for high strength 35MPa.
  • Increasing the Water cement ratio to 1 (20L water to 20kg cement) will reduce the strength to 10MPa.

To ensure they don’t add too much water premix companies usually measure the water content in the sand and gravel piles and reduce the water content accordingly.

This means ading water to a premix lorry will affect the strength of the concrete

For more information see Concrete.


How Much Should Stage (Progress) Payments Be

When you contract someone to build a new house you are required to make regular payment as each STAGE is completed. . . . But how much?

Well builders want to get paid as soon as possible so they will want the early payments to be as big as possible.

You as the purchaser need to make sure you aren’t paying for work that’s yet to be done. (See this link: If The Builder Goes Bust) You will need enough money to finish the house!

A good guide to what’s fair is found in a Victorian Government Act which lay down the following percentages of the full contract price:

    1. Deposit 5%
    2. Base 10% – (Check on this link to find  what you get; Base )
    3. Frame 15% – (link at: Frame 15)
    4. Lock Up 35% – (link at :Lock Up)
    5. Fixing 25% – (link at Fixing 25%)
    6. Completion 10% – (link at: Completion)

In Victoria many builders will ask you to sign an agreement accepting that the above payment levels don’t apply and the percentages will be similar to those shown below.

In other Australian states where there is no Act controlling the amount of progress payments then the builder is more likely to want the following values of progress payments.

    1. Deposit 5%
    2. Base 20%
    3. Frame 20%
    4. Lock Up 25%
    5. Fixing 20%
    6. Completion 10%

Think very carefully before you accept these different payments, as it increases your level of risk if things go wrong.

Before you make each progress payment, you need to check the work comprising the stage is:

    • Complete
    • Meets your contract requirements
    • Meets the building regulations

If you are not confident checking the work it may be worthwhile using an independent building consultant to check everything before you make progress payments.

If you want to check yourself you may find this link: PCI Guide useful

Whatever happens do not pay any money in advance of when the contract requires it.


For more information about when Progress Payments are made see Construction Stages

For similar posts see this link: Contract Documents


Soil Heave – Protecting the Slab After Construction

Once the house is completed it doesn’t mean that you shouldn’t be concerned about the foundations.

This is particularly the case if your house is Built on Clay as there is a risk of ‘Slab Heave’.

This is the result of moisture getting into the clay under the slab causing the clay to swell pushing the slab upwards.

Protection Against  Soil Heave

In South Australia there is a requirement for a 1m path around the building if there is a risk of ‘Soil Heave’,

That is good practice whichever state you live in.

The diagram below shows a suitable detail to protect the ground under your slab.

The key issues are:

  • Paving falls away from external walls for at least 1m with a minimum fall of 1:20 (50mm of fall in 1m)
  • Where the water will not continue to flow away from the edge of the path an Aggi Drain in a trench backfilled with granular material should be provided.
  • Although the requirement for an aggi drain is not as critical where the ground slopes away from the slab, it is nevertheless good practice to have one.

Got Problems?

Generally there aren’t easy fixes for foundation problems, and the cures aren’t DIY jobs

You really need to get an expert involved like Geotech Built 


Also see Agricultural Drains

Construction Stages – Background

For readers unfamiliar with the building process I thought I would provide some information on the various construction activities that will be carried out in the full schedule.

This schedule has been generally be based on the typical single storey brick veneer house, on slab, which I am most familiar with.(Every builder will have slightly different items in each stage but this provides a general guide)

As there are a lot of steps I will break it up into the separate work packages that comprise the the stage payments after a 5% deposit has been paid.

These work packages are

  • BASE ( approx 20% of Cost)

This package covers all the work in site preparation, up to ground floor level.

See this link for more details: Base

  •  FRAME (approx 20% of Costs)

This is when the frame for the house and the roof trusses have been fixed and the windows have been fixed in position.

See this link for more details: Frame

  • LOCK UP (approx 25% of Costs)

This includes external brickwork, or cladding, final covering of roof and fixing of house doors. (often the front door will be a temporary door)

See this link for more details: Lock Up

  • FIXING (approx 20% of Costs)

Comprises all the work up to completion of drylining walls and ceilings and installation of bathroom and kitchen cabinets.

Completion of attached garages, porticos. and carports.

See this link for more details: Fixing

  •  COMPLETION (approx 10% of Costs)

Everything left to make you home ready to move in.

See this link for more details: Completion

Although you will be asked to visit site for the a Pre-Completion Inspection (PCI) I would recommend at least a visit at the end of each of the stages, to check how things are going, and ask questions.


For similar psts see Construction Stages

For more on stage payments see Progress Payments


Construction Stage 5 – Completion

After Fixing comes Completion

Its probably been a long haul but we are getting to the last lap now.

Nevertheless there is still a fair bit to do including:

  • Complete Plumbing

Internally install taps, mixers, shower fittings, shower screens, and toilets

Externally finish downspouts and fix external taps.

  • Painting, Internal and External.

Internal painting will be in at least two stages. The walls and ceiling will be done before fitting of electrical fittings while woodwork/doors may well be later in the process.

  • Complete electrical.

Fitting all the power points and batten fittings.

If you are having a high level of home automation this might be quite complex and involve various stages. This stage also includes bringing the NBN service.

  • Paths and Driveways

Generally this is the front path and driveway unless you ask for more. I find it is cheaper to do the rest separately after the move.

  • Carpentry Final Fix

Room doors and cabinet doors and drawers.

  • Internal floor Finishes

Timber floating floors, tiles, or carpets.

  • Clean Up

Outside all rubbish will be removed and the site left flat. Inside it will probably be whats known as a builders clean – Dust brushed up and surfaces wiped, but not polished!

  • Pre-Completion Inspection

See PCI posts and the PCI Guide to help you through this stage

  • Deal With PCI Issues

Normally this should take one to two weeks but could be longer if there are a lot of defects.

  • Install Appliances

This will normally include oven, hob and any other expensive appliances and the hot water service. Frequently this occurs on the day of handover.

  • Hand Over Day 

The keys at last!  Make sure you are insured from the morning of handover. Also see this post on Construction Locks

Good Luck with your New House!


Settling In has more posts about getting your new house just right

For more on stage payments see Progress Payments


Construction Stage 4 – Fixing

Fixing follows on from Lock Up.

The fixing stage is moving from a very rough looking interior to something resembling the house you are expecting.

During this stage the following works will be taking place:

  • Install Insulation This includes both roof and wall insulation Although the wall insulation will be installed before dry walling the ceiling insulation may be installed following ceiling board installation.
  • Electrical – Rough in Running cables/conduits and installing switch and outlet boxes to the frame.
  • Plumbing – Rough In Running pipes inside walls
  • Plasterboard installation This will include ceiling boards, wall boards and cornices.
  • Air conditioning / Ducted Heating If a large main unit is mounted in the roof space it may be installed before the ceiling boards are in place.
  • Waterproofing Wet Areas The waterproofing membrane is applied to floors and walls before tiling
  • Carpentry – First Fix This sees the kitchen cupboards and bathroom vanities carcasses installed. (Doors, drawers, and counter tops are often left off at this stage) Skirting boards and architraves and internal window sills are also installed.
  • Main Plumbing Fixtures Baths, basins, sinks shower trays and laundry troughs are installed and connected to the drainage system. Taps, mixers and toilet bowls are often left off until after tiling.
  • Tiling Both wall and floor tiling are normally completed at this stage.
  • Portico and Carports These will be constructed at this stage together with any freestanding garage. It’s likely that the garage door however will be left until later.

The next stage is 5; Completion

The Practical Completion Inspection (PCI) will be coming up soon. This PCI Guide tells you what you need to look out for.

For similar posts see Construction Stages

For more on stage payments see Progress Payments


Construction Stage 3 – Lock Up

The house really starts to look more like what you expected as the build advances from the Frame Stage to Lock up.

Looks however can be deceptive… in actual fact the building process is really only 50% completed at Lock Up.

Here are the work items that comprise this stage of the works:

  • Building Wrap This wrap is used to protect the building, retain the insulation, prevent drafts, and allow moisture vapor to escape from the insulation. In its basic form a reinforced paper such as Tyvek may be used. Higher specification materials include additional insulation and/or reflective coatings.
  • Attach Windows Normally the window frames are attached to the frame before the brickwork starts and the brickwork is then built against the frames and tied in.
  • Clad Roof This may or may not include sarking under the tiles or roof steel. (Sarking is only required for certain wind strengths and roof slopes, although I think its always worthwhile.
  • Completed Walls This will be the brickwork or the typical house. In the case of a rendered house it may be blocks or even an insulation system instead of bricks. The render is not applied until later in the construction process
  • Attach Facia boards and Gutters Once the external walls are finished the facia boards, and soffiet boards if you have got eves, are fitted. Gutters are often fitted at this stage although the downpipes are frequently left until later.
  • Install Doors Of course to lock up the house you need doors. If you have specified expensive doors the builder may well fit temporary doors to make the house secure. The proper doors will only be fitted before the final inspection to minimise the chance of damage.

Once the house is at Lock Up it’s the last time you will be able to sneak round and inspect the work at night! You will need to make appointments now to check up on things.

For similar posts see Construction Stages

For more on stage payments see Progress Payments


Construction Stage 2 – Frame

This stage of the building is fairly quick but gives you a chance to get a feel for the finished house.

Framing usually starts a few days after the slab has finished. Sometimes frame erection may start the day after the slab has been laid. Although not ideal the load from the frame is fairly small compared with the loading from the brickwork and the roof covering.

  • Wall Frames Usually finished in two days for a single storey house although it may take longer for a 2 storey house.
  • Roof Trusses Usually will be completed in another day or two.
  • Roughing In Cables and Pipes Sometimes called first fix, this work involve fitting the cables and pipes that will be hidden behind walls such as;
    • Water Will involve running water pipes from entry point on the slab to all cold tap positions and hot water service. Lines will also be run from hot water service to hot tap positions. In the case of a solar hot water system with remote panels the lines between the hot water service and the roof panel location may also be run.
    • Gas Lines will be run from the proposed meter position to the site of all gas appliances.
    • Electrical In addition to running cable to all power locations steel backing plates for the power outlets are usually fixed to the frame at this stage. some data lines may also be run
  • Wrap
    The building is also wrapped with a plasticised paper wrap which helps protect the interior and insulation during the bricklaying.

It’s worth checking at this stage whether the plumbers and electricians have damaged the frames. Check:  Holes in Frames


For similar posts see Construction Stages

For more on stage payments see Progress Payments


Exit mobile version