One of the inevitable facts about concrete slabs is that there will be some cracking.
One of the sayings in concrete design is “ All concrete cracks…..the purpose of reinforcement is to hold the broken bits together.”
So what does this mean when you are having a new house built?
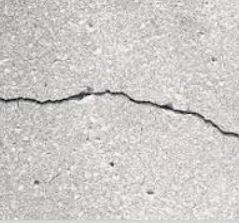
Surface Cracking – All Concrete
Hairline surface cracking is not unusual particularly in steel power floated house slabs. It can be caused by
Excess water in the mix,
Too much work when finishing the surface
Or drying out too quickly when curing.
Although the cracks don’t look very good they shouldn’t affect any subsequent flooring such as tiles.
Full Depth Cracks – House Slabs
House slabs are normally designed as a single slab with reinforcement so that any cracks that occurs will be prevented from opening too far.
Cracks of up to 2mm wide are considered acceptable in a floor slab. If you should get any cracks this wide and want a tiled surface its important to make sure a flexible tile adhesive is used.
Full depth Cracking – Driveways and Paths
Good design of driveways and paths is based on making sure that cracks are encouraged to occur, but only at the location of constructed joints.
This is done by making sure these joints are weaker than the main slab.
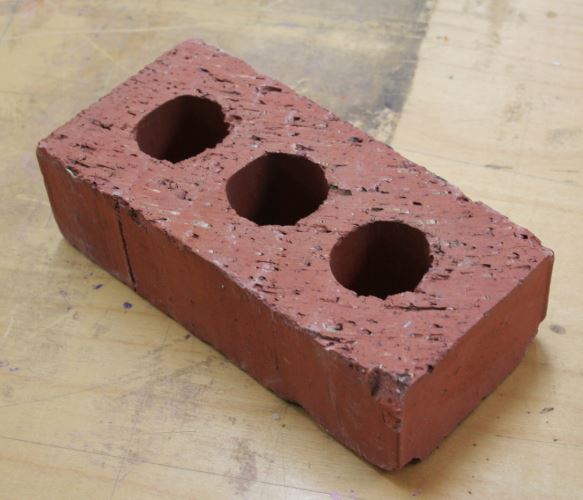
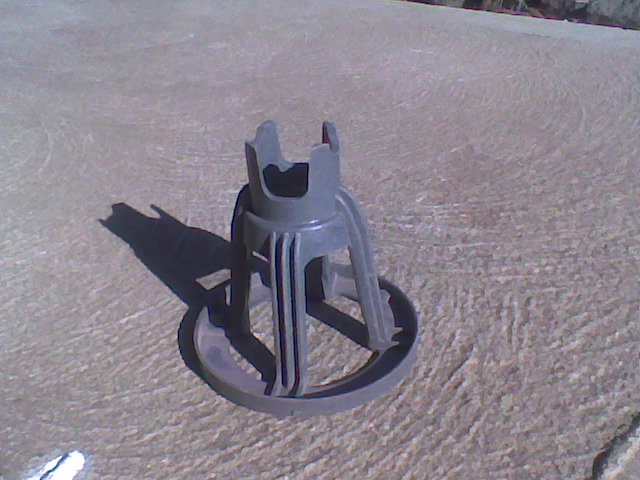
Bar Chairs are used to make sure the steel reinforcement in concrete ‘sits’ in the right place.
Here is a typical plastic ‘chair”
And here is a different type.
Getting the steel reinforcement in place is very important in making sure you get the best quality slab. . . .and the only way to make sure is to ‘sit’ the reinforcement mesh, or bars, on these chairs.
The chairs need to be 800mm apart unless the bars in the mesh are greater than7mm diameter.
The reinforcement in paths and driveways should be a minimum of 40mm from the top and bottom of the slab. (This typically means around the middle of the slab)
Some concreters, especially the one who give you a cheap price, will tell you you don’t need bar chairs as they can pull the reinforcement up to the right position with special hooks while they are pouring the concrete*.
This is completely wrong.
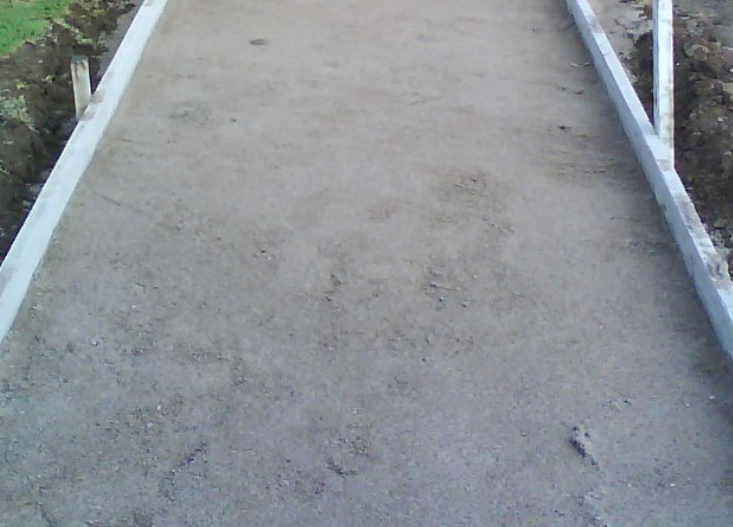
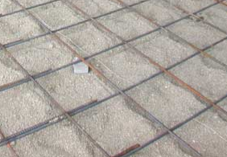
Below is a picture of the underside of a concrete slab that had to be dug up due to excessive cracking after using this money saving** ‘technique’.
You can clearly see the rusting reinforcement that was on the underside of the slab was doing nothing to stop the slab cracking.
To ensure you get the best slab make sure there are bar chairs in place while the concrete is being poured…………. I have been told its not unknown to put the chairs in place for a pre-concrete inspection and then take them out before the pour!
*Footnote 1: Many concretors disagree with me. . . but in America where they lay huge amounts of concrete roads they have developed special machines to pull the steel up into place. . . .In 300mm thick slabs they have found that the steel can be 75mm out of place (Federal Highways Administration).
So how can workers correctly “hook and pull” mesh reinforcement accuratly While Standing On The Reinforcement?
**Footnote 2: The actual cost of the chairs works out at around $1/m2 of concrete!
For more posts on on getting your paths and driveways correct see Concreting
A lot of people believe that the steel mesh adds substantially to the strength of concrete paving.
This is a myth!
The truth is large areas of concrete paving will crack.
What well thought out reinforcement steel does is:
Limits cracking where you don’t want it (in the middle of slabs)
If some cracking does occur it holds the cracks tightly closed.
A reduced amount of steel across joints helps to make sure that cracks do occur at the joints (where you want it to crack).
Sizes and Types of Mesh Reinforcement
A single full sheet of mesh is 6m by 2.4m.
Many local suppliers will sell you half a sheet, or less, for small jobs if you plan on doing it yourself.
These are the common types of mesh that you can buy in Australia for paving work, with my opinions on what mesh to choose.
Type
Description
Comment
SL52
5mm dia bars @ 200mm spacing
For garden paths (max joint spacing 2m)
SL62
6mm dia bars @ 200mm spacing
For plain paths or patios (max joint spacing 3m)
SL72
6.75mm dia bars @ 200mm spacing
Caravan or Boat parking areas
SL82
7.6mm dia bars @ 200mm spacing
Front Driveway minimum for plain concrete
SL92
8.6mm dia bars @ 200mm spacing
Front Driveway best for patterned concrete
RL81
7.6mm dia bars @ 100mm spacing
Polished concrete floors
There are many more types of mesh but they are more specialised, the above will be fine for typical concrete slabs around your home.
Depth of Cover
The minimum cover from the top and bottom surfaces of the slab should be 30mm.
This will prevent the steel rusting once the concrete is placed.
To make sure you get this cover see this link: ‘Bar Chairs‘.
Overlap
When you need to join two pieces of mesh the overlap should be 2 squares.
Do Not overlap mesh across the site where a joint is going to be. That will stop the crack forming at the joint.
Rust
Don’t worry about a bit of surface rust on the mesh, although you should remove any rust flakes. The roughness of the corroded area help the concrete grip the reinforcement.
The alkali nature of the concrete will stop any further rust, as long as the 30mm cover is maintained.
See this link for advice on the thickness of concrete slabs: Concrete Thickness
For more posts on on getting your paths and driveways correct see Concreting
Let face it, I am a typical man and colours don’t really interest me much.
I like to limit myself to the standards of White, Black, Brown, Red, Orange, Yellow, Green, Blue, Indigo, and Violet.
I’m even not too sure about Indigo and Violet. . . What’s wrong with just saying Purple?
Don’t start on talking about colours like Aquamarine and Avocado as I will quickly get lost. . . and that’s before we mention the 100 different types of white, or ’50 shades of Grey!
The average project home builder has about the same sense of colour as me so if you want a particular colour here are some things you need to do:
Find out if the builder has a standard paint supplier or will allow the use of any paint manufacturer as early as possible.
Get that paint manufacturers colour charts and pick the colours and finishes (gloss, satin, matt etc) you want before the colour selection.
Make sure the full description of the colours are handed over preferably with copies of the colour cards stapled to the documents for reference.
Check the colours are correctly described in the contract documents.
Check the final finishes against the cards at the PCI inspection.
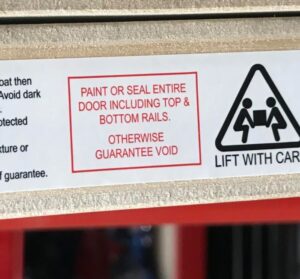
Did you finish up with a colour you hate on your house? Or just the wrong shade of white?
Well here is one on a door at my local Bunnings store. II am including this post for 2 reasons.
DIY door installation
If you are going to fit a door don’t rush the job make sure you paint all edges before you install it.
When its an external door I would reccomend at least 3 coats all over if you don’t want it to shrink and expand when the weather changes.
There is little that is more annoying than a door that continually sticks.
New Houses
With new houses the guy who paints normally comes along after the doors are fitted so its quite common that both the top and bottom edges don’t get painted.
This is just one of the things you need to check before you agree to the final payment.
For more advice on things to check see the PCI Guide