When we first came to Australia and started looking at display houses we often saw En-Suites with two wash basins.
We thought it looked fairly classy so that’s what we got in our first Australian new house.
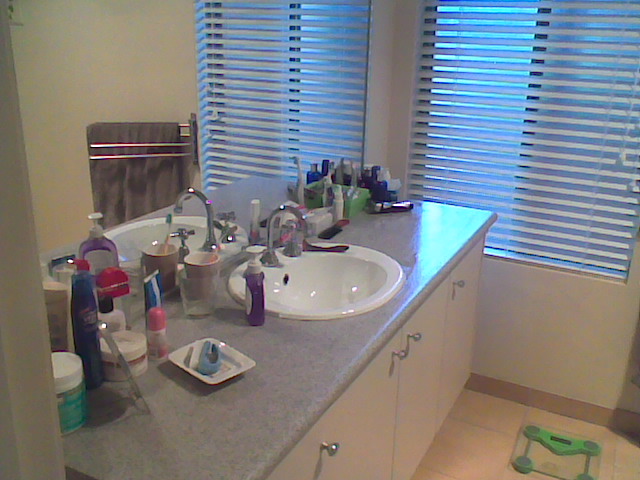
Ever since we have always gone for a single basin. . . here’s why:
We found that we are never in the bathroom at the same time. Even when we used to travel to work together I always got up first to take the dog for a walk which gave my wife a clear run.
Having a single basin gives more counter space on the vanity. (sometimes too much!) We do have fairly strict demarcation lines. My wife’s stuff is on the left and my stuff is only allowed on the right.
Having one basin with only one set of waste plumbing leaves more room in the vanity cupboards for fresh towels, hair dryer, toilet rolls, spare toiletries, etc, etc.
Cost saving of basin, tap fittings, and labour. Even with basic fittings this gave us a few hundred dollars we could use on things we really wanted. If you have expensive plumbing fittngs the savings could be thousands!
The trend these days seems to be for double garages……… but how many of them have two cars in them. . . . My guess would be about 10% and quite a few never have a car in them at all.
Some are just a home for junk that really should go to the tip.
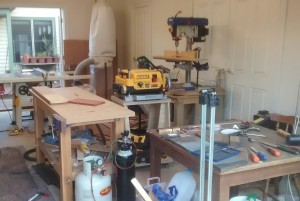
Some are a workshop with bench, fixed power tools and shelves of tools.
I have seen a few ‘Man Caves’ with pool table and a bar.
Others are a storage place for bikes and barbies.
My double garage can still get one car in but the remainder is a combination of most of the above.
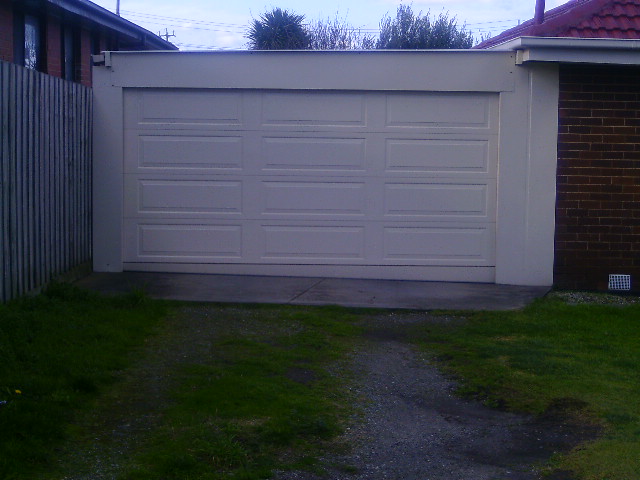
With narrower blocks a problem can be the garage dominates the rest of the house.
When you come to sell not many will want a house that looks more like an industrial lock up storage than a home, like This House.
Dimensions
Typical internal garage dimensions are:
Single garages – 3.5 metres (wide) by 6 metres (long) with a door around 2.5m wide.
Double garages – 6 metres (wide) by 6 metres (long) with a door around 5m wide.
These garages should fit anything up to a large 4WD, which are around 5.5m long by 1.9m wide.even with a bull bar on the front and tow bar behind.
Alternative Layouts
In the past I have had a single carport for parking the car with a separate garage/workshop at the back as my shed, which seemed to work well.
Another option may be to have a garage and a half! This could be either:
9 m long by 3.5 m wide with the back half being the store room/shed.
or
6m long by 5m wide with shelves and/or a workbench along one or both side walls. This would work better if you wanted a large door through to the back garden.
Not enough room? . . . perhaps an underground/basement garage is the way to go. (see this link to find out more: Underground Garage)
Other Considerations
Once you have chosen the size here are some links to other aspects of garage planning:
Do you know that in spite of the standard block getting smaller over the past 20 years the actual size of the houses has been getting bigger. The builders are doing a good job of selling us on the idea of more space.
There are three sizes of house you could buy:
The size you need . . .. SMALL
The size that you would like. . . . BIG
The size that the builder wants to sell you. . . .ENORMOUS
Get a bigger house and it could blow your Budget. To keep costs in check you need to do some preparation. Here are some suggestion:
Avoid starting by visiting show houses.
Go through your existing house throwing away all the junk you haven’t used in the last year or two. You could even raise some money and have a garage sale.
Measure the internal size of each room in your house, in m2 and think about whether that room needs to be bigger, or could be smaller.
Don’t forget to include the wardrobes, the pantry, and the garage.
Don’t measure the hallways but allow 15-20m2 for hallways and passages.
Allow around 15-20m2 for internal and external walls.
Decide what additional rooms you need, for example an extra bedroom if you have another child on the way.
Add all the areas to get the total area of the house.
You could also convert the sizes to Squares for easy comparison when looking at adverts.
Start looking on the builders web sites or adverts for houses plans that are close to this size.
When you are looking at plans use the dimensions you originally took for each room to get a feel for the room sizes.
Only go and look at houses that are within the dimension you calculated, plus say no more than 10%.
To help I have prepared a Google documents Checklist which can be accessed from the link or the Checklist tab at the top of the page.
How have you made sure you haven’t finished up with a house that’s too big?
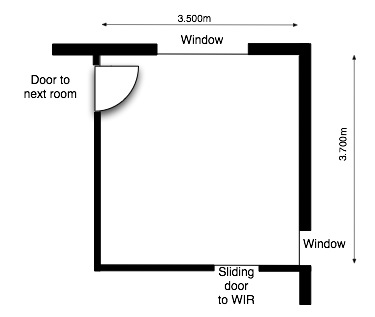
A basic floor plan is the sort of plan you will see in the developer’s brochure or on their web site.
Most people aren’t used to looking at plans and relating them to what they are going to get.
So here is a way of helping you understand.
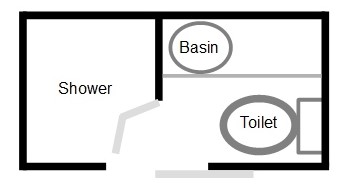
1. Get a pad of metric graph paper. These usually have smaller squares with 2mm sides and heavier lines every 10mm. 2. If we are going to draw a plan at 1 in 100 then the side of every small square is equivalent to 200mm, or 20cm. 3. Start in a simple room, say a bedroom, and measure one wall. Draw a thin line along one of the lines of the graph paper. 4. From one of the corners measure to the next corner and draw this line on the graph paper, don’t worry about the doors or windows at this stage. 5. Carry on measuring and drawing until you have gone right the way around the room. You should now have drawn a box that looks something like the picture below.
6. Mark the position of the doors and the windows. 7. Thicken the outside of the lines to the thickness of one square for external brick walls. 8.Thicken the outside of the lines to the thickness of half a square for internal walls. 9. Draw in a quarter circle to show the way that the door opens. You should now have a drawing that looks something like the picture below.
10. This will help you relate the size of your existing room to one you see on a plan.
11. If you want to see how the furniture looks its better to cut out sections of graph paper the same size as the furniture rather than draw on the paper. You can then move these around.
Once you have got the hang of this you can expand the drawing to include all the rooms of the house.
This addendum was added to an original Post from 2014 as there has been a lot of publicity recently (late February 2019) about foam panels and certification has been removed from certain types of panels.
A particular issue for apartment blocks has been related to high speed spread across the surface of the panels to other flats.
On a standard house the render should protect the insulation from external flames. (If flames penetrate the plasterboard, from the inside, it is likely that the occupants will either have already evacuated, or be dead before the insulation ignites) n
Nevertheless you should review whether the potential risks from foam panels are acceptable to you.
Original Article
Rendered Foam walls are becoming much more common, particularly in the upper floor of 2 storey homes. They offer a real advantage in situations where it would be difficult to provide adequate suppport for a heavy brick wall (For example when the upper floor needs to be set back from the ground floor)
If you are worried about strength you need to be aware that the real strength of the house is in the frame. (see: House Construction – The Frame)
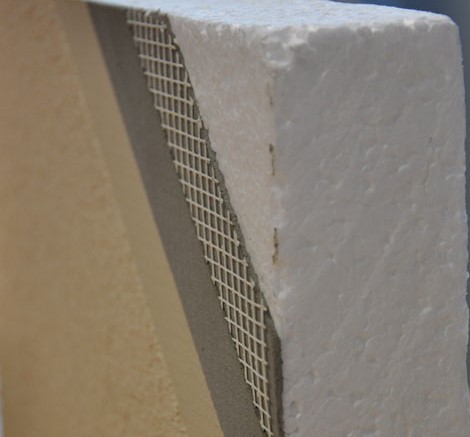
Construction
The Foam boards, which are manufactured with an external mesh face, are fixed to the frame with special galvanised screws that incorporate spreader washers.
Joints are sealed with a polyurethane foam and have mesh jointing tape.
External corners are reinforced with metal strips.
A minimum of 5mm of acrylic render is applied, normally in a three layer system.
Polystyrene Foam
There are 2 different types of foam used in this construction method:
Expanded polystyrene( EPS) – Good thermal performance but limited impact resistance/structural strength.
Extruded polystyrene (XPS) – Similar thermal performance and looks similar but the production method is different which results in increased impact resistance and structural strength. Higher cost
Insulation values for the various board thicknesses are:
50mm – R 1.2
75mm – R 1.8
100mm – R 2.4
Final Thoughts
Although there are some advantages in this system it does require careful detailing and construction otherwise leakage can occur damaging your house.
The advantage of masonry on the lower part of the house is that it is less likely to be damaged by the bumps and bangs of daily life. Once the wall is above head height damage becomes less of an issue and the rendered foam board should be fine.
I’d prefer XPS to EPS.
Although the insulation values are good the builder will most likely want to save the cost of the insulation batts in the frame. If you ask for the wall to include insulation batts you will have an exceptionally well insulated wall at very little extra cost.
Some people say they can deter burgalaries as thieves don’t like the noise when they approach your house!
They can look nice. . . . . Just don’t think it is a cheap option.
To do a good job you need to provide a good foundation otherwise the gravel will be punched into the soil and you will finish up with a muddy mess.
Even with a good foundation you need to make sure that the stones don’t get pushed around.
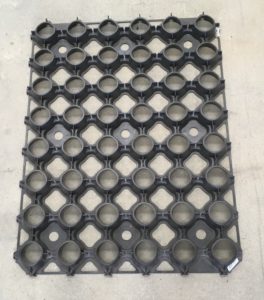
If you look carefully at the above picture you will see there is a geogrid keeping the stones in place.
If you took the stones away the geogrid looks like this:
You can buy these at the ‘Big Green Warehouse’ but they aren’t cheap!