Is Grey Water Re-Use Worthwhile?

What is Grey Water?

Grey Water includes all the waste water from the house with the exception of toilet waste. (Black Water)

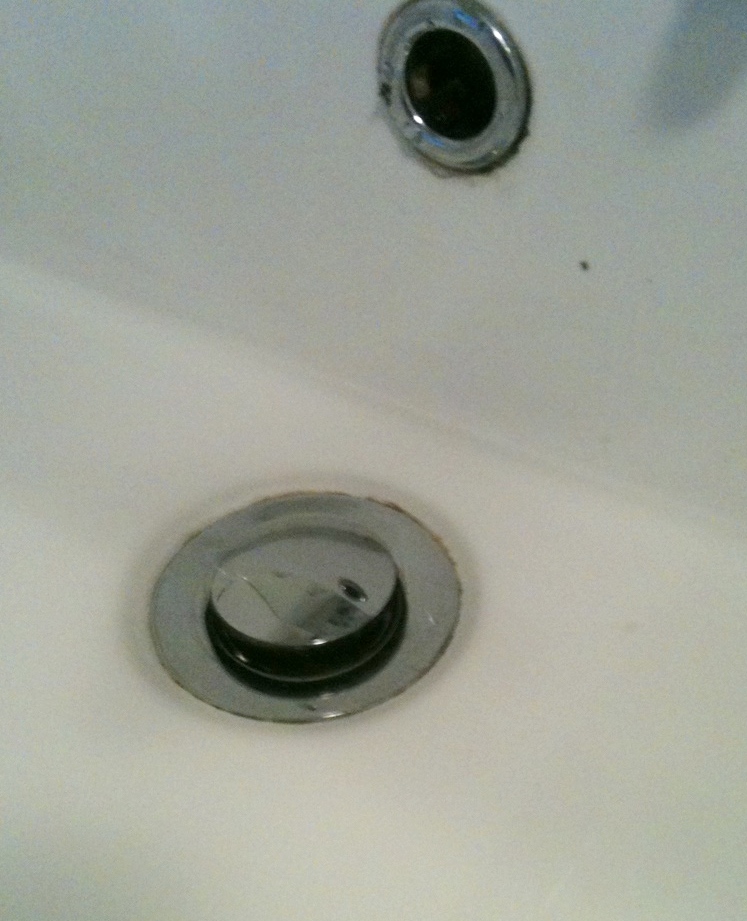
It can includes water from; Washing Machine, Dishwasher, Sink, Wash Basin, and Shower.

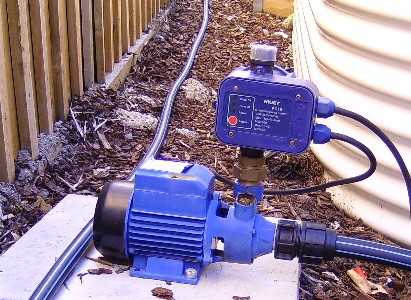
A basic grey water reuse scheme sending washing machine water using a two way diverter valve to a perforated hose will cost less than $100.  A top-of-the-range system, taking all the grey water, with treatment and pumps can cost $2-4,000.

Advantages

  • It’s available all year round whether it rains or not.
  • A basic system is inexpensive.

Disadvantages

  • You are not supposed to use grey water on root crop plants in your veggie plots because of bacterial contamination.
  • You shouldn’t store grey water as it is likely to go Septic and smell.
  • A lot of grey water contains too many nutrients for native plants.
  • Many common domestic soaps are high in sodium which can cause soil problems with long term use.

Summary

Because of its disadvantages I really regard grey water as a last resort rather than a main garden watering system.

If you have a veggie plot, or a lawn, one of the more basic systems will help you in times of drought, so I wouldn’t go for one of the top of the range systems.

If you are intending to use grey water make sure you use an eco friendly laundry liquid such as Earth Choice.


A better alternative is to make sure you get the right size of rainwater tank so follow this link: Rainwater Tank Size


Condensation

Condensation,  a minor inconvenience,  or a major problem?

A little condensation on windows is easily dealt with, . . . . . .  but heavy condensation in poorly ventilated corners can lead to mould damaging your walls, ceilings, or even your clothes.

Why does Condensation Occur

Condensation in a building occurs when warm air, containing water vapour, comes into contact with a cold surface.

As the air cools it can’t hold as much water vapour so the excess changes into liquid water which is deposited on the cold surface.

The  water usually appears as surface condensation as water droplets or water film on cold surfaces, typically windows.

Condensation occurring on cold walls and ceilings is a major issue as it is when mold problems start. Of particular risk are wardrobes on  an external wall as there is a cold surface and a lack of ventilation.

Sources of Water

Here are five main sources of water vapour in the home

  • People A typical adult will lose around 0.8L/day of water, half from skin evaporation, and half from breathing.
  • Bathrooms Not just the obvious showers and baths, its also those drying towels and bathrobes 
  • Kitchen – Kettles, Pans, dishwasher, and the microwave will add water vapour
  • Un-Flued Combustion – Portable Gas Heaters, Gas Hobs, Bio Ethanol Heaters, even Candles, all emit water vapour into the room as they burn.
  • Laundry – Unvented Tumble driers, Airing Clothes.
  • Evaporative Cooling – Because it is mainly used in summer less of a problem, but can be an issue on cold nights.

Preventing Condensation Damage

Action to prevent condensation damage involves looking at both insulation and ventilation.

Insulation. Additional insulation in walls or ceiling will keep those surfaces warmer which will reduce the risk of condensation damage in most rooms .

Ventilation In bathrooms and kitchens the more moisture laden air means that insulation by itself will not be enough. The moist air needs to be effectively extracted to prevent condensation being an issue. (Although I have previously posted about Heat Loss due to Ventilation some  ventilation is  needed throughout the house)

Role of Double Glazing

Double glazing is often suggested as an answer to condensation however this is not really the case. As the windows are now less cold there is less surface condensation on the windows, so it looks like the issue has gone away. The problem is that without removing the moisture laden air the risk of condensation on walls and ceilings is increased.

See this link to find out why I prefer a separate Extraction fan in the Bathroom: 3 in 1 Bathroom Heaters

To keep moisture out of the insulation materials see this link: Vapour Barriers


Overflow Relief Gulley

Have you ever wondered what this is in your garden?

Perhaps you have seen ‘ORG’ on a drawing.

Well the answer is it’s called an Overflow Relief Gully. It needs to between the house and the connection to the main sewer.

An ORG is a vital part of protecting your house against Sewage blockages in the main causing an overflow inside your house.

The grate is set 150mm below the level of the lowest waste water fitting in your house. Normally the shower drain or Floor Drain. ( In cases where the 150mm minimum height cannot be achieved, a reflux valve should be installed in addition to the ORG)

In the event of a sewer blockage the sewage can flow out of the ORG. Not very nice!…….. but much better than flowing out across your floor.

To make sure it works when you need it:

  • DON’T landscape over it!
  • DON’T put a plant pot …… or anything else, on top of it!
  • DON’T fasten the grate down! 
  • DON’T allow storm water to flow into it! 


Firewood Storage

If you are serious about wood fired heating you are going to have to think about storage.

How Long Do You Need To Store?

Firewood should be seasoned, until it is thoroughly dried out.

For freshly cut wood that typically means for at least 2 years.

Wood gathered from the forest floor still needs at least a years storage.

Unseasoned wood  doesn’t burn as efficiently as seasoned wood.  The difference is noticeable, and some of the problems are:

  • The volatile components won’t ignite such as creosote.
  • The volatiles are deposited as a black mess (which is highly flammable once it dries) on the inside of the flue.
  • There will be too much smoke.
  • There will lot of steam going up the flue, Which carries a lot of the heat with it.

Storage Locations

As Enough Wood for a Year is around 10 cubic m you need to be able to store around twice that amount.

This can be split between 3 places:

  1. An open storage for the first years storage. (The timber will still dry even though it is being rained on)
  2. A roofed storage for the second years storage. (Make sure this, and the first years storage is well away from the house)
  3. A day or two storage next to the door.(I just use a wheelbarrow)

 What Not to Do

One of the things I sometimes see in those trendy magazines is firewood storage next to the fire. A bad idea in my opinion there is going to be a lot of spiders and other insects in the firewood.

See why Wood Heaters are Better than Open Fires


Bio-Ethanol Fires

Everywhere I go these days I see Bio-Ethanol Fires….. so are they a good idea for your new home?

Well all the publicity says they are a renewable resource that produces a ‘living flame’.  As Ethanol (we used to call it methylated spirits) burns cleanly with no toxic byproducts these heaters can be used in a room without a flue.

Well before you go down the Bio-Ethanol heater route here are some things to consider.

It’s Not a Main Heat Source

While a Bio Ethanol fire does give out heat, it’s not enough to heat out your house like a traditional Wood Heater. About the most you can expect is around 2 kW (the equivalent of a small fan heater).

Water Vapour

One of the combustion products is water. For each litre of fuel it produces almost 1/10th of a litre of water vapour. That can mean more condensation on the windows, and even mould in cold corners.

Oxygen Consumption

Although there are no fumes like a traditional fire it consumes the oxygen in the air. So make sure you get some fresh (colder) air into the room.

Safety

Some points about the Fire Risk:

  • You are storing a highly flammable liquid and pouring it in a heater in your living room.
  • You should never fill the heater while its burning or even when the burner is hot.
  • It is still a naked flame. Make sure children are kept well away from it.

Cost

Although there are some cheap Bio- Ethanol Heaters I wouldn’t feel all that safe with a cut price unit. If you get a quality heater you could be paying a lot of extra money for that flame effect.


Heating is just one of the topics included

in the Pre-Start/Selection Guide?


Firewood

Wood can be the Most Expensive………..or the Cheapest heating available for your new home.

It all depends on your level of commitment.

Most Expensive

Buy firewood at the service station and burn it in an open fire and it could easily cost $20-$30 for a few hours in the evening.

Cheapest

Use a slow combustion wood heater,  collect and split your own wood, and it can be less than $10 for a week of continuous heat.

How Much Wood Do You Need?

From my experience of heating a 180sqm home I reckon about ten 6×4  trailer loads (around 10 cubic m) is enough for a typical winter.

Another way of looking at it is what a friend of mine says “All you need to heat a house is to pick up three logs every day of the year”. I would say that’s about right.

Low Cost Sources

  • Nature Strips, Free, I often see piles of branches outside suburban homes. Here is around three night of heat recently seen on a Nature Strip! Be careful some councils don’t approve of removing stuff left for council collection.
  • Friends, Free If you make it known you are willing to collect wood you can quite often get asked by friends take aware tree branches. WARNING Don’t offer to cut down trees, that should only be done by licenced, and insured, tree fellers
  • State Forests and Public Land, Free – $25/trailer. Each state has their rules in Victoria its free but  only at certain times of the year. In NSW it ranges from $8-$25 per cubic m.
  • Timber Companies, Free I often see skips of free firewood outside factories but be careful that you only pick up untreated wood. The fumes from burning treated wood can be extremely toxic.


See why Wood Heaters are Better than Open Fires


Rattling or Thumping Pipes – Cures

These cures relate to general rattling or banging when you turn the tap on.

The various reasons for these noises, and their cures are:

Air in Pipes
Typically occurs in new systems, or after some plumbing alterations. You need to purge the air from the system. To do this

  1. Start at the lowest tap or valve and slowly turn on to full. If there is some spluttering leave on until the water runs smoothly then turn off.
  2. Go to the next lowest tap and repeat the procedure, continue working your way around the house until you reach the highest outlet.
  3. Don’t forget outside taps, toilet cisterns and shower heads.

Steam in Pipes
Can affect solar hot water systems and hydronic heating. Generally means the system is running too hot.

  • For solar systems the first thing is to reduce the temperature for the circulation pump start. This will take the hot water from the panels at a lower temperature. If that doesn’t work it may be the storage tank is too small for the area of panels. If you can’t afford a bigger tank shading the panels on summer days can help.
  • For Hydronic heating systems you will need to lower the boiler thermostat.

Insufficient Fixing of Pipes
Affect all sorts of plumbing systems. May need a combination of four different approaches

  • Pack around any loose pipe clips.
  • Install additional clips between existing clips.
  • Install pipe insulation.
  • For pipes in cavities push foam tube insulation along the pipe so it stops the pipe banging on the walls.

If the problem is a bang when you turn the tap off then you need to see the post on Water Hammer.

Brickwork – Mortar Joints

During your Selection or Pre-Start meeting It isn’t just Picking a Brick. You also have to pick a mortar colour and a type of mortar joint.

Mortar Colour

If you have been to a Brick Display Centre check what colour mortar they use in the test wall of the brick you like. This will probably be the best colour for your house.

Joint Types

Below are the more common types of brick joints:

  • The ‘Ironed’ or ‘Rounded’ joint is quite common and helps to keep the water out of the brickwork
  • The ‘Weather’ joint, which is not so common in Australia, also helps to keep the wall dry.
  • The ‘Raked’ joint does give an interesting texture to the wall, but is the least moisture resistant joint. Best choice for beveled edge, or tumbled, bricks. It is unsuitable for bricks that only have a surface coating on the sides as the body colour will be exposed at the joints.   Because the mortar is almost always in shade it will look darker than you expect.
  • A flush joint is reasonable weather resistant but can look uneven. It is unsuitable for rustic or rounded edged bricks. Another issue is it is more likely to result in staining of the brick face.

My E book Guide to Selection/Pre-Start includes lots more information and checklists to help you choose the details that will make your new house a home.


Pre-Start / Selection Guide 2nd Edition

Available now the latest edition of the E-book

PRE-START / SELECTION GUIDE

This major revision, and expansion, of the Guide means you now get:

  • 90 pages of information and advice
  • 8 pages of checklists

All aimed at making sure you think about all the details that need to be included in your new home.

Previous Purchasers

  • All those who bought the previous edition between 1st April and today should have already received a Free update by Email.
  • If you have bought the E-book before this date and would like a Free Copy of this edition send an Email to brian.anewhouse@gmail.com with a copy of the file for the 1st edition attached and I will send you a Free Copy.

Still only $4

Be prepared for your new house Selection / Pre-Start Meeting.

CLICK HERE To find out more

Rainwater – Pump Size

One of the reasons why most rainwater systems use too much power is because because the pump is too big. For other reasons see Rainwater – Pump Issues

Most pump suppliers and design charts will specify a larger pump than you really need (They sell a more expensive pump, It’s less likely that the pump will be returned because it isn’t big enough, and they aren’t paying the power bill)

If you want to pick the most economic pump here is how to go about it.

Instantaneous Flow

What is the most flow you need at any one time. Here are some figures for typical house fittings.

Fitting Flow Litres/min
Tap 10 to 15
Tap with Flow Restrictor 4 to 6
Low Flow Shower 7 to 9
Washing Machine* 4 to 10
Dishwasher 4 to 6
Toilet 3 to 5
Garden Sprinkler** 10 to 15

*To get to the lower figure you will need to close the supply valve this will add a few minutes to the wash but will help with issues like Water Hammer.

**It’s really better to irrigate the garden with a separate pump.

Add together the highest flow rate fittings that you think you will want to run together, which will give you a Total Flow Rate ‘Q’

Pressure

You need to aim for a pressure at the fitting of around 150kPa (15m of Head)

To get this pressure you need to:

  1. Measure the height of the furthest fitting above the lowest level in  the tank ‘Hs)
  2. Calculate the Pressure  Loss ‘Hf‘ due to Friction in the pipes See table below
Max Flow Rate
Litres/min
Hf  m head per 100m of pipe
20 25 32 40
12 10.9 3.7 1.2 0.4
24 13.4 3.9 1.3
36 8.3 2.8

The Required Pump Pressure is then calculated from:

Required Pump HeadP‘ m = 15 +Hs + Hf
Or
Required Pump Head ‘P‘ KPa = 150 +(Hs +Hf)) x 10

Ordering

To order a pump you just need to quote the Total Flow and Required Pump Head


When you are ordering a pump think about getting a Pressure Tank

Exit mobile version