Termites

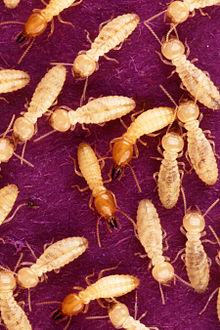
Did you know Australia has around 15 species of termite which can damage the timbers in your new house.

Although some species of timber are resistant to termites none are termite-proof. In practice any structure containing wood can be attacked, unless protective measures are taken.

Even if you have got a steel framed house, or double brick, you will still have timber in things like doors and architraves.

photo from Wickipedia

Know Your Enemy

Termites are more like cockroaches than ants.

Subterranean termites do more damage to timber than either damp wood or dry wood termites.

The termites generally remain within a system of tunnels that can extend 50m, from the central nest, to food sources.

Its not unusual for the termites to build their tunnels round any barriers so no matter what termite protection you use you still have to inspect the barriers regularly.

In order to get to their food source of wood, termites can damage materials they cannot digest such as plastics, rubber, metal or mortar.

Protective Measures

In the past certain areas were identified as at risk of termite attack while others were considered termite free. I thick it is much better to consider all properties at risk.

I’m not a fan of regular spraying of chemicals so for me a permanent barrier is a must.

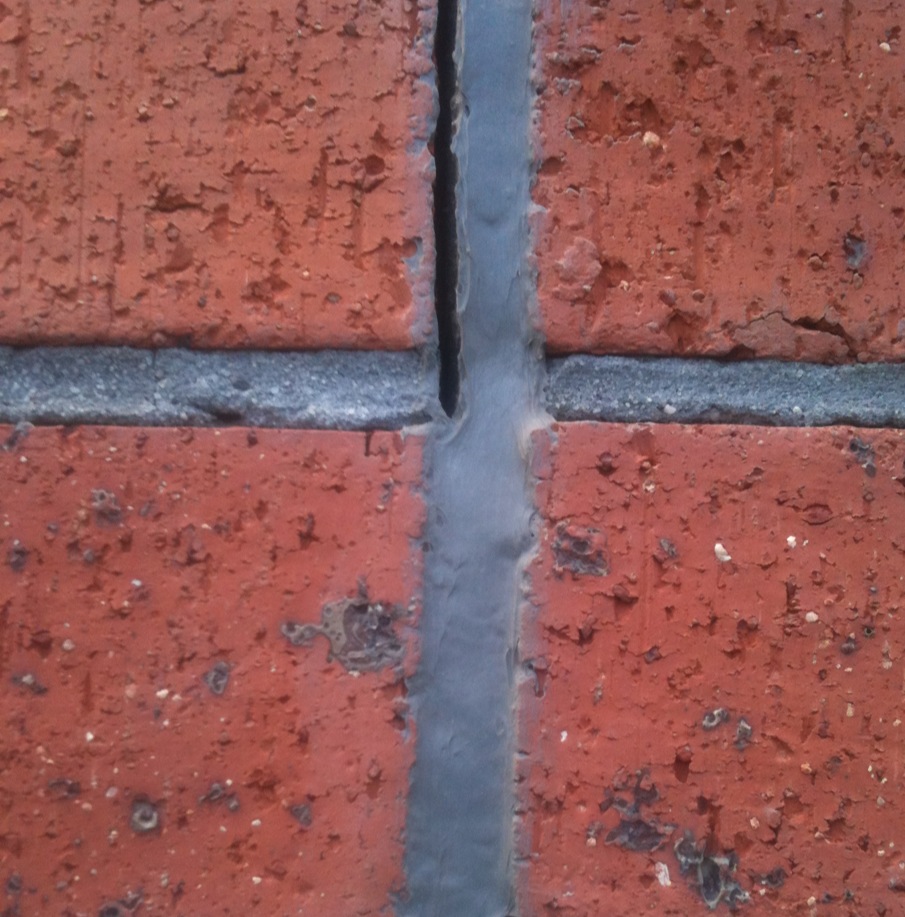
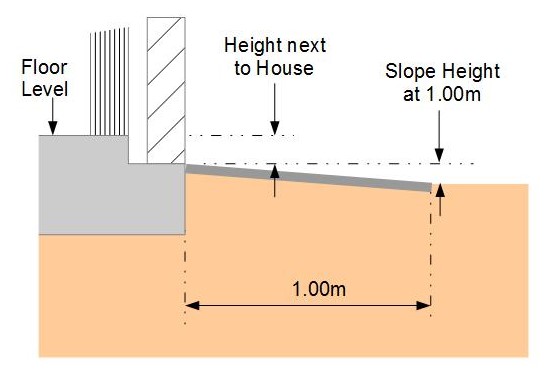
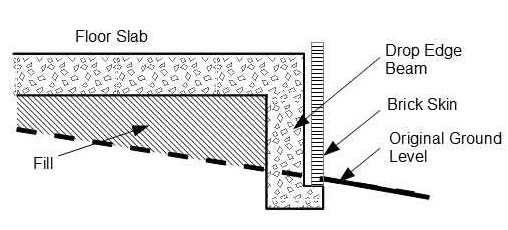
Basically you need a continuous barrier to prevent termites climbing up through the external wall and individual protection around any pipes and conduits that penetrate the slab.

Options for the barrier in the walls, in order of rising cost include:

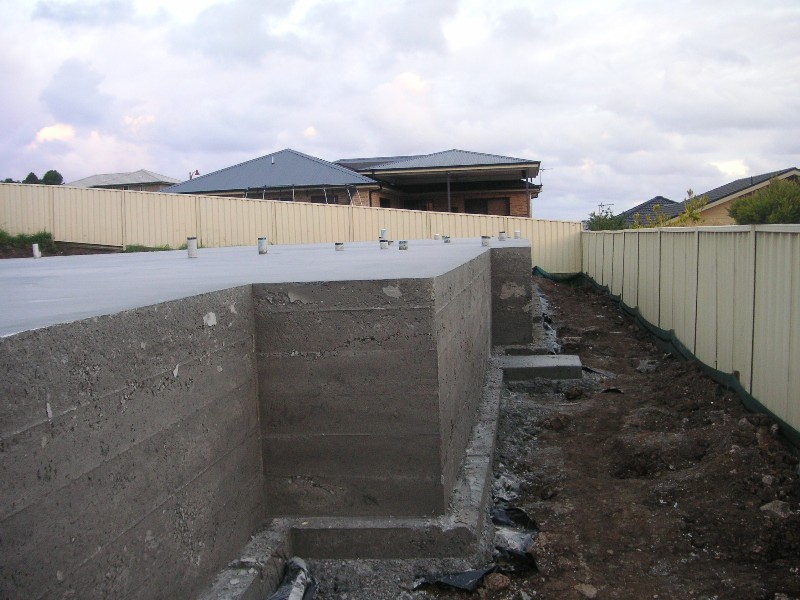
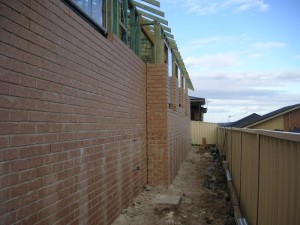
  • Exposed Concrete This is cheap and effective as it involves leaving the bare concrete of the slab exposed for a minimum of 75mm. Unfortunately not very attractive,  although you could use a concrete paint to match the brick colour.
  • Barrier Containing Insecticide Probably the most common is  Kordon, which is a  combined DPC and termite protection. It is two layers of plastic sandwiching an insecticide impregnated layer. (Expect to pay around $1,500)
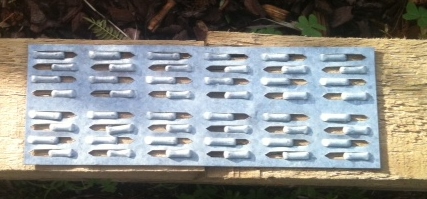
  • Termimesh A fine stainless steel mesh. (expect to pay around $2,000)

Last time I built I used Termimesh as I was concerned about appearance, and preferred not to use chemicals.


Decisions on your new home? . .  see  Selection/Pre-Start Guide

Only $4


What Are Brick Articulation Joints?

When you are looking round your new home build you may think  “What’s that gap between the window and the brickwork?” . . . . . . .or even “Why is there a vertical gap between the bricks in the middle of the wall?”

Before you panic it might be worth checking if it is an Articulation Joint.

Why Are There Articulation Joints?

Brick Veneer houses can move for several different reasons including:

  • Temperature
  • Humidity
  • Movement of the frame
  • ‘Flexing’ of the foundation

As the structure moves articulation joints are used to accommodate these movements in the structure without cracking.

Unless the soil has been classed as either A or S (see: Soil Classification) vertical articulation joints must be installed in any un-reinforced masonry walls.

Location

In straight walls without openings, the articulation joints must be at a maximum spacing of 6m. They must not be closer than the wall height from the corners.

Where there is a door or window its normal practice to put the joint alongside so they are less obvious.

Construction

For articulation joints next to windows and doors a gap of 10 mm must be left between the edge of the frame and the brickwork.

In a plain wall the gap between bricks again should be 10mm.

The space between the bricks is taken up with a foam filler with a flexible seal on the outside face keeping water out.

The bottom of this photo shows what the finished seal should look like . . . . . . . the top part shows a problem that will needs to be sorted. (normally this tearing of the sealant from the brick is caused when the sealant is too thin)

What you can’t see is  that during the construction the bricklayers should be inserting expansion ties across the joint.

During construction it is well worth checking that there is NO MORTAR in the joint. . . . Any mortar will stop the joint acting as it should and can cause cracking over the next few years.

See Bricks for More Posts


Height Above Ground


For the typical modern house with slab on ground base there are two minimum heights above ground level that need to be considered:

  • Next to the building.
  • Distance of 1m away.

The reason for these minimums is to keep water out of the building, including the structure and foundations.

Next To The House

Floor level above external finished surfaces must be a minimum of:

  • 50 mm above impermeable (covered paved or concreted areas) that slope away from the building
  • 100 mm above the finished ground level in low rainfall intensity areas ( 5 minute intensity of less than 125mm/hour for a recurrence interval of 20 years -see: Rainfall Intensity to check your site), or sandy well-drained areas
  • 150 mm in any other case.

Distance of 1m

The external finished surface surrounding the slab must be sloped away from the building, for the first 1m by a minimum  of the following:

  • 25 mm in low rainfall intensity areas for surfaces that are reasonably impermeable (such as concrete or clay paving)
  • 50 mm  in any other case.

Normally in clay soils I would allow another 15-20mm to allow for any ‘Soil Heave’. (See:Building on Clay Soils)

Overall

To meet the Building Code the range of total heights above ground will vary between 75mm and 200mm depending on circumstances. If you want a smaller step between inside and outside (for reasons such as Better Accessible Design) you will need to talk with your House Designer about a detail which meets the intent of the Building Code (Keeps water out of the house).


Roof Trusses

Although  roof trusses only started being used in Australia in the 1960’s they now have around 80% of the total ‘Pitched Roof’ market.

They are all designed using well proven computer programs and manufactured in factory conditions. (the whole process is high tech and relies on specialised equipment…….site work is limited to erection of the completed trusses).

Trusses can span large areas without needing intermediate supports. Because the individual components are engineered to share the stresses acting on the roof the total amount of timber is usually much less than an equivalent ‘Conventional Roof’.

Components

The following diagram is of a standard timber roof truss.

For more complex roof shapes there are a range of special trusses that can be made.

Steel roof trusses would look generally similar although they would use a different jointing method rather than nail plates.

The timber components are normally pine and will be either ‘F’ or ‘MGP’ graded. The size is determined from the  manufacturers computer program.

Nail Plate (or Gang Nail)

The chords and webs are joined by nail plates. The plates are galvanised steel sheets that have spikes protruding on one side.


The plates are hydraulically pressed into the timber at the manufacturing plant, with one plate on each side of the join. They form a solid fixing that is very strong.

As well as joining chords and webs they are quite often used to splice timbers together particularly when a long bottom chord is needed.


 For more about house construction see: Basic Timber Frame


Steel Wall Frames

With a steel frame house a standard wall panel, other than using a different material, is much the same as a Basic Timber Wall Panel.

Once it comes to a panel with openings there are a few differences as the sketch below shows:

Typical differences are:

Diagonal Brace

The diagonal braces are used (instead of a panel of sheet material in the timber frame) to resist sideways forces on the frame.

Lintel

Rather than a solid beam a truss structure is formed to carry loads over the opening.


Also check the following links:

Brick Veneer

House Construction – The Frame

Timber or Steel Frame


Openings in Timber Frame

Openings in a Timber Frame Wall Panel usually mean that the Bracing Straps of the Basic Frame can’t be installed.

The following diagram shows typical panel details.

Bracing Panels

The bracing panels replace the bracing straps to keep the frame square and ensure the panel resists sideways forces. They are a sheet  material that is nailed to the studs top plate, bottom plate, and noggins.

Usually the panels are ply although I have seen other materials such as particle board.

Lintel

The lintel carries loads from above to the studs either side of the opening. The size of the lintel will depend on the width of the opening

Jam Stud

The jam stud in normally the last full height stud before the opening

Secondary Jam Stud

As well as assisting the jam stud to carry the lintel load the Secondary Jam Stud also provides extra stiffness to counteract the fact that there is only one noggin.

Sill Trimmer

This forms a fixing point for a window frame, and also the top fixing point for any Jack Studs.

NB for a small window a Head Trimmer may be used between the lintel and the top of the opening

Jack Stud

The jack stud is a short vertical stud. It can be between:

  • The Bottom Plate and the Sill Trimmer
  • The Lintel and a Head Trimmer

For background information about House Frames see this link: House Construction – The Frame.

Basic Timber Frame Panel

The House Construction-The Frame post explains the background to frame construction.

The drawing below shows a typical standard wall frame

Minimum timber size will be 95mm x 35mm although this may increase for the  following reasons:

  • Additional wall insulation may increase the depth of the frame to 125mm 
  • If the wall requires more structural strength that may increase the timber thickness from 35mm to 45mm.

Studs

Studs are the main structural component as they support the main vertical load of the roof and and upper floors.

Normal spacing is at 450mm centers for external walls and 600mm for internal walls unless specified otherwise for structural reasons.

Top Plate

The top plate fixes the top of the stud in position and acts as a mounting point for the structure above the frame.

A single top plate does not have the strength to carry major loads, such as roof trusses or upper floor beams so these should be fixed directly above the studs. 

To increase the strength, if required, a second timber can be added during erection to make a double top plate. This additional timber is fixed to overlap adjacent frames, junctions, and corners, and increases overall ridgidity

Bottom Plate

The bottom plate holds the frame to the base and fixes the bottom of the stud in position .

It needs to be firmly fixed to the base. If the base is uneven packing needs to be installed under the stud positions to prevent any vertical movement of individual studs.

Noggings

Noggings are the individual short pieces of timber between the studs. They are there to prevent the studs bowing under the load or warping. It is important that they fit exactly into the space.

Maximum spacing between noggons and top and bottom plates is 1350mm. For walls up to 2.74m  high a single noggin meets the standards. Taller rooms and you will need 2.

Diagonal Bracing Strap

The diagonal bracing straps are typically galvanised steel strip which is nailed to each strut. The bracing is the part of the frame that resists any sideways deformation of the frame, such as wind loading.

Although these braces seem insubstantial compared to the struts and plates they are vital to the overall strength. If you find a brace has been cut during construction ask for it to be replaced!

Where there are openings the details in the following link are required: Openings in Timber Frames.

Want to know more?  The following external link is worth a look: Timber Plus Toolbox

House Construction – The Frame

The  Internal Frame is the key structural element in most Brick Veneer House Construction.

In more lightweight structures such as timber cladding and lightweight render it takes on an even more of the structural loads.

The overall frame is composed from a number of individual wall panels, which when fixed to the base, and fastened together, form a rigid box like structure.

Structural Loads

The frame carries several main structural loads:

  • It takes the load of the roof, and any upper floors, down to the foundation.
  • It resists the wind trying to push the whole building over.
  • It provides lateral support for the brick walls.
  • Holds the windows in place.
  • It gives a secure fixing point for the internal wall and ceiling lining boards.
  • In the case of weatherboard or lightweight render construction it supports the outer skin of the building.

Additional Functions

  • Provides a route and fixing points for cables and pipes.
  • Retains insulation.
  • Supports cupboards and shelves.
  • Fixing of building wrap.


See also Brick Veneer


Drop Edge Beams

If you want to build your new home on a slope you may need to have the additional cost of needing drop edge beams on the low side of the slabs.

These are a sort of retaining wall to hold the fill under the house slab as shown in the drawing below.

Here is a photo of a typical drop edge beam before the brickwork has been started.

Costs (2013) are in the order of $500-$700/sqm of beam, plus the cost of the fill under the slab.

Say. . . $12,000 to $18,000 for a 20m long house with a 1.5m drop beam so a significant extra!

The photo below shows the same wall after the brickwork has been completed.


If you are building on a slope you may also want to know about Retaining Wall Fairness

Thanks to Grumblebum54 for the photos

Spot the Garage


Can you see the garage?

Not just one, but two!

Perhaps this second photo helps


This is a device called a Cardok which I hear is coming to Australia.

Its quite expensive at around $60,000 each, but probably cheaper than having a basement garage with ramp.  It also would probably be easier to fit in a tight city block.

NB I have not been paid to promote this product I included it because it seems an interesting idea.

For more unusual houses go to What the………………….?


Exit mobile version