Why Double Brick

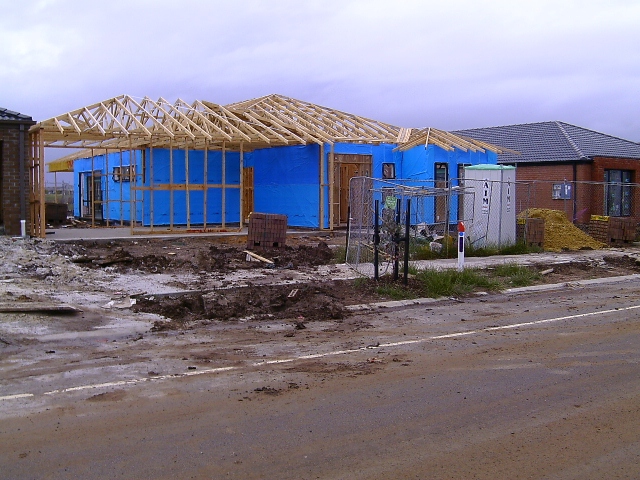
Double Brick is the most common method of construction in WA.

Construction consists of two panels (sometimes called leaves) of masonry with a cavity between them. The panels are connected by steel ties at regular intervals.

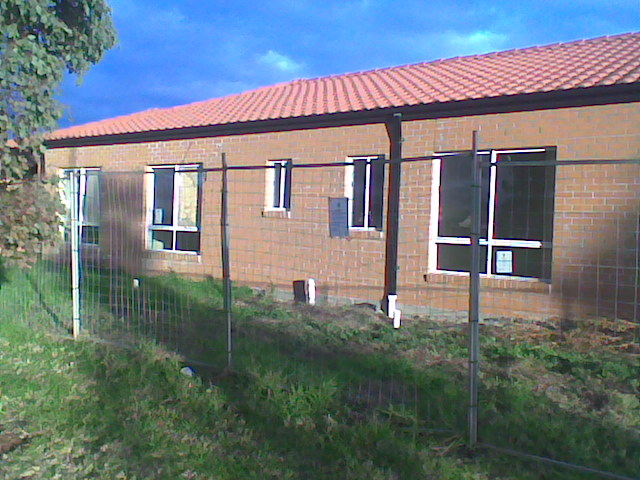
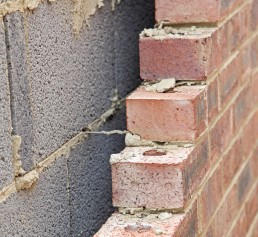
A better description would be Structural Masonry, Cavity Construction. which also includes using limestone, rendered brick and concrete block for the external face, and brick or concrete block for the internal leaf. (The photo shows a brick external leaf connected to a concrete block inner leaf by a wire tie)

The purpose of the cavity between the outside leaf of brick and the inside leaf is so that moisture doesn’t penetrate into the home. In more sustainable homes this cavity is partially or fully filled with insulation.

Internal walls are usually a single brick thickness and generally use a 2nds brick or concrete block that is plastered or lined using a lining board.

Advantages

  • It is extremely durable requiring very little maintenance.
  • The mass of the brickwork can help moderate the internal temperature of the dwelling
  • You can place a heavy fixing anywhere on the walls.

Disadvantages

  • More expensive than Brick Veneer.
  • Not as well insulated.
  • The house will take a long time to warm up in winter or cool down once it does get hot.
  • Likely to crack if subjected to ground movement.


Also see:  Brick Veneer.

See this link for more posts:  Bricks


Why Brick Veneer?

Brick veneer is probably the most common method of construction in Australia.

However if you live in Western Australia you will find Double Brick is more popular in that state.

Although brick veneer is the usual term these comments will apply to all ‘Masonry Veneer’ construction which includes external walls of:

  • Brick.
  • Block work. including Light block such as Hebel.
  • Rendered brick / blocks.
  • Stone.

A Masonry veneer structure has two main components:

  1. The Frame. Can be either Timber or Steel. This is the main structural component of the house supporting the roof, and if required the upper floor. This is usually ‘wrapped’ as in photo above.
  2. The Masonry Veneer. Although this looks solid it really only supports itself, and relies on ties to the frame to keep it stable. It provides a weatherproof ‘skin’ to the building.

So Why

  • Gives a solid look to the house.
  • Lower cost than solid brick
  • The prefabricated frame allows the frame to be erected quickly allowing the builder to get the structure weatherproof.
  • Easy to insulate.
  • Lightweight internal construction which means it can be cooled or heated up quickly when you get home.
  • Relatively easy to make internal alterations at a later date.
  • Better able to deal with soil movement in ground conditions such as Clay Soils.

Problems with Brick Veneer:

  • Termites if using a timber frame.
  • Not as good as brick in preventing noise transmission.
  • Doesn’t have much Thermal Mass to balance extremes of temperature or help with Passive Solar Design

If you don’t like Brick (Masonry) Veneer tell me why not!


The most appropriate Brick Dimensions will make the walls easier to build.


Planning the Laundry

In England the washing machine and dryer are generally in the kitchen.

As a consequence the laundry in our first house we built was tiny. It was just big enough to fit the washing machine, dryer, laundry trough, and a walkway about 800mm wide to the back door.

After ten years in that house we decided that the next laundry would be bigger.

Our current house has a laundry that includes room for washing baskets, and a linen press. We also have room to store the ironing board, brushes and mops. I am still not sure however I have got everything the laundry right.

I have tried to list all the things below you might want in this undervalued room besides having a home for the laundry appliances and the trough:

  • Baskets for dirty linen and clothes baskets.
  • Room for baskets of laundry brought in from the washing line before they are folded
  • Storage of soaps, detergents, toilet rolls.
  • Room to set up an ironing board.
  • Rail for ironed clothes.
  • Airing rack.
  • Laundry press.
  • Television, to watch while doing the ironing.
  • Hooks for gardening clothes and a boot storage rack.
  • Pet food storage.
  • Dog basket.
  • Storage for mops, buckets, brushes, and a vacuum cleaner.

I am not saying you need to have room for all these things but its worth considering what space you want.

Other things to think about are

  • Installing a floor drain to protect the rest of the house in case of floods.
  • Putting the machines on a plinth to save all the bending over.
  • Making sure a drier can be vented to the outside.
  • Plumbing to allow grey water to be collected for garden watering.

Do you have any tips for laundry planning?


See Electrical Planning for Electrical fit out of your Laundry


Roof Choice – Risk

Something you might never have thought about when thinking about the sort of roof that you want on your new house is Risk.

Low Risk

A conventional roof which slopes to the outside can be considered to be a low risk roof.

In severe weather conditions heavy rain can exceed the capacity of the gutters and the downspouts causing an overflow. Blockages in the gutters and downspouts will also cause overflows

With a conventional roof the gutters will overflow to the outside of the building as shown in the diagram to the right avoiding damage to the inside of your home.

High Risk

A couple of other roof choices are of much higher risk.

These are:

Roof with Parapet

This sort of construction is used to give the effect of a Flat Roof, although there is actually a pitched roof behind the parapet wall.

As you can see from the diagram in severe rain, or a blockage, there is a greater risk of the overflow occurring inside the house.

Butterfly Roof

A butterfly roof is when two pitched roof panels fall to a central box gutter.

Again you can see the real risk of overflow into the house in case of problems.


What the Regulations Say

For a ‘High Risk Roof’ the regulations require the roof plumbing to be be designed for a heavier storm (1 in 100 years), rather than 1 in 20 years for a ‘Low Risk Roof’.

A ‘High  Risk Roof’ drainage system also require special  overflows to be installed.

This link will show you how to calculate the rate of rainfall used in design: Rainfall Intensity

In practice I hear of a number of non complying plumbing installations, and many of the overflows I see don’t look to have adequate capacity.

Did anyone check your roof drainage calculations? ……..If I chose a high risk roof it would be something I wanted to be checked thoroughly.


Also see Whats on the Roof

and Want a Flat Roof


Building on Fill – Screw Piles

I have previously posted about building on fill using Concrete Piers.

Well one alternative to constructing concrete piers is to use Screw Piles such as the one to the right.

These are made from a thick steel tube with:

  • A cutting edge on the bottom.
  • A  spiral plate close to the bottom.
  • A keyway at the top to lock into the drive tool.

The pile is screwed into the ground using a drive tool mounted on an excavator.

Screw piles will normally be more expensive than concrete piers when only a few shallow piles are needed.

They can be cost effective, and fast to install, when a larger number of piles are required or soil disposal is a major problems.

Other advantages are:

  • There is minimal spoil to be removed from site.
  • You don’t have to worry about rain as much during the installation.
  • They can be easily installed when the base of the pile is below the water table.
  • They can be installed in very restrictive locations.

Edit based on question I received

If you are worried about corrosion normal screw piles are fairly thick steel to stand the driving forces (individual thickness of material may vary)

Typically corrosion for plain steel piles in natural ground can be in the range 0.12 – 0.3 mm in 10 years, although galvanised steel will be less.

See Ground Conditions for more about your new house foundations.

High Ceilings – Unexpected Effects

Quite a lot of people go for  Higher Rooms because it does give a more impressive interior effect.

Something to bear in mind is that it can effect the external appearance of the house by making the windows look small.

This photo of a house under construction  illustrates this. The additional courses of brickwork between the head of the window and the fascia board looks a bit incongruous.

The alternatives to deal with this for this single storey house are:

  • Make the windows taller.
  • Have Overhanging Eaves which brings the fascia lower.

With 2 storey houses the effects of the higher ceiling can be even more pronounced.

If you think you may go for higher ceilings it’s worth thinking about how the house will look from the outside.  If the display house you saw has high ceilings its easy to check, otherwise you may need to see a drawing before you make a final decision.
 

The Design Section has more posts on planning your new house.

Or see the ‘Selection / Pre-Start Guide’


Want a Flat Roof ?

When thinking about a flat roof for your new home my advice is…..a roof can be:

  • Flat.
  • Inexpensive.
  • Have a long leak free life. 

PICK ANY TWO!

Sounds harsh but my experience, and others I have talked to, confirms this opinion.

My personal experience  with a flat roof was my parents house which had a pitched roof for the main house, but a flat roof for the garage.

After about seven or eight years the garage roof started to leak. Following 4 attempts to fix it they bit the bullet and had a pitched roof put on the garage. No more  problems in the next 30 years.

Yes, I know many multi-storey building have a flat roof without problems but with these tall buildings the roof is a small proportion of the total cost and so the builder can invest in a more sophisticated, and expensive, roofing system.

In your one or two storey property the roof will be a much bigger proportion of the total cost.

Most builders go for a low cost, low tech roof to keep the cost down. If it’s flat it will probably last until the guarantee period runs out and then you could be faced with ongoing repairs.

These comments will also apply to balconies over habitable rooms which are also prone to leaking.

If you do decide to have a flat roof you will need plenty of large downspouts (See Roof Choice – Risk)…………..otherwise you could have several cm of water on your roof in a storm, which will really tests the waterproofing.


Want Tiles or a Colorbond Roof see  What’s On The Roof


Waffle Pod Raft Slab

A ‘Waffle Pod’ slab is now probably the most common Concrete ‘Raft’ House base. Its generally taken over from the Conventional Raft Foundation.

It’s an example of composite construction with polystyrene pods forming voids in the underside of the concrete ‘Waffle’.

This photo shows the pods, with the reinforcement placed over them, prior to placing the concrete.

Advantages

  • Cost
  • No trenches resulting in:
    • Simpler excavation; and
    • Flat site means site is easier to keep dry than trenches that collect water.
  • Waffle Pods bring house further out of ground. In an area that is wet the higher the better.
  • Better insulation from the ground meaning the floor will warm up quickly from cold. (especially if you go for in slab heating)

Disadvantages

  • More susceptible to bad workmanship – If the pods move during placing of the concrete.
  • More susceptible to bad drainage which can lead to soil heave if building on reactive clay
  • Lower thermal mass so less suited to passive solar design.
  • Thinner slab (typically 75mm rather than 100mm) means may not be as resistant to point loads such as jacking a car. Some people specify 100mm thickness for garage floor.
  • A thicker overall slab may be needed if you want Floor Drains (To allow for the dropped floor in those rooms)

Problem Sites

If  your block has difficult ground conditions its still possible to use a waffle pod slab with:


Also see Ground Conditions


Building On Fill – Concrete Piers

Its not unusual for the Site Investigation for your new house to reveal fill materials on top of the more stable clay or rock.

Even if there is no fill the builder may need to level a sloping site using ‘Cut and Fill’ methods, or the top layers of soil are generally poor.

To deal with the problem of building on poor ground concrete piers are commonly used.

These are basically a hole that is excavated through the fill and into the top of good ground. The hole is then backfilled with concrete to the level of the underside of the slab.

When they are finished you have a flat site with concrete pads (like the photo below), ready for the slab to be constructed

You don’t have to have Concrete piers over the whole site, just the parts where there will be fill between the bottom of the slab and the stronger soils.

The following diagram shows a typical slab on a cut and fill site with piers excavated through the fill to the good ground.

See the following link for an alternative to Concrete Piers: Screw Piles.

The Slab is likely to be either a Waffle Pod Raft or a Conventional Raft Slab

When the site investigation indicates fill the builder will often put in a Provisional Sum for so many metres of concrete piers.

At the time of construction they will drill down to  good ground in the fill areas and calculate the actual metres you will need to pay for.

If your whole house is on ‘Controlled Fill‘ You may not need to use concrete piers.


Lots more information in the anewhouse Guide to Buying a Block for only $4

See Ground Conditions for more about your new house foundations.


Starting House Design 1- Bubble Diagram 1

A big mistake in designing a house is to get involved in detail too quickly.

Rough sketches of a floor plan, which you can easily change, are the best way to start. . . . Much better than using a computer drawing tool which can  ‘Lock You In’ and stop you considering different ideas.

  1. Decide what rooms you need and the approximate size of the house (see How Much House?)
  2. Draw some bubble diagrams. . . . These are drawings where each bubble represents a room, or a feature of the house.
  3. Work quickly, while thinking, and discussing, how you want the various rooms to relate to each other.
  4. As you develop the plans try to draw the bubbles to roughly represent the room sizes, but don’t try to be too accurate.
  5. Because the drawings are done quickly you can easily do new ones as your ideas develop.
  6. Don’t throw the old one out though! You might want to go back to a previous idea.

The collection of diagrams will be a demonstration that you have gone through a process of developing a design rather than infringing someone else’s Copyright.

The above illustration is a tidied up version of the initial bubble diagram for our first Australian house. It was based on certain things we wanted in the floor plan. These were:

  • A rectangular plan to keep things simple and economical
  • A passive solar house with the main rooms facing North
  • A wood burning stove in the centre of the house
  • Our bedroom at the opposite end of the house to the children.

Next  I will show how we developed the initial bubble diagram to a refined version which we could then use to develop the final floor plan.


For more Posts about Design see Floor Plans


Exit mobile version